Blog

  • A Practical Guide to Solving Bulk Clone Issues in Jira

    A Practical Guide to Solving Bulk Clone Issues in Jira

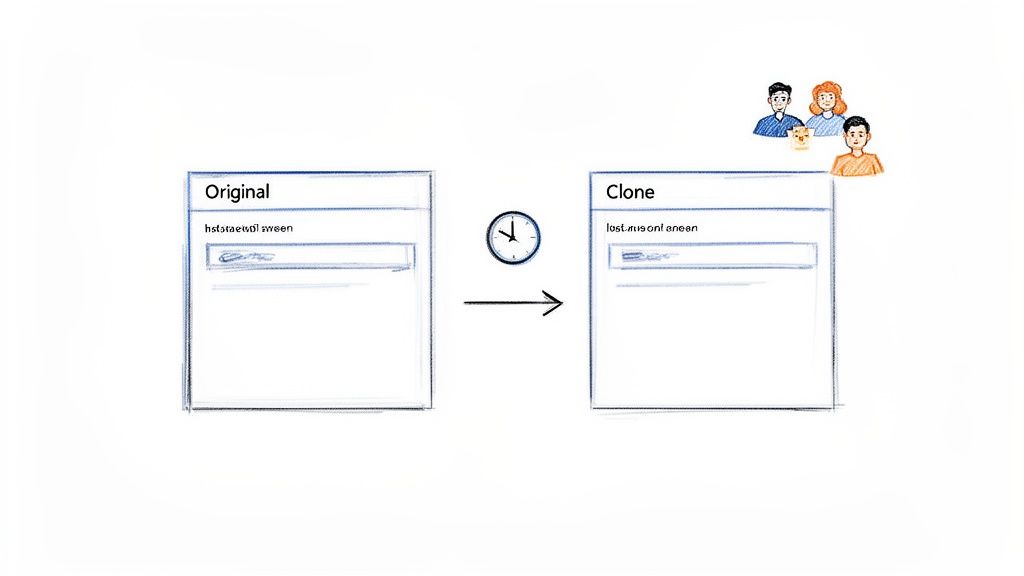
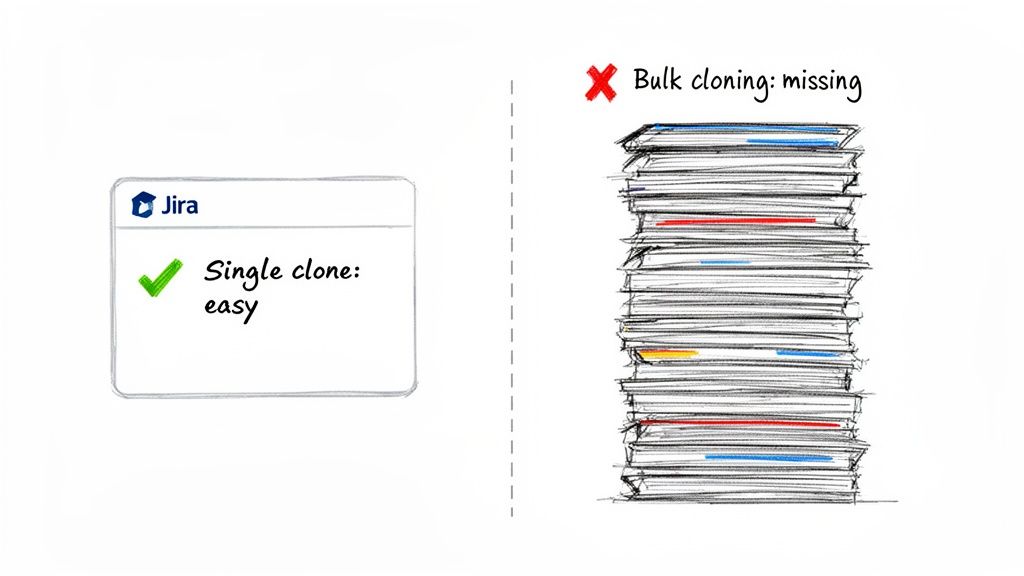
    Cloning a single issue in Jira is simple. But when you need to clone ten, fifty, or a hundred issues at once, you hit a wall. This is one of the most common gaps in Jira's native toolkit, causing real bulk clone issues in Jira that disrupt project plans and lead to manual errors.

    This isn't just a minor missing feature. For many teams, it's a fundamental roadblock that forces them into clunky, time-consuming workarounds.

    Confronting the Reality of Bulk Cloning in Jira

    Illustration comparing Jira's easy single cloning feature with its missing bulk cloning capability for multiple issues.

    You expect a tool like Jira to handle repetitive tasks at scale. The need to duplicate a whole set of issues comes up all the time—spinning up a new project from a template, creating a standard regression test suite, or onboarding a new customer with a repeatable checklist of tasks. But this is where expectation meets reality, especially if you're on Jira Cloud.

    The bottom line is that Jira Cloud has no native bulk clone functionality. It simply doesn't exist. This leaves most Jira users scrambling for third-party apps or getting stuck with mind-numbing manual processes. Atlassian Support has been direct about this, stating, "Currently, it is not possible to clone/copy issues in bulk in Jira Cloud." This position has held firm despite a long-standing feature request on the Atlassian community forums.

    Native Bulk Clone Capabilities Cloud vs Data Center

    The gap becomes clear when you compare Jira's two main versions. While Data Center users have a basic built-in option, Cloud users are left without a solution. It's a jarring difference that often catches teams by surprise, especially when migrating from one platform to the other.

    This table breaks down the core differences in what you get out of the box.

    Feature Jira Cloud Jira Data Center
    Native Bulk Clone Not available Available (with limits)
    Actionable Solution Marketplace Apps, Automation Rules Native Feature, Marketplace Apps
    Impact on Teams High reliance on paid add-ons or time-consuming manual work. Functional but often hits a 1,000-issue cap, requiring manual workarounds.

    As you can see, even the Data Center solution has its limits. This isn't just a missing button in the UI; it creates workflow bottlenecks that impact productivity.

    Actionable Insight: The inability to reliably clone issue templates at scale is a major productivity drain. What should be a five-minute setup task can easily become a multi-hour manual effort. The most effective solution is to invest in a Marketplace app or build a robust automation rule.

    Why This Limitation Creates Workflow Bottlenecks

    Without a built-in tool, teams are forced into inefficient habits. Manually cloning dozens of tickets one by one is tedious and a breeding ground for mistakes. A project manager rushing to get a sprint started might forget to copy attachments on one ticket, misconfigure a custom field on another, or fail to link a sub-task correctly.

    This triggers a cascade of downstream problems:

    • Delayed Sprint Planning: Teams burn valuable planning time manually recreating tickets that should have been cloned from a template in seconds.
    • Inconsistent Project Setups: Manual work introduces inconsistencies. One project's task structure looks different from the next, confusing team members and making reporting difficult.
    • Error-Prone Test Cycles: QA teams struggle to replicate complex test suites accurately, which can lead to missed regression tests and bugs slipping into production.

    The absence of a solid bulk cloning feature undermines Jira's core purpose: to bring agility, consistency, and standardization to your work. Finding a scalable solution isn't just a nice-to-have; it's critical for maintaining process integrity.

    Working Around Jira Data Center Cloning Limits

    If you're on Jira Data Center, you have a native bulk clone option—something Cloud users are missing. But this built-in tool comes with a significant limitation that can cause major bulk clone issues in Jira.

    Diagram showing Jira Data Center, JQL segmentation, and issues processed in three batches.

    The roadblock is a hard-coded 1,000-issue limit for any single bulk operation. Atlassian put it there to prevent massive operations from slowing down the server. While the intention is sound, the real-world impact for teams managing large-scale projects is a major pain point.

    The 1,000-Issue Cliff

    When you try to clone 1,200 issues, you won't get a warning. Jira will simply process the first 1,000 issues and silently ignore the remaining 200.

    This silent failure is dangerous. Teams can walk away thinking the operation was a success, only to find out later that critical tasks are missing. You often don't spot the problem until a key task is missed during a release.

    For example, a QA team needs to duplicate a regression test suite of 1,500 test cases. The manager runs a JQL filter and kicks off the bulk clone. In reality, 500 test cases were never created, leaving massive holes in their testing coverage.

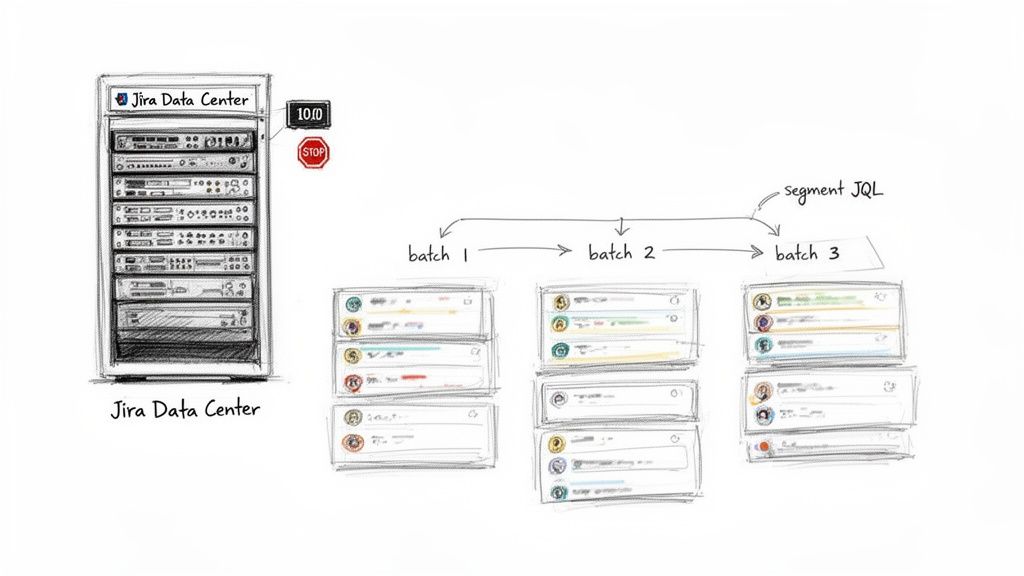
    Segmenting Your JQL for Batch Processing

    To get around this, you must break down your issues into smaller batches. This means getting creative with your JQL queries to create multiple sets, each with fewer than 1,000 issues.

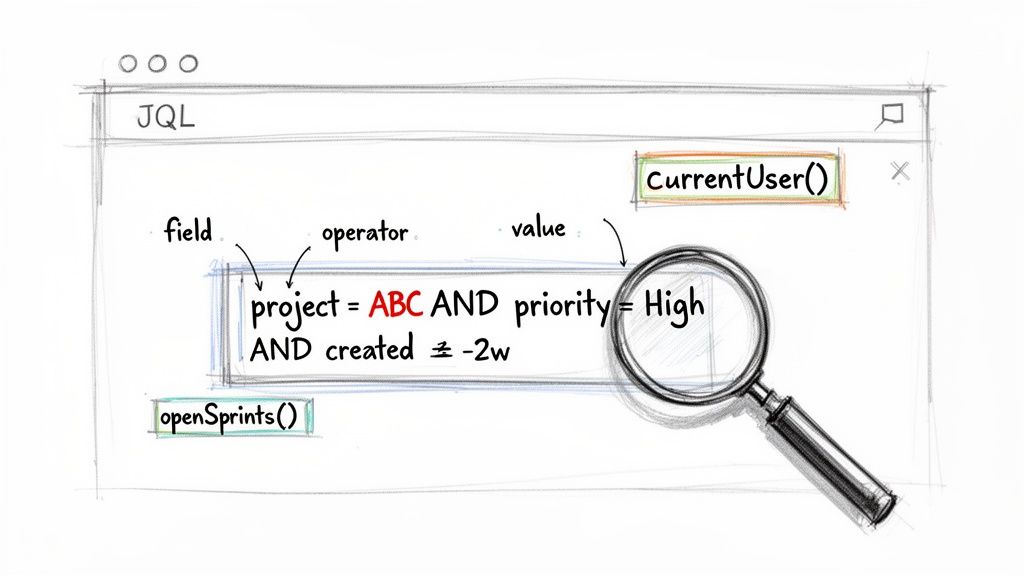
    Here are actionable JQL strategies you can use to segment your issues:

    • By Creation Date: Run separate clones for issues created in specific timeframes.
      created >= "2023/01/01" AND created <= "2023/03/31"
    • By Component or Label: If you use categorization, clone issues one component or label at a time.
      component = "API" OR component = "Backend"
    • By Priority: Clone "Highest" and "High" priority issues first, then circle back for "Medium" and "Low."
      priority in (Highest, High)

    Actionable Insight: Always check the issue count your JQL query returns before you click "Bulk Change." Never assume it's under 1,000. This simple check can save you from major problems later.

    While this batching approach works, it's not foolproof. Every manual clone is another opportunity for error. This method can also break relationships between your issues. If your original tickets have intricate links (like "blocks"), cloning them in separate batches often means those links won't be recreated properly. An issue in your first batch might be looking for a ticket that won't exist until you run the second batch, forcing you into manual cleanup.

    In Jira Data Center, even app-based cloning operations are often capped at 1,000 issues per project to maintain system stability. Anything over that limit is simply ignored. You can find more on this limitation in Appfire's documentation.

    Choosing the Right Marketplace App for Cloning

    When you hit the wall with Jira's built-in options, the Atlassian Marketplace is your solution. It’s packed with third-party apps built to solve complex bulk clone issues in Jira. But how do you pick the right one?

    The secret is to look past the "clone" button. You need an app that solves the real-world complexities of your team's workflows.

    Evaluating Key Features That Matter

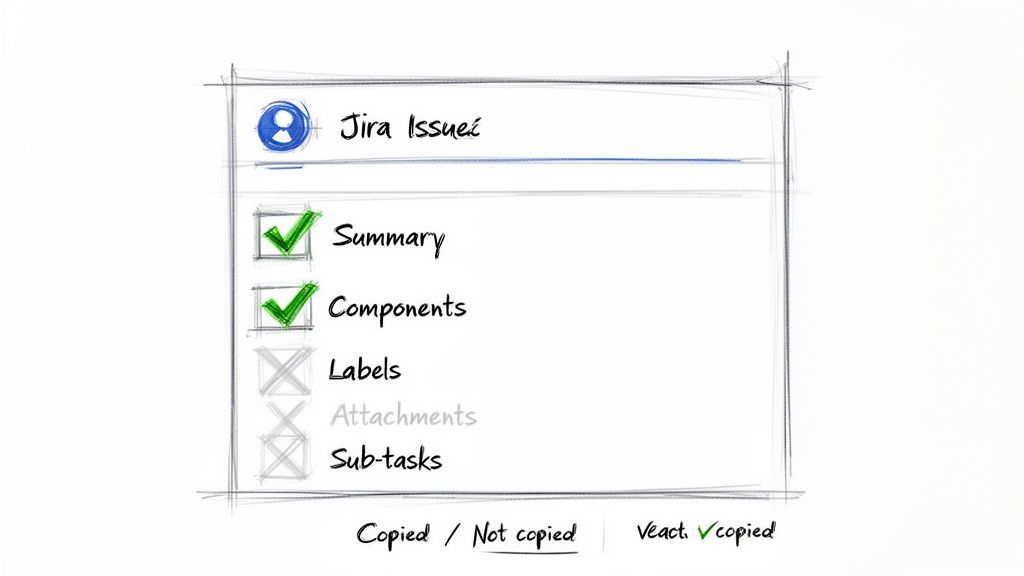
    Not all cloning apps are the same. A basic tool might copy an issue's summary and description, but that's rarely enough. The real value lies in the attached context.

    When comparing apps, focus on how they handle these critical elements:

    • Sub-tasks and Epic Hierarchies: Does the app keep the full parent-child structure intact? A DevOps team cloning a release epic needs every user story and sub-task perfectly organized.
    • Attachments and Comments: Can you bring over every file and discussion thread? This is non-negotiable for QA teams cloning bug reports, where comment history is essential.
    • Custom Fields: How does it manage your unique custom fields? If your "Client Name" or "Deployment Environment" fields get dropped, you’re creating more manual cleanup.
    • Issue Links: Will the app intelligently recreate links like "blocks" or "is duplicated by" within the newly cloned set of issues? Losing these connections can derail your workflow.

    Actionable Insight: Your goal is a true, one-to-one replica of your source issues with a single click. Anything less just creates more manual work on the back end, defeating the purpose of using an app.

    A Real-World Scenario: DevOps Release Cloning

    Let’s walk through a common example. A DevOps team is preparing to deploy a new microservice. Their process revolves around a standardized release epic in Jira with over 50 child issues and sub-tasks. It covers everything from build configuration to deployment checklists.

    This epic is their master template for every new environment—Dev, Staging, and Production.

    Imagine cloning that epic and its 50+ children manually, three times. It’s slow and prone to human error. A single missed sub-task could lead to a failed deployment.

    This is where an app like Deep Clone or Elements Copy & Sync becomes a lifesaver. The team can select the source epic and create perfect duplicates in a few clicks.

    Here’s their new, actionable process:

    1. Find the Source: Run a JQL query to find their "Release Template Epic."
    2. Configure the Clone: Inside the app, define target projects and set up rules, like adding a prefix such as "[STAGING]" or "[PROD]" to each summary.
    3. Preserve Everything: Check the boxes to include all sub-tasks, attachments, and comments.
    4. Execute: One click creates two new epics, each with a complete and accurate hierarchy of all 50+ child issues.

    What used to be a risky, half-day manual slog is now a reliable, two-minute task.

    Comparing Top Bulk Cloning Apps

    While many apps clone issues, a few stand out. For serious bulk cloning challenges, the top contenders are Deep Clone, Elements Copy & Sync, and the flexible ScriptRunner.

    Each has its strengths, and your choice depends on your goals.

    Top Bulk Cloning Apps Feature Comparison

    Feature Deep Clone Elements Copy & Sync ScriptRunner
    User Interface Intuitive, wizard-style UI that guides you through the process step-by-step. Recipe-based system that is powerful but has a steeper learning curve. A blank canvas. Requires scripting knowledge (Groovy) to build custom actions.
    Hierarchy Cloning Excellent support for cloning entire epic hierarchies and sub-task structures. Strong capabilities for copying issues and maintaining links across projects. Fully customizable. You can script any hierarchy logic you need, but you have to build it.
    Cross-Project Cloning Seamlessly clones issues to different projects, with easy field mapping. Specifically designed for complex cross-project synchronization and data mapping. Can handle any cross-project scenario, provided you can script the logic for it.
    Customization Offers great out-of-the-box options for prefixes, suffixes, and field edits. Highly customizable through its "recipes," allowing for complex conditional logic. The ultimate in customization. If you can dream it, you can script it.
    Best For Teams needing a fast, easy-to-use, and powerful solution for bulk cloning. Teams with complex, ongoing synchronization needs between projects or instances. Technical teams who need total control and want to build their own bespoke cloning automations.

    The right tool comes down to your team's specific pain points. For straightforward replication, Deep Clone is a fantastic go-to. If you need issues to stay in sync across projects, Elements Copy & Sync offers deeper functionality. For custom solutions, ScriptRunner provides unlimited power. Run a trial to find the perfect fit.

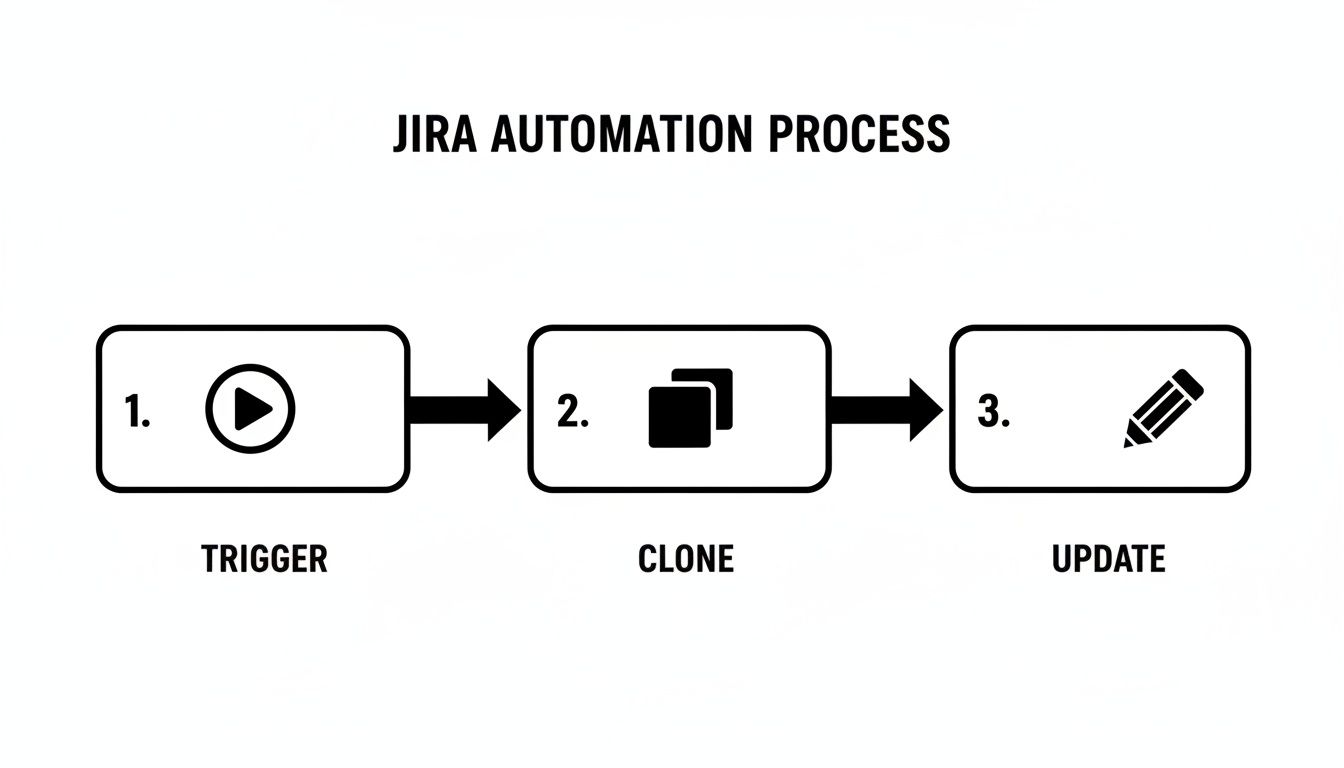
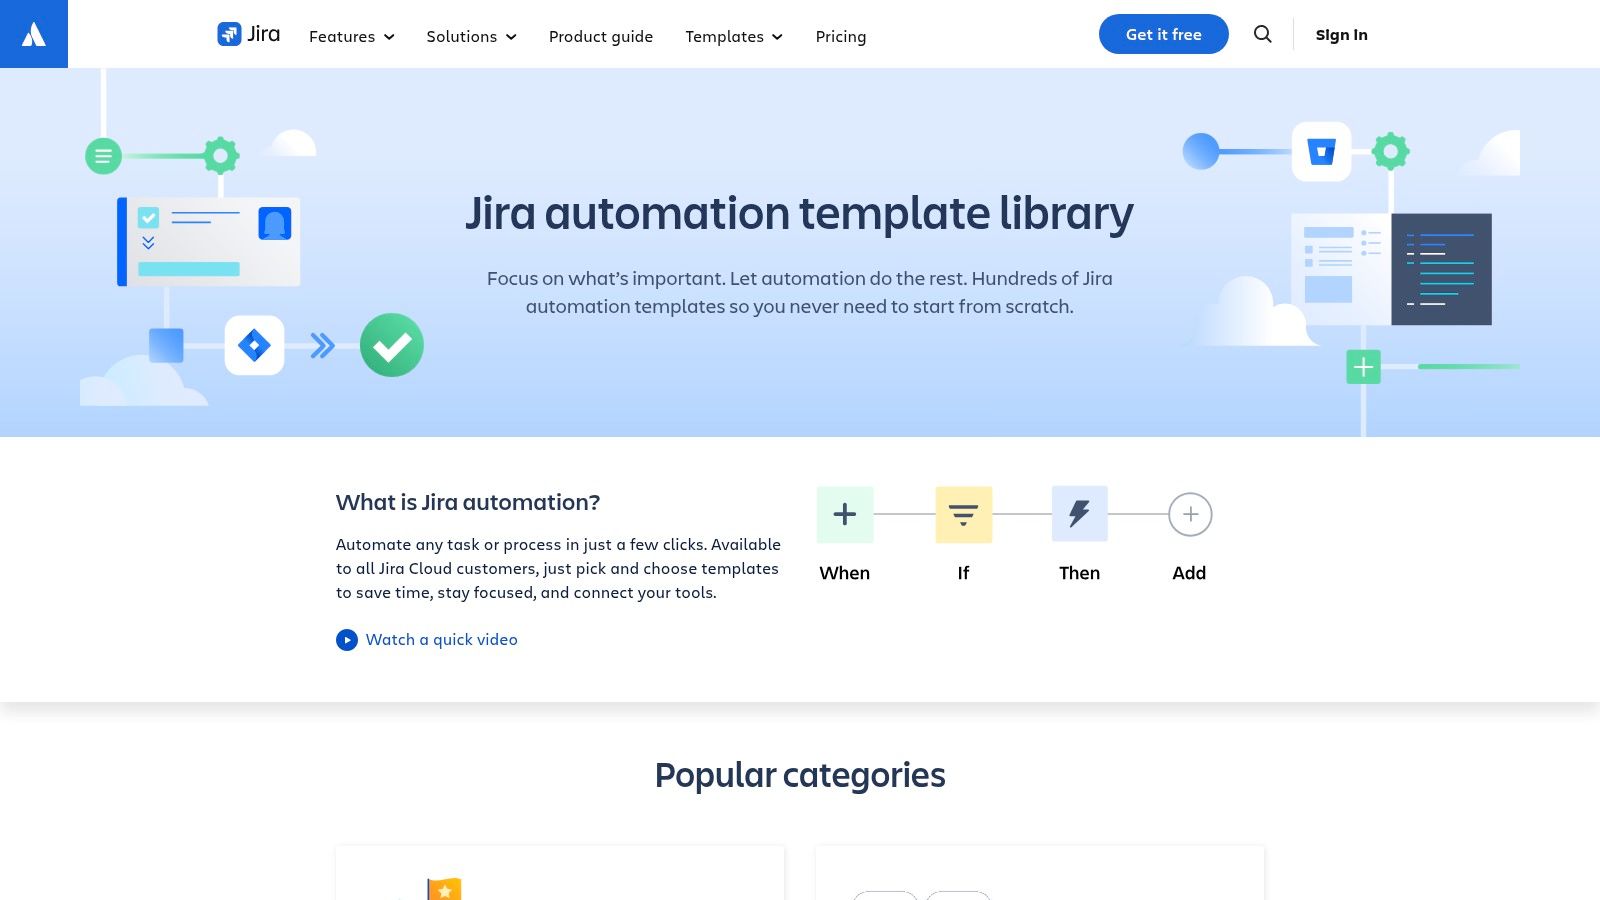
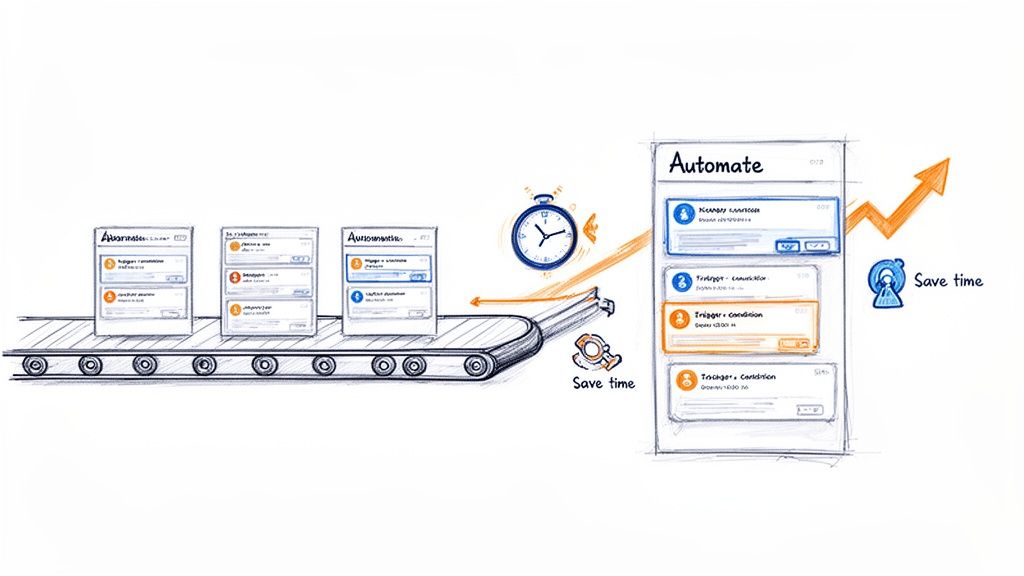
    Bringing Automation into Your Cloning Workflows

    Instead of cloning issues manually, automate the process. Setting up trigger-based automation for cloning eliminates repetitive work and ensures consistency.

    With Jira Automation, you can set up rules that automatically clone issues based on specific events.

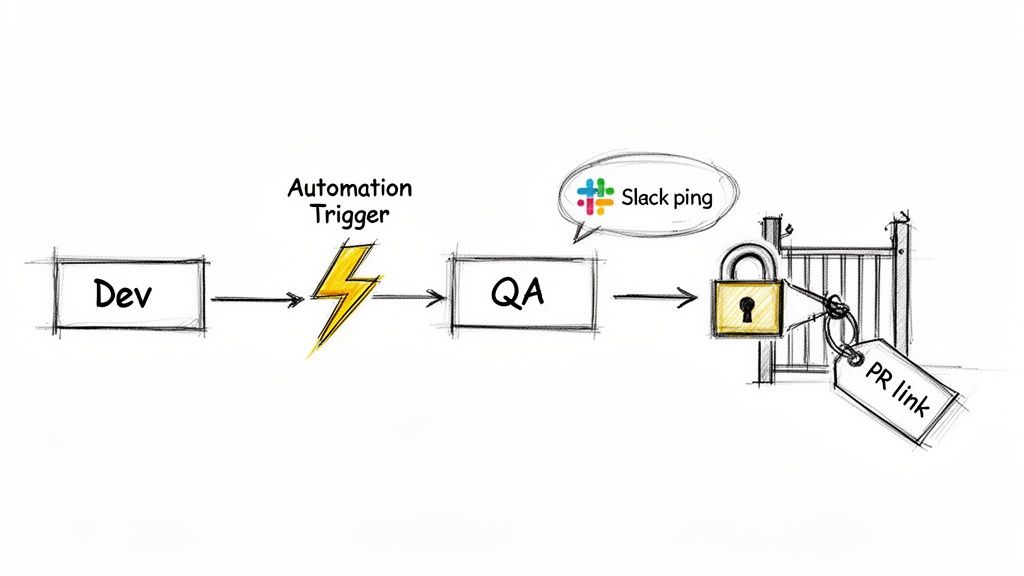
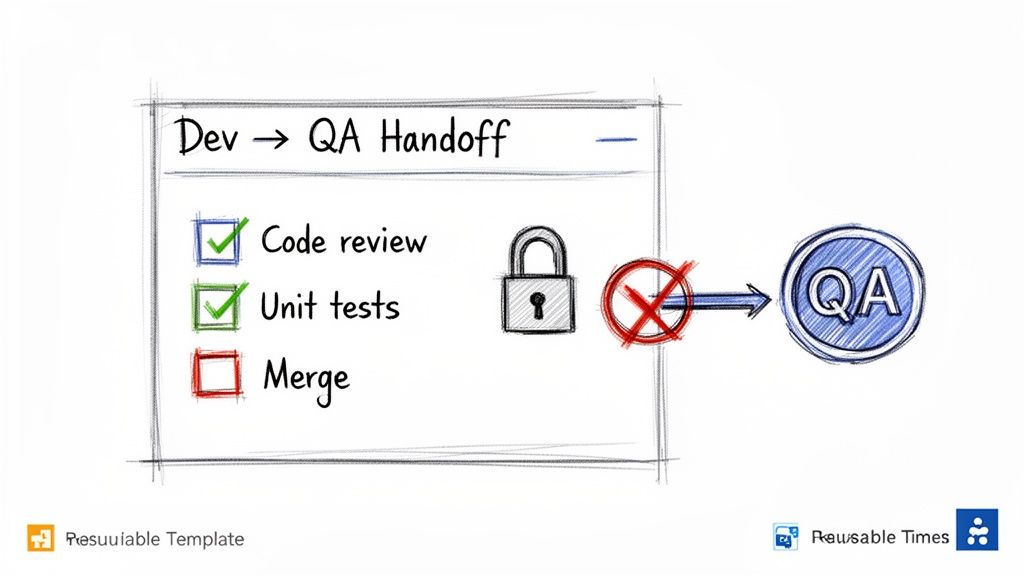
    • When a developer pushes a task to “Ready for QA,” an automation rule can instantly create a copy in the QA team’s project.
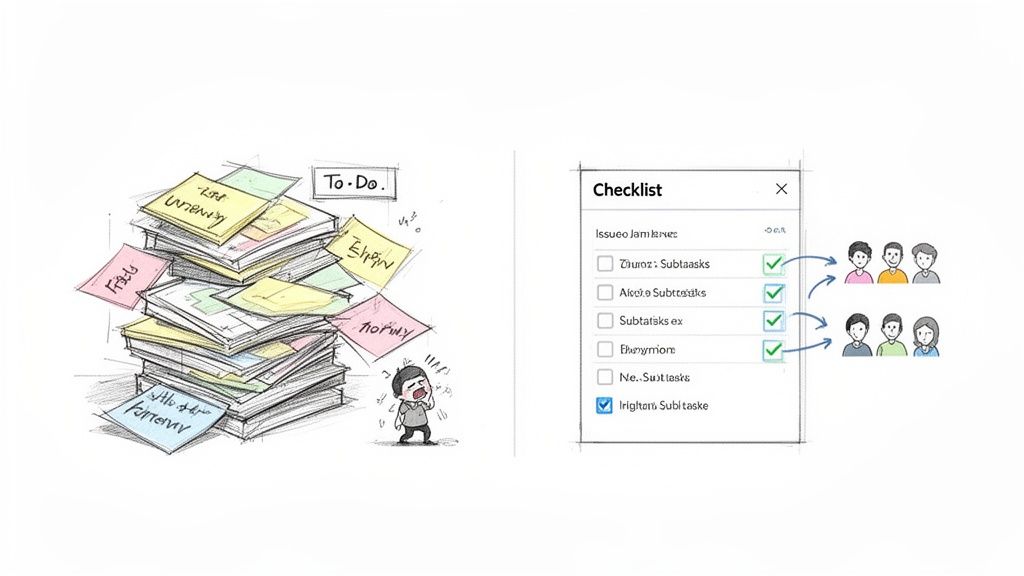
    • The moment a new customer onboarding epic is created, a complete template with all its sub-tasks can be duplicated and assigned.
    • You can even schedule recurring tasks, like monthly audit checklists, to generate themselves automatically.

    How to Set Up an Automation Rule

    Start by going to Project Settings > Automation.

    First, choose your trigger. A common one is Issue Transitioned, but it could also be a scheduled trigger that runs at a specific time.

    Next, narrow the scope with a JQL condition, like "project = DEV AND status = 'Ready for QA'". Ensure the rule’s scope includes both the source and target projects.

    Finally, give your rule a descriptive name like "Clone Dev Tasks to QA Project" so everyone understands its purpose.

    Defining the Clone Action

    Once your trigger is set, define the action. In the Actions section, select the Clone Issue option.

    Specify the destination project and issue type. You can add a prefix to the summary, like "QA -". Use smart values to pull in data from the original issue dynamically, like {{issue.key}} or {{triggerIssue.summary}}.

    Actionable Insight: Teams can cut manual ticket creation time by 50% or more by automating this single step. It improves both speed and consistency.

    After the clone is created, add more actions. You might want to automatically link the new issue back to the original or update a specific field.

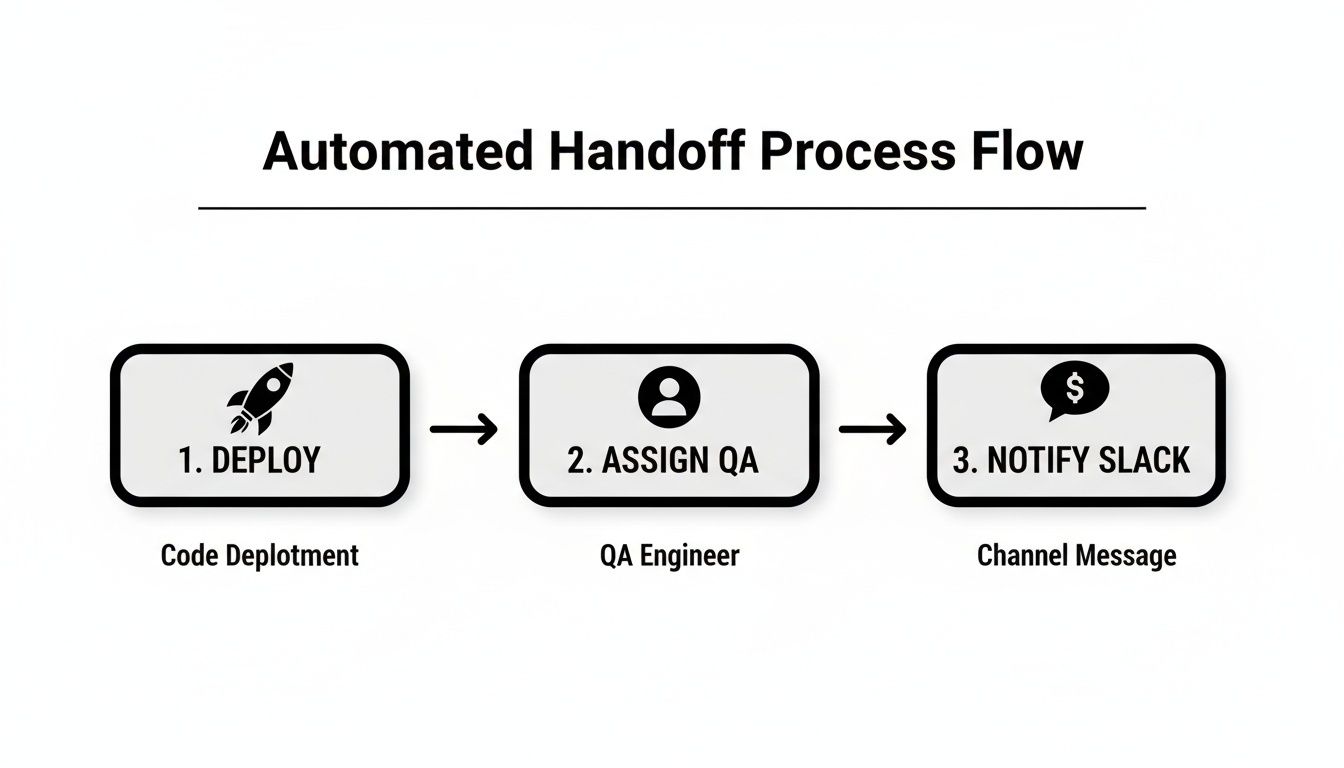
    Keeping Everyone in the Loop with Notifications

    Automated cloning shouldn't happen in a black box. Notify your team about what's happening.

    Add a notification step right after the clone action:

    • Slack: Use a webhook to send a message to a specific channel with the new issue key.
    • Email: Notify the new assignee directly using an @mention.
    • Microsoft Teams: Use an HTTP request action pointed at a Teams incoming webhook.

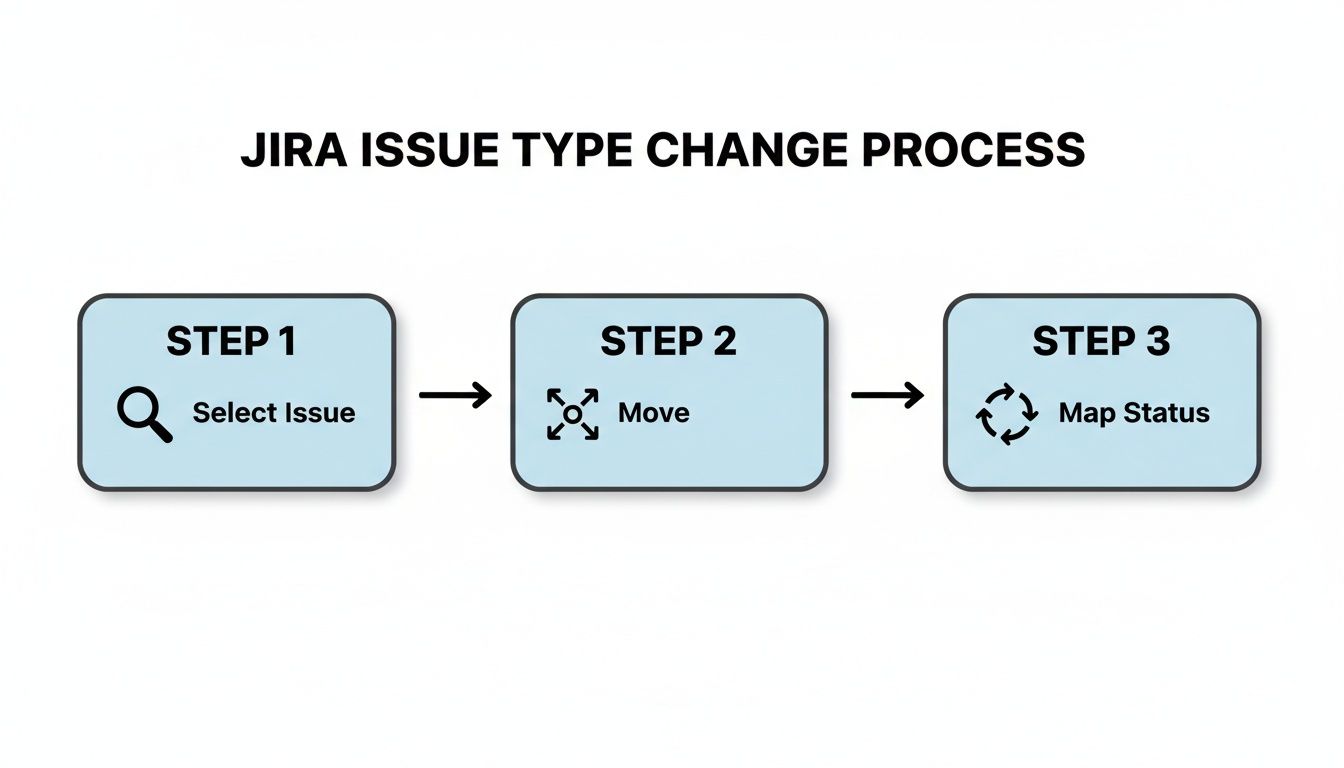
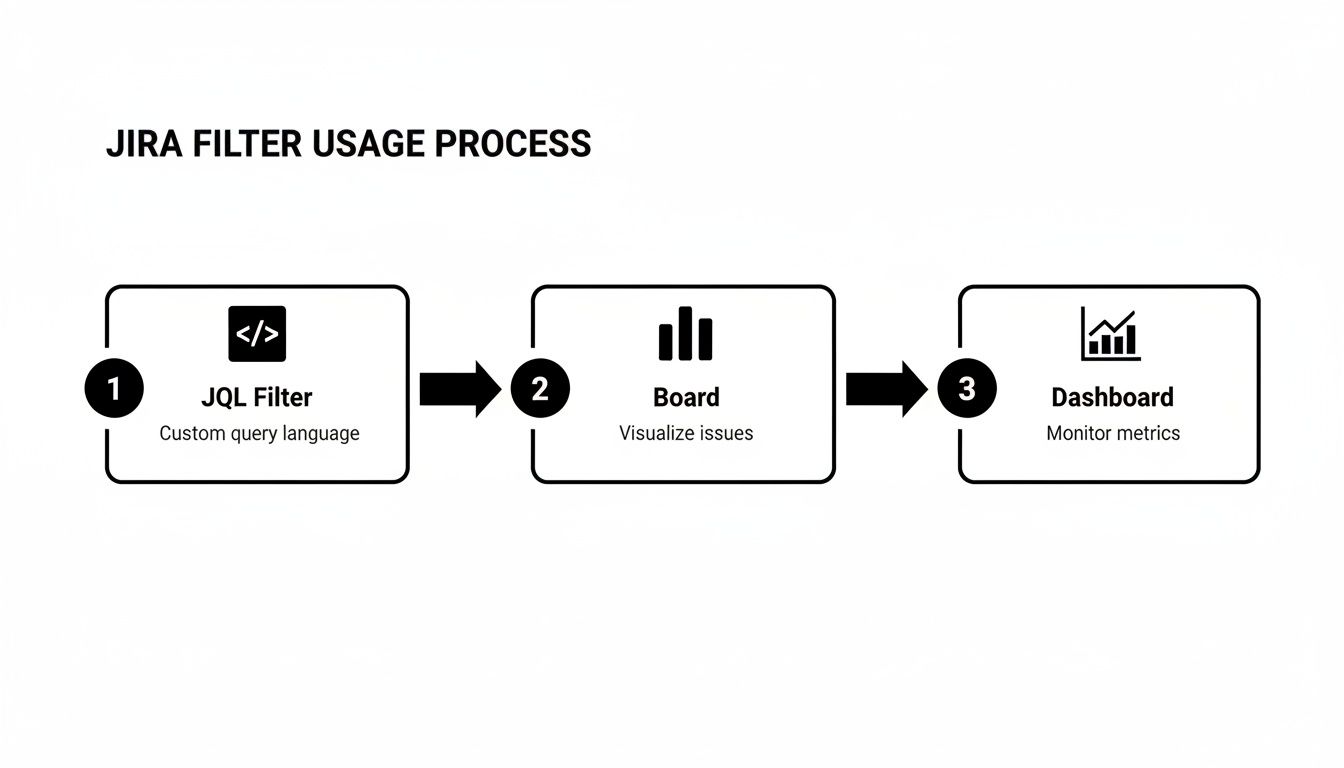
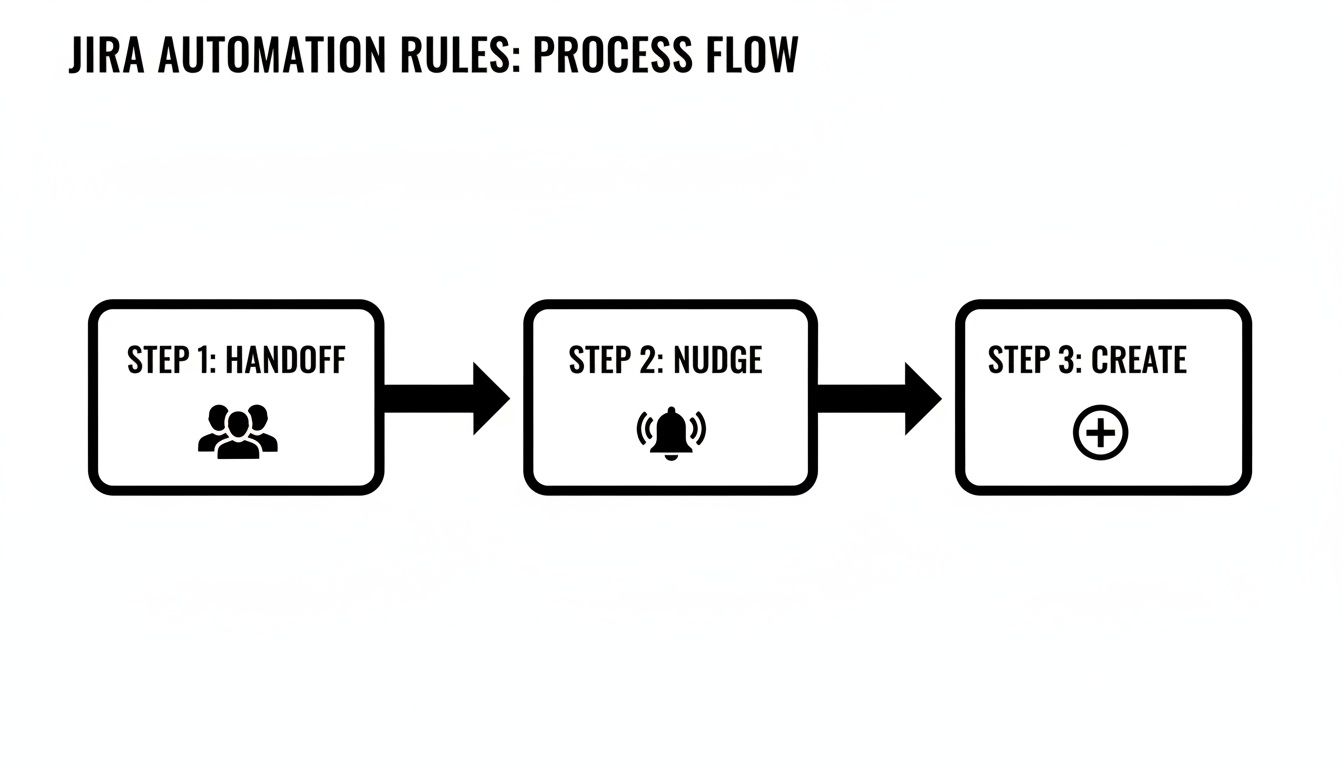
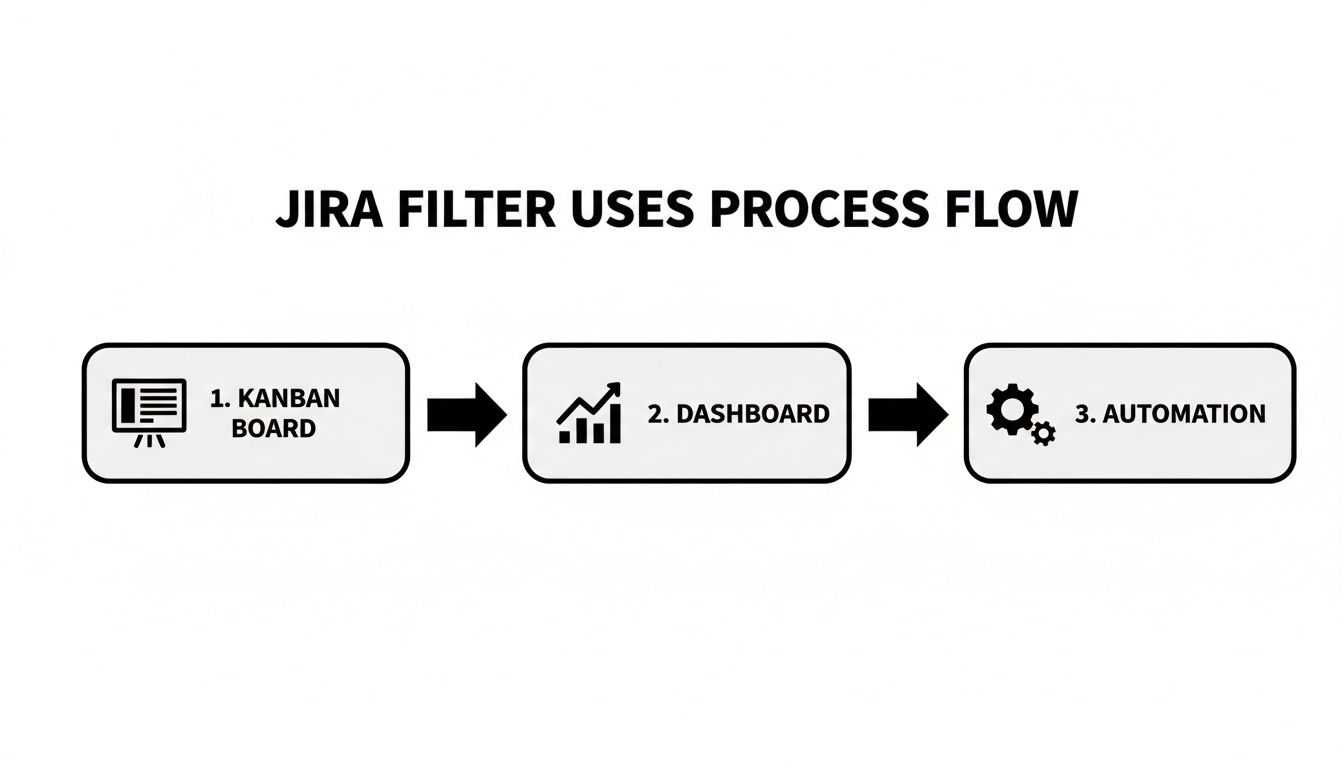
    Visualizing the App Selection Process

    If Jira's native automation isn't enough, the Atlassian Marketplace has specialized cloning apps. Here's a simple, three-step process for choosing the right one.

    A three-step flowchart outlining the Jira clone app selection process: search, evaluate, and install.

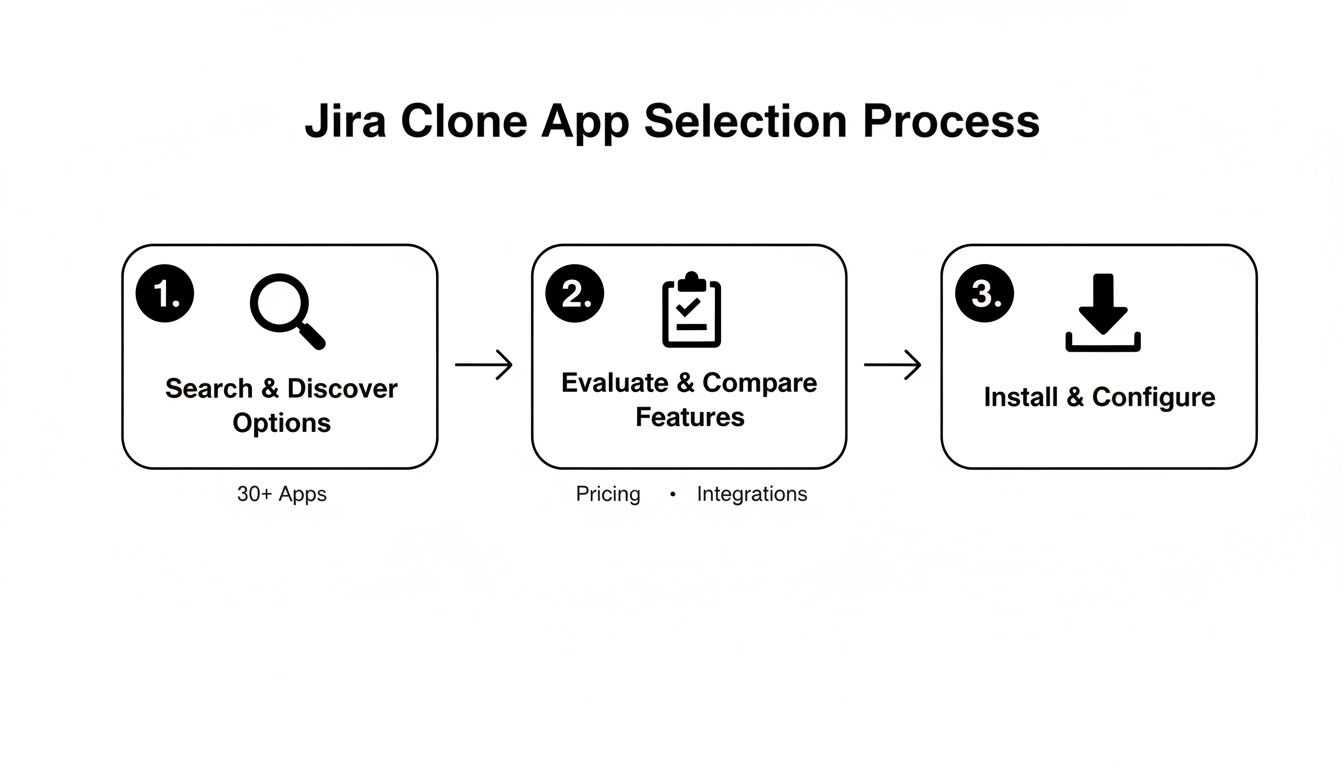
    This flow involves searching the Marketplace, evaluating top contenders, and installing the best fit. Following a structured approach can reduce implementation time by around 30% and ensure you get a tool that handles all your needs from day one.

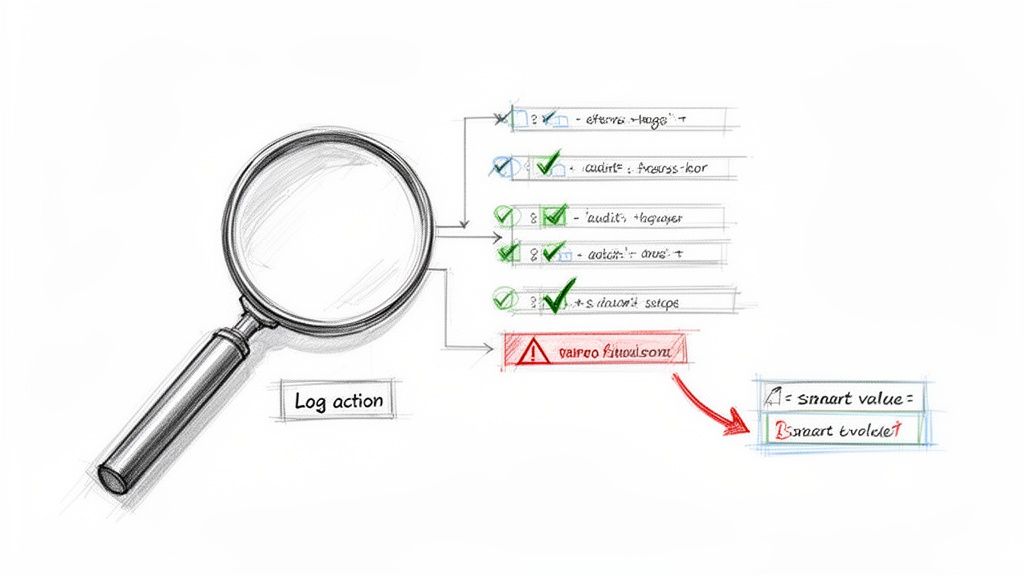
    Pro Tips for Handling Errors

    Automation rules can fail, often due to permission issues. Build error checking directly into your rule to handle this.

    Use an If/Else block to check if the user has permission to clone issues. If they do, the clone proceeds. If not, the "else" branch can add a comment to the original issue: "Clone failed: insufficient permissions." This logs failures so they can be addressed quickly.

    Scaling Cloning Across Different Teams

    When creating automation rules for multiple teams, consistency is key. Avoid these common pitfalls:

    • Using slightly different smart value syntax in different rules.
    • Forgetting to give the automation user permissions in both source and target projects.
    • Running into project permission schemes that block sub-task cloning.

    For workflows spanning multiple teams, use multi-project or global automation rules. These let you create a single rule that works across your entire Jira instance. For more on this, see our guide on Jira workflow automation.

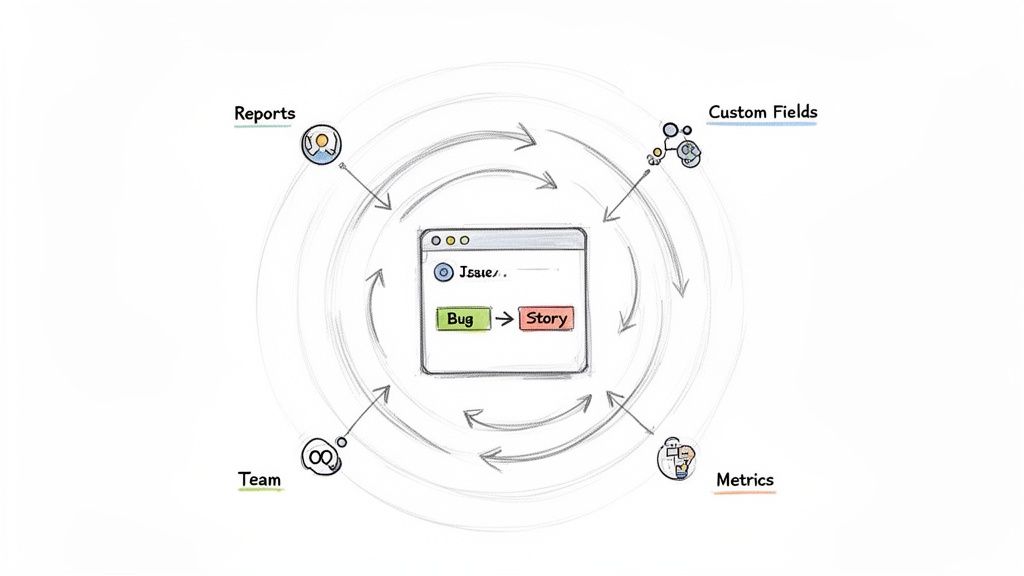
    Mapping Custom Fields Correctly

    Cloning between projects can be tricky due to custom field mismatches. If configurations don't align, data can be lost.

    Ensure field IDs and configurations match between source and target projects. You might need to:

    • Map a "Severity" field in one project to a "Priority" field in another.
    • Ensure critical data like SLA dates and the original reporter are carried over.
    • Decide whether to copy custom checklists as-is or reset them.

    Real-World Examples

    A QA team automated the cloning of their regression test suite every time a new release branch was created. This simple rule cut their test prep time by 40%.

    Other powerful use cases include:

    • Nightly builds automatically creating testing tasks for the QA team.
    • Recurring compliance audits that spawn a fresh checklist of tasks monthly.
    • Standardized onboarding templates for new clients, complete with over 20 predefined tasks.

    The Business Impact

    Automating routine processes like bulk cloning does more than save time. To learn more, explore the advantages of business process automation. It strengthens your audit trails, reduces manual oversight, and frees up your team for more valuable work.

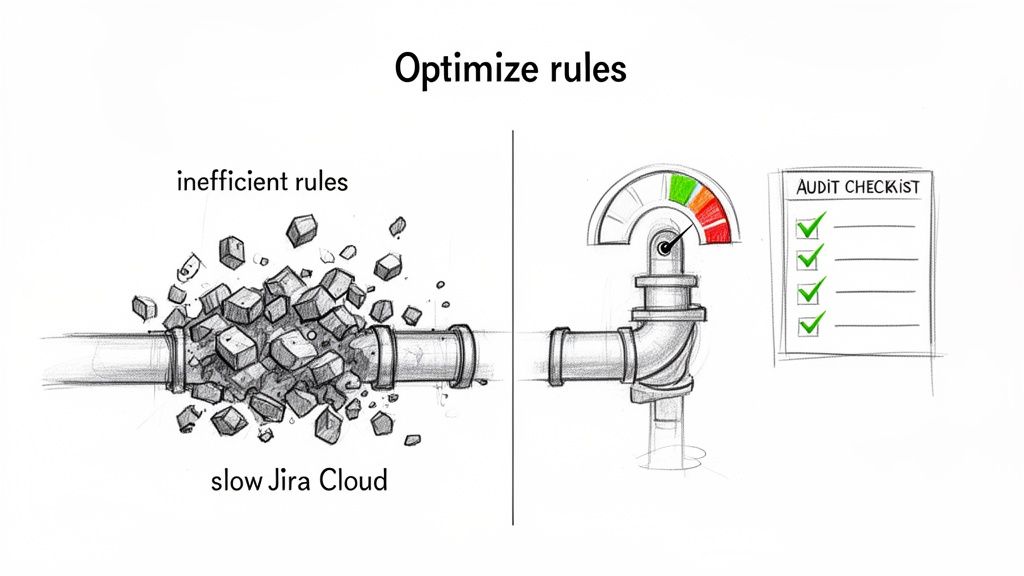
    Keeping Your Automation Rules Healthy

    As you build more rules, your Jira instance can feel the strain. Regular maintenance is essential.

    Archive old or redundant rules monthly. Label active rules clearly by function. Regularly check the Automation Audit Log to identify performance bottlenecks. Keep your instance running smoothly by enabling only the rules that deliver the most value.

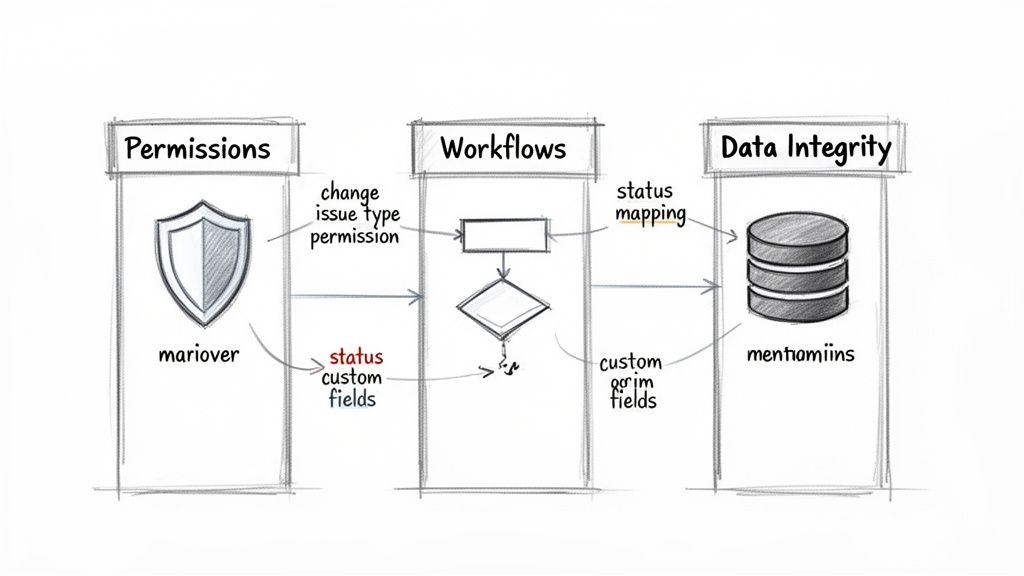
    Troubleshooting When Jira Cloning Goes Wrong

    Even with a solid plan, bulk cloning can fail. When a clone fails, it's almost always a predictable issue tied to permissions, workflows, or a data mismatch. Understanding these common failure points is key to fixing the most frustrating bulk clone issues in Jira.

    Sometimes, the process halts without a clear error, leaving you with a half-finished job. The good news is that most of these problems have straightforward solutions.

    Decoding Permission-Related Errors

    The most common culprit behind a failed clone is permissions. The user or automation rule running the clone must have the right permissions in both the source and destination projects.

    The user needs "Create Issues" permission in the destination project. It sounds obvious, but it’s the first thing to check. If you’re copying comments, they’ll also need "Add Comments" permission. This layered permission model often catches people off guard. For more guidance, review strategies for addressing "Access Is Denied" errors.

    A classic scenario is an automation rule that works for one team but fails for another. The issue is almost always that the Automation for Jira system user lacks project permissions in the new target project.

    Actionable Insight: Before starting a big clone, do a quick sanity check. Ensure the user or automation agent has full create and edit permissions in the target project. A five-second look at the permission scheme can save you an hour of headaches.

    Navigating Workflow and Screen Conflicts

    Mismatched project configurations, especially around workflows and screen schemes, are another major cause of cloning failures. If your destination project has a required custom field that doesn't exist in the source project, the clone will fail. Jira can't create an issue when it can't populate a mandatory field.

    Workflow validators are also notorious for causing trouble. If the destination project’s "Create" transition requires the "Due Date" field to be set, and the original issues don't have a due date, the validator will block the creation of every single one.

    Here’s an actionable diagnostic checklist for these failures:

    • Required Fields: Compare the "Create Issue" screens for both projects. Are there required fields in the destination that are missing from the source? That's your likely problem.
    • Workflow Validators: Check the validators on the "Create" transition in the destination project's workflow. Temporarily disable a restrictive validator to see if the clone works—that will confirm the cause.
    • Field Context: Ensure all necessary custom fields are available and configured for the specific issue types in the destination project.

    Fixing these issues requires a methodical approach. For complex setups, maintaining a clean record of project configurations is a lifesaver. Solid audit trail best practices can help you quickly spot a recent workflow change that might be causing the trouble.

    Handling Timeouts and Incomplete Clones

    When cloning thousands of issues, you might encounter server timeouts, especially on Jira Cloud. The operation starts, clones a few hundred issues, and then stops without warning.

    The result is a mess: sub-tasks without parents or broken issue links. There's no magic button to fix this, but you can mitigate it.

    The best strategy is to break the job into smaller chunks, just as you would for Jira Data Center's 1,000-issue limit. Instead of cloning 2,000 issues at once, run four separate batches of 500. This reduces the system load and lowers the risk of a timeout.

    If you consistently hit these limits, it may be time to look at a Marketplace app with more robust batch processing.

    Common Questions About Bulk Cloning in Jira

    When you start bulk cloning in Jira, questions come up. You might be hitting native limitations or trying to optimize a Marketplace app. Here are direct, practical answers to the most common questions.

    Can I Bulk Clone Issues Natively in Jira Cloud?

    No. Out of the box, Jira Cloud has no built-in feature to clone multiple issues at once. This is a significant gap compared to Jira Data Center.

    To bulk clone in Jira Cloud, you must use a third-party app from the Atlassian Marketplace. Cloning issues one by one is not a scalable solution.

    What Happens to Sub-Tasks and Issue Links During a Clone?

    This depends on your method. Jira’s single-clone function has checkboxes for attachments and links, but it can be unreliable with complex issue structures.

    • Native Cloning (Single Issue): You can bring sub-tasks and links along, but it often struggles to replicate deep hierarchies, especially across projects with different configurations.
    • Marketplace Apps: This is where apps like Deep Clone or Elements Copy & Sync excel. They are built to preserve these relationships and maintain the entire hierarchy—epics, stories, sub-tasks, and all links—giving you a true one-to-one copy.

    Actionable Insight: A successful bulk clone is about accuracy. If you're losing sub-tasks or breaking links, you aren't saving time. You're creating a massive cleanup project. Always use tools that guarantee the integrity of your issue hierarchy.

    Why Do My Cloned Issues Have a "CLONE" Prefix?

    By default, Jira adds "CLONE -" to the summary of any duplicated issue to distinguish it from the original.

    While sometimes helpful, it's often an annoyance. Here's how to change it:

    1. System-Wide Change (Admin): A Jira Administrator can go to Jira Administration > System > Advanced Settings and find the jira.clone.prefix value. They can remove it or change it to something more useful.
    2. Marketplace App Settings: Most cloning apps let you customize or remove this prefix in their configuration settings for each clone job, giving you more flexible control.

    How Can I Clone Issues Between Different Projects?

    Cloning issues to a different project adds complexity due to potential configuration mismatches. While you can set up an automation rule for this, it requires careful setup.

    The biggest hurdle is mapping fields. Your source and destination projects might have different required fields, screen schemes, or workflow validators that will block the process. If your target project requires a "Customer" custom field that doesn't exist in the source project, the clone will fail.

    This is another scenario where dedicated Marketplace apps are more robust. They typically include an intuitive field mapping interface that lets you resolve these conflicts before you start the clone, ensuring your data moves over smoothly.


    Tired of fighting Jira's limitations and wasting hours on manual workarounds? At Harmonize Pro, we build powerful apps to solve these exact problems. Our flagship app, Nesty, transforms static Jira tickets into dynamic, automated checklists that enforce your team's processes. Stop wasting time on repetitive tasks and ensure quality at every step. Discover a smarter way to manage complex workflows.

  • How to Clone Jira Issues: A Practical Guide for Teams

    How to Clone Jira Issues: A Practical Guide for Teams

    Cloning a Jira issue seems simple: find "Clone" in the issue's action menu (the three dots), click it, and you're done. This creates a basic copy with the summary and description. But to truly leverage this feature, you need to go beyond a simple click and integrate cloning into your team's core strategy. This guide provides actionable steps to do just that.

    Why Cloning Jira Issues Is a Strategic Advantage

    Diagram illustrating an 'Original' issue being cloned into a 'Clone' issue, showing a clock and team members.

    Cloning in Jira is about more than saving a few minutes; it's a practice for improving efficiency and consistency. Manually recreating tickets is slow and introduces risk. Details get missed, standards vary, and critical context is lost when work moves between teams. The result is rework and delays.

    When you clone Jira issue tickets, you create a repeatable, reliable process. This reduces human error and accelerates your entire workflow.

    Consider a practical scenario: a developer fixes a complex bug in a development environment. That same fix must be tested in staging and deployed to production. Instead of manually creating two new tickets and hoping all details are copied correctly, clone the original bug report for each environment. This action guarantees that all context, descriptions, and initial findings are carried over accurately.

    The True Cost of Manual Creation

    The hidden cost of not cloning is significant. It's about maintaining momentum and ensuring everyone—from developers to QA to operations—is working from the same information.

    A solid cloning strategy delivers tangible benefits:

    • Workflow Consistency: Ensures every similar task, from a new user story to a deployment request, has a consistent structure and includes all necessary information from the start.
    • Reduced Errors: Eliminates typos or forgotten details on recurring tasks, which is critical for QA and release teams who rely on accuracy.
    • Accelerated Handoffs: Speeds up the movement of work between teams. For example, you can escalate a support ticket to the development backlog without losing any of the customer's original report.

    Actionable Insight: Don't think of cloning as just making a copy. Treat it as a tool to protect information integrity. Cloning establishes a single source of truth that prevents misunderstandings and aligns your team.

    However, Jira's native cloning feature has limitations, especially regarding agile reporting. For instance, if the status of a cloned issue isn't reset, it can skew metrics like cycle time by 20-40%. An estimated 70% of users encounter difficulties when trying to clone an entire epic with all its subtasks. Community experts frequently discuss how cloning affects Jira reports, highlighting it as a common pain point.

    Understanding the line between simple duplication and strategic replication is key.

    Mastering Jira's Native Cloning Feature

    Hand-drawn sketch showing a Jira issue cloning interface with fields like Summary and Components selected for copying.

    The first step for most teams is using Jira’s built-in clone function, located in the issue view under the "Actions" menu (the three dots). It’s a direct way to create a copy, but the key is to know exactly what information is transferred and what is left behind.

    When you clone a Jira issue with the native tool, you create a new, separate ticket. Jira automatically links it back to the original via a "clones" link for traceability. By default, the new summary gets a "CLONE -" prefix, which your Jira admin can customize.

    Now, let's get into the specifics of what this feature does and doesn't do.

    What Gets Copied and What Stays Behind

    To use the standard cloning feature effectively, you must understand what data is included. Use this table as a quick reference.

    What Gets Copied with Native Jira Cloning

    Jira Field or Attribute Is It Cloned? Actionable Insight
    Summary & Description Yes The core text is fully copied.
    Components & Versions Yes Copied, but only if they also exist in the destination project. Verify these fields post-clone if moving across projects.
    Priority & Issue Type Yes These fundamental classifications are always preserved.
    Reporter Yes The original reporter is maintained. Decide if your workflow requires this or if it needs to be manually updated.
    Labels & Custom Fields Mostly Most standard and custom fields are copied, but complex field types may not transfer correctly. Always double-check critical custom fields.
    Attachments Only if selected You must manually check a box during the clone process to include them. This is a common oversight, so make it a habit.
    Sub-tasks & Links No The issue hierarchy is ignored. Only the "clones" link is created. Do not use native cloning for epics with child issues.
    Comments & Work Logs No All discussion, time tracking, and history are left on the original issue. Manually copy essential comments if needed.
    Status No The cloned issue always starts at the beginning of its workflow, which is useful for clean-slate tasks.

    The limitations quickly become apparent. The most significant omissions are the context and history of an issue.

    Comments, work logs, and status history are stripped away. This is a major drawback for bug reports or complex tasks where the discussion thread contains critical information.

    Even more importantly, the issue hierarchy is ignored. Cloning an epic only copies the epic itself—none of its stories or tasks are included.

    Actionable Insight: Use native cloning to duplicate the what (the issue's core data), but not the who, when, or why (the collaborative context). For that, you need a more advanced solution.

    Working Around the Limitations

    For a simple one-off task, you can manually re-attach a file or copy-paste a key comment. This is a practical, though not ideal, workaround.

    However, if you need to clone an issue with five sub-tasks, a dozen attachments, and a long comment thread, the manual effort becomes unsustainable and error-prone. This is the point where you should consider a more robust solution.

    Understanding these boundaries is key to using Jira effectively. The native feature is a time-saver for simple cloning needs. For teams with structured processes, it serves as a starting point that reveals the need for automation. To better integrate cloning into your processes, learn about changing workflows in Jira. This will help you design workflows that accommodate these native limitations.

    Cloning Across Projects and Keeping Subtasks Intact

    Jira's built-in clone feature works well for duplicates within the same project. But what if work needs to move from one team's board to another? This is where the standard "clone" button falls short. Work rarely stays confined to a single Jira project.

    For example, a support agent logs a critical bug in a Jira Service Management project. To fix it, that ticket must become a story in the development team’s software project. A simple clone won't carry over subtasks, attachments, or the full context developers need. This manual handoff is slow and prone to information loss.

    Where Native Cloning Hits a Wall

    Cross-project cloning is a common challenge. Another frequent use case is replicating an entire epic for a new software release. After carefully crafting a complex feature with all its user stories and technical subtasks, you now need the same structure for a parallel product line in a different project.

    If you try to clone a Jira issue like an epic using the native tool, you will only get a copy of the epic itself. The entire hierarchy of child issues and subtasks will be left behind. Manually recreating dozens of linked issues is not only time-consuming but also a guaranteed way to introduce errors.

    These scenarios demand a more powerful solution. You need a tool capable of:

    • Cross-Project Cloning: Duplicating an issue from one project (e.g., "SUPPORT") directly into another (e.g., "DEV").
    • Hierarchy Preservation: Cloning a parent issue and its entire tree of child issues and subtasks.
    • Field Modification: Changing key fields—like setting the new issue's status or assigning it to the correct person—before the clone is created.

    Why You'll Probably Need a Marketplace App

    When you encounter these limitations, it's time to explore the Atlassian Marketplace. Apps are designed to fill these gaps, turning a cumbersome manual task into a single, reliable action. They extend Jira's functionality to support how modern teams collaborate.

    Actionable Insight: Native cloning treats an issue as a flat item. Advanced workflows, however, depend on preserving structure and context—the links, subtasks, and project-specific fields. Marketplace apps are built to handle this complexity.

    When evaluating Marketplace apps, focus on how they solve your specific cloning problems. Can it convert a Service Desk ticket into a development backlog story while correctly mapping all fields? Can it duplicate a complex project template for a new client, ensuring every subtask is perfectly preserved?

    The best tools provide granular control, allowing you to define exactly what gets copied, what is ignored, and what is modified during the cloning process. This precision is what elevates a basic copy-paste into an intelligent, automated workflow.

    Automating Your Cloning Workflow

    Cloning issues manually is inefficient for recurring tasks. If you find yourself repeatedly clicking "Clone" for the same reason, it's time to automate. Jira Automation is a native feature that lets you create "if-this-then-that" rules to handle repetitive work, saving time and improving process consistency.

    Consider a common workflow: a developer moves a User Story to the "Ready for QA" column. To ensure a smooth handoff, you can create an automation rule to create the QA ticket automatically.

    Building Your First Automation Rule

    The objective is clear: when a 'User Story' status changes to "Ready for QA," Jira should automatically clone it and its sub-tasks into a new 'QA Ticket'. This creates a seamless transition and provides the testing team with all necessary context without manual intervention.

    Jira's automation engine uses three core components:

    • Trigger: The event that initiates the rule.
    • Condition: An optional check to ensure the rule runs only under specific circumstances.
    • Action: The task you want Jira to perform.

    For this scenario, you'll build a rule with a trigger and an action to automatically clone a Jira issue upon a status change.

    The rule builder uses a drag-and-drop interface, making it accessible even without development skills.

    You can chain these components to map out nearly any process your team follows.

    A Practical Cloning Automation Example

    Let's build the QA handoff rule. Navigate to Jira's automation settings and create a new rule with these steps:

    1. Select a Trigger: Start with the Issue transitioned trigger. Configure it to activate when an issue's status changes to "Ready for QA."

    2. Add an Action: Next, add the Clone issue action. Here, you specify what to create. You can clone it into the same project but change the issue type to 'QA Ticket'.

    3. Use Smart Values: To pass information from the original issue to the new one, use smart values. For the new ticket's summary, enter QA for: {{issue.summary}}. Jira will automatically pull the title from the original user story.

    Actionable Insight: By automating this single step, you create a reliable process that ensures the QA team receives exactly what they need, precisely when they need it, every time. This eliminates forgotten tickets and missing information.

    This is a basic example. You can build more complex, multi-step workflows. For more advanced techniques, explore this guide to Jira workflow automation. To connect Jira with other applications, you can extend these concepts by automating your workflow with Zapier integration.

    Scaling Up with Bulk Cloning Marketplace Apps

    Jira's native automation is excellent for simple, single-issue cloning workflows. But what happens when your needs scale up significantly?

    Imagine launching a new product and needing to create 200 standardized tasks for QA, DevOps, and marketing. Or onboarding a major client, which requires replicating an entire project template with hundreds of issues and subtasks. Triggering automation rules one by one is impractical.

    This is where dedicated cloning apps from the Atlassian Marketplace become essential. These tools are built to handle large-scale cloning operations that are beyond the scope of native Jira features.

    Moving Beyond Single-Issue Limitations

    The primary advantage of a marketplace app is its ability to perform batch operations. Instead of one-to-one duplication, these tools support one-to-many or many-to-many cloning. This is crucial for tasks like setting up recurring quarterly initiatives or rolling out a standardized set of epics for a new sprint.

    Most of these apps allow you to use Jira Query Language (JQL) to select the exact issues you want to duplicate, giving you precise control over the process. If you need to build more effective queries, our guide on how to create a filter in Jira can help.

    Actionable Insight: Transitioning from single-issue automation to a bulk cloning app is like moving from manual craftsmanship to an assembly line. Both produce quality, but only one can deliver at the speed and scale required by modern organizations.

    A simple automation flow often follows this pattern: a trigger leads to a clone action and an update.

    A diagram outlining the Jira automation process, featuring steps: Trigger, Clone, and Update.

    While this works for individual tickets, it doesn't scale for duplicating hundreds of issues at once. Specialized apps are designed for this purpose.

    High-Powered Cloning Solutions

    The Marketplace offers several powerful cloning solutions. Some excel at straightforward bulk actions, while others provide deep customization for complex, nested issue structures. Their common goal is to save you time and enforce process consistency.

    One notable solution is Deep Clone for Jira, which can bulk clone up to 100,000 issues or even entire projects in a single operation. For large-scale migrations or DevOps teams needing to preserve intricate issue hierarchies, this is a powerful tool. It meticulously copies everything—epics, subtasks, comments, attachments, and checklists—avoiding the pitfalls of native Jira.

    When evaluating apps, look for these key features:

    • JQL-Based Selection: Use JQL to precisely target which issues to clone.
    • Cross-Project Bulk Cloning: Duplicate multiple issues from one project directly into another in a single operation.
    • Hierarchy Preservation: Ensure that epics are cloned with all their stories, tasks, and subtasks intact.
    • Pre-Clone Modifications: Modify fields like the assignee, status, or priority before the new issues are created.

    Investing in a dedicated cloning app is about adopting a scalable system to keep your projects organized and your teams efficient.

    Common Questions About Cloning Jira Issues

    When you start cloning issues, several practical questions arise. Understanding how Jira handles links, permissions, and reporting can prevent future problems. Here are answers to common queries.

    What Happens to Issue Links When I Clone a Jira Issue?

    Jira's native clone feature creates a "Clones" link between the original and the new issue, which is useful for basic traceability.

    However, other important links, such as “blocks,” “is blocked by,” or “relates to,” are not copied. If this relational context is vital to your workflow, this is a significant limitation. For complex projects, consider Marketplace apps that let you specify which links to copy, ensuring no critical information is lost.

    Can I Clone Issues Between Jira Cloud and Jira Server?

    Directly cloning an issue from a Jira Cloud instance to a Jira Server instance (or vice versa) is not a built-in feature. This action is more of a migration and requires specialized tools designed for moving data between separate Jira environments.

    Most cloning apps operate within a single Jira instance. To replicate an issue across different instances, you will need to use an export/import strategy rather than a simple clone function.

    How Do Permissions Affect My Ability to Clone Issues?

    If you can't clone an issue, it's almost always a permissions problem. To clone a Jira issue, you must have the “Create Issue” permission in the project where the new issue will be created. If you are cloning into a different project, you need that permission in the destination project.

    If the "Clone" option is missing from the issue's action menu, it's a clear sign of a permissions issue. Contact your Jira admin to verify that your role has the necessary access rights in the target project.

    Actionable Insight: No "Create Issue" permission means no cloning. This is the most common reason users believe the feature is broken, but it's simply Jira's security model at work.

    Do Cloned Issues Affect My Agile Reports?

    Yes, they do, and this requires careful management. A cloned issue is a new ticket in Jira, which can impact your burndown charts, velocity metrics, and cycle time reports.

    For example, if you clone an issue that was already "Done," the new copy will likely start at the beginning of your workflow, such as "To Do." This can skew your data, making it appear that more work was completed in a sprint than was actually the case. To maintain accurate reporting, immediately review any cloned issue and set its status and sprint details correctly.


    Ready to stop wrestling with manual cloning and start automating your most complex Jira workflows? With Harmonize Pro's flagship app, Nesty, you can transform static issues into dynamic checklists that enforce your Definition of Done, automate handoffs between teams, and ensure quality at every step. See how Nesty can bring order and efficiency to your projects at https://harmonizepro.com/nesty.

  • A Practical Guide to Jira Change Issue Type

    A Practical Guide to Jira Change Issue Type

    Changing a Jira issue type seems like a simple dropdown click, but it's rarely that easy. What looks like a minor edit can impact workflows, custom fields, and reporting. Get it wrong, and a single Jira change issue type operation can corrupt your project's data. This guide provides actionable steps to do it right.

    Why Changing an Issue Type in Jira Is Never Just One Click

    Changing an issue type is reclassifying a piece of work. A small Task becomes a full-blown Story. A customer-reported Bug turns out to be a request for a new Feature. These adjustments are a normal part of agile development.

    However, in Jira, an issue type is more than just a label. It's the anchor for critical project settings:

    • Workflows: A Bug follows a "Triage," "Fix in Progress," and "Ready for QA" workflow. A Story follows a "Backlog," "In Development," and "Done" path. Changing the type means you must map the issue to a new workflow.
    • Fields: An Epic has an "Epic Name" field that a Task doesn't. When you switch, you must decide what happens to data in fields that don't exist on the new issue type.
    • Permissions: Specific teams may have permission to edit certain issue types. Changing a Bug to a Story could require a handoff between your support and development teams.
    • Reporting: Your dashboards and reports are filtered by issue type. A miscategorized issue will throw off key metrics like team velocity or cycle time.

    The Real-World Impact of Mismatched Issue Types

    When a team member logs a new feature as a simple Task, it sets the wrong expectations and often leads to rework. In the US market, which accounts for 33.56% of Jira's website traffic, some teams see rework rates hitting 30% due to improper issue typing.

    Worse, projects that require mid-sprint issue type changes often see resolution times increase by 15-20%. That's a direct hit to your delivery schedule. You can find more about these Jira statistics and their impact on team productivity.

    The decision to change an issue type isn't just admin cleanup; it's a strategic move that realigns the work with the correct process. Getting it right saves a ton of confusion later and makes sure the issue follows the right path to get done.

    This image shows how reports, fields, metrics, and workflows are all tied directly to the issue type field.

    A diagram illustrating issue type change from Bug to Story within a workflow involving reports, custom fields, metrics, and team.

    Swapping a "Bug" for a "Story" isn't an isolated change. It forces you to rethink how that work moves through its lifecycle and how you capture its data. To run a clean, efficient, and accurate Jira instance, you have to master this process.

    The Right Way to Change a Single Issue Type

    Changing an issue's type in Jira is a common task. To do it correctly and protect your data, use Jira's built-in migration wizard. It ensures you don't lose critical information when shifting an issue between different configurations.

    Here's how to change a Bug into a Story. A customer support ticket, "DEV-123 User cannot export report," is not a glitch but a feature request. To get it on the development team's radar, you need to change its type to Story.

    Finding the "Move" Operation

    You won't find a "Change Type" dropdown on the issue screen. Jira considers this a "move" because you are shifting the issue between different sets of rules—workflows, fields, and screens—even if it stays in the same project.

    1. Open the issue you need to change (e.g., DEV-123).
    2. Click the actions menu (•••) in the top-right corner.
    3. Select Move. This starts the change wizard.

    If you can't click Move or don't see the option, it's a permissions problem. Contact your Jira admin for help.

    Navigating the Four-Step Change Wizard

    After clicking Move, Jira launches a four-step wizard to guide you.

    1. Choose New Issue Type: The first screen confirms the issue. Select the new Issue Type. In our example, choose Story.
    2. Map Status: Now, map the issue's current status to a status in the new workflow. For example, if the Bug is in "In Triage," map it to the "Backlog" status in the Story workflow. This ensures the issue appears where the product owner expects it.
      • Source Status: The Bug issue's current status.
      • Target Status: The status the new Story will land in.

        Expert Tip: If no status mapping makes sense, cancel the move. Change the original issue’s status to something generic like 'Open' or 'To Do', then restart the move. This prevents the new issue from getting stuck in an illogical state.

    3. Update Fields: This step is crucial for data integrity. Jira lists all fields from the original Bug. If a custom field like "Root Cause Analysis" doesn't exist on the Story issue type, Jira will flag it. To preserve this data, copy its contents into a common field like "Description" or add it as a comment before finalizing the move. Otherwise, the data will be permanently discarded.
    4. Confirm Changes: The final step is a confirmation screen summarizing all your changes. Double-check everything. Once you hit confirm, Jira completes the process. DEV-123 is now a Story in the development backlog.

    Tackling Bulk Issue Type Changes with JQL

    To change dozens or hundreds of issues, use Jira's bulk change feature. This tool relies on a precise Jira Query Language (JQL) search to isolate the exact issues you need to modify. A sloppy query can grab the wrong tickets and create a bigger mess. To sharpen your skills, review our guide on how to create a filter in Jira.

    Crafting the Perfect JQL Query

    Imagine a team has been logging new feature work as Sub-tasks, but they should be Tasks to use a different workflow. A JQL query can quickly gather all relevant issues.

    In Jira's advanced search bar, enter this query:

    project = "Phoenix Project" AND issuetype = "Sub-task" AND status not in ("Done", "Closed")

    This query does three things:

    • Limits the search to the "Phoenix Project."
    • Targets only issues currently typed as "Sub-task."
    • Excludes completed issues to avoid altering project history.

    Once the search results show the correct issues, click the ••• menu in the top-right corner and select Bulk change all issues.

    The process from here is straightforward but requires care.

    Flowchart illustrating the Jira issue type change process: Select Issue, Move, and Map Status steps.

    As the diagram illustrates, the operation involves selecting the right issues, launching the "Move" action, and carefully mapping statuses and fields to the new issue type.

    Navigating the Bulk Change Wizard

    After starting the bulk change, Jira presents a wizard similar to the single-issue process. First, check the boxes for the issues you want to modify (usually all of them).

    Next, choose the Move Issues operation. Select the target issue type (in this case, Task). Then, you will map statuses and fields.

    The number one mistake people make with bulk changes is rushing the mapping screens. One wrong click here can push dozens of issues into the wrong status or, even worse, permanently delete data from custom fields. Slow down and check every single mapping.

    For status mapping, you must map every current status from the selected issues to a corresponding status in the new workflow. For example, if sub-tasks are in "To Do" and "In Progress," map them to the equivalent statuses in the Task workflow.

    For field mapping, if your Sub-task type has a custom field that the Task type doesn't, Jira will prompt you. In the bulk change wizard, your only choice is to discard the data from that field. If the data is important, cancel the operation, export or copy the data first, and then restart. There is no "undo" button for lost custom field data.

    Finally, Jira provides a summary screen. Review it carefully before you commit. After you hit confirm, Jira will process the changes.

    Navigating Workflows, Permissions, and Data Integrity

    Changing a Jira issue type is a strategic move that involves three core elements: permissions, workflows, and data integrity. Mismanaging any of these can lead to stuck tickets, lost information, or security gaps. To avoid this, you must understand what happens behind the scenes.

    A hand-drawn diagram illustrating the interaction between permissions, workflows, and data integrity in a system.

    These three elements are interconnected. Permissions determine who can make a change, the workflow defines the path the issue follows, and data integrity ensures nothing critical is lost.

    The Gatekeepers: Permissions and Project Roles

    If the "Move" option is grayed out, your permissions scheme is working as intended. The ability to Jira change issue type is controlled by the Move Issues and Edit Issues permissions. Admins restrict these permissions for good reason.

    An unrestricted "Move" permission is risky. A junior team member could accidentally move a critical Production Bug to a different project as a Marketing Task, causing the ticket to vanish from the engineering backlog and its specific fields to be wiped.

    Follow these best practices for assigning permissions:

    • Project Admins and Leads: Grant them these permissions to manage the backlog and correct mistakes.
    • Scrum Masters and Product Owners: They often need this ability to reclassify work as priorities shift.
    • General Users: Restrict this permission for most team members. Have them request changes from a project lead to ensure a second pair of eyes reviews the move.

    Untangling Complex Workflow Mapping

    Workflow mapping is where most changes go wrong. When you change an issue type, you are often moving the ticket to a completely different workflow. A problem arises when the original issue's status has no logical equivalent in the new workflow.

    For example, a Development Task is in "Ready for Deployment." The team changes its type to Release, which has a workflow with "Staging Deploy," "UAT," and "Production Deploy" statuses. There is no direct match for "Ready for Deployment."

    If you force a mapping that doesn't make sense, you risk pushing the issue into a state where no one knows what to do next. The best approach is to map to the earliest logical status in the new workflow, like "Staging Deploy," to ensure the process restarts correctly.

    Inconsistent workflows can delay projects. Data shows that projects with frequent type changes can see a 25-35% spike in unresolved issues lingering for over 30 days. This happens because re-categorization often resets workflow assignments and disables notifications, leaving the ticket in limbo.

    For more details on this topic, see our guide on changing a workflow in Jira.

    Preserving Data Integrity During the Switch

    You must protect your data during a type change. Each issue type can have its own set of fields controlled by field configurations and screen schemes. When you switch an issue type, any field that exists on the original but not the target is at risk.

    For example, a Bug report has a "Log Files" custom field with attached diagnostics. If you change this issue to a Story that doesn't use this field, Jira will ask what to do with that data. Your only option is to discard it. If you proceed, those log files are gone forever.

    Use these steps to prevent permanent data loss:

    1. Audit Before You Act: Before changing the type, review all the source issue's fields. Note any custom fields with essential data.
    2. Copy and Paste: The simplest manual fix is to copy data from a unique field and paste it into a universal field like "Description" or add it as a comment before starting the move.
    3. Ask an Admin for Help: If your team frequently moves between two issue types and loses the same data, ask your Jira administrator to add that field to the target issue type's screens. This will streamline future changes.

    4. Automating Issue Type Changes for Better Handoffs

    Manual issue type changes are fine for occasional fixes, but relying on them for daily process handoffs is inefficient and risky. Each manual change introduces the potential for a forgotten step, a missed notification, or incorrect field mapping.

    Automation transforms a basic type change into a smart, reliable, and consistent part of your workflow. Instead of hoping people remember complex procedures, you build the process directly into Jira.

    Setting Up Your First Automation Rule

    Use Jira’s built-in automation engine, found under Project Settings > Automation. The logic is a simple "when/if/then" model that lets you create rules to react to project events.

    Here's how to automate a common service desk scenario:

    A customer opens a Service Request for a slow report. A support agent discovers it’s a critical bug and changes the priority to "Highest." This is a perfect trigger for automation. Instead of requiring the agent to also manually change the issue type to Incident, build a rule to do it automatically.

    Here’s the rule breakdown:

    • Trigger (When): Issue field value changed. Configure it to monitor the Priority field.
    • Condition (If): Issue fields condition. Set it to run only if Priority is now Highest and the Issue Type is Service Request. This prevents the rule from firing on existing Incidents.
    • Action (Then): Edit issue. Select the Issue Type field and set it to change to Incident.

    Once this rule is active, the moment an agent escalates a Service Request to "Highest" priority, Jira automatically converts it to an Incident. No extra clicks or forgotten steps.

    Expanding Automation for Cross-Team Handoffs

    This simple type change can trigger a more sophisticated handoff. Add more actions to the same automation rule to orchestrate the entire response:

    • Re-assign issue: Automatically assign the new Incident to the on-call Site Reliability Engineering (SRE) team.
    • Add comment: Post a standardized comment, such as "This issue has been automatically converted to an Incident due to its 'Highest' priority," to keep everyone informed.
    • Send notification: Send a message to the #sre-incidents Slack or Microsoft Teams channel to alert the right people immediately.

    This approach shifts your process from reactive and manual to proactive and automated. The system handles administrative work, freeing up your team to solve the problem.

    To learn more about how different issue types are routed, explore the principles of automated ticket routing. This practice ensures that once an issue is reclassified, it immediately enters the correct operational stream.

    For more advanced, multi-step workflows, our guide to Jira workflow automation offers deeper insights.

    Automating the jira change issue type command isn't just about saving clicks. It’s about building a more resilient system where process rules are enforced, handoffs are frictionless, and your team can work with confidence.

    Dealing With Common Errors When Changing Issue Types

    Even with a solid plan, changing an issue type in Jira can cause errors. Most error messages point to simple configuration mismatches that you can often fix without waiting for a Jira admin.

    Here are the most common roadblocks and how to resolve them.

    Why Is the "Move" Option Grayed Out?

    This is the most common issue. If you open an issue's actions menu (•••) and the "Move" option is grayed out, it is 100% a permissions issue.

    Your user account lacks the Move Issues permission in the project's configuration. There is no workaround. Contact your project administrator or a Jira admin, explain what you are trying to do, and request the necessary access.

    My Fields Vanished After the Change!

    If key information like "Story Points" or an "Epic Link" disappears after changing the issue type, don't panic. The data is hidden, not deleted.

    This occurs because the issue's Screen Scheme controls which fields are displayed. If the new issue type is not configured to show a certain field, Jira will hide it, but the data remains in the background.

    What to do: First, check the issue's history tab to confirm the data is still logged. Once you've confirmed it's there, ping your Jira admin. Tell them exactly which field is missing on the new issue type, and they can tweak the project's Screen Scheme to make it visible again.

    The Issue Is Stuck in a Status and Won't Budge

    This tricky problem can bring an issue to a complete stop. You change the issue type and map the status correctly, but later find you can't transition the issue forward because the buttons are missing or disabled.

    This is a classic workflow mapping problem. The status you moved the issue into is a dead end in the new workflow, with no configured outgoing transitions. For example, if you move a Bug from "Closed" to a Task's "Done" status, and the Task workflow prohibits transitions out of "Done," your issue is stuck.

    Here’s how to get it unstuck:

    1. Check the Workflow: Ask your admin to show you the workflow diagram for the new issue type. They can immediately see if the current status has any outgoing transitions.
    2. Move It Again: The fastest fix is often to "reset" the issue's place in the workflow. Perform another type change to a temporary type (like Sub-task), mapping its status to an early state like "To Do." Then, immediately move it back to the correct issue type, again mapping it to an early status. This gives it a fresh start in the correct workflow.

    Common Questions and Quick Answers

    When changing issue types in Jira, a few questions consistently arise. Here are the answers to the most common ones.

    Can I Undo a Change to an Issue Type?

    Yes, you can change an issue type back by repeating the "Move" process. If you accidentally moved a Bug to a Story, simply move it back to Bug.

    However, be aware of potential data loss. If the original move caused data from a custom field to be discarded (because the field didn't exist on the new issue type), that data is gone permanently. Moving the issue back to its original type will not restore it.

    What Happens to Sub-Tasks When I Change the Parent Issue’s Type?

    Sub-tasks will remain linked to the parent issue after you change its type, and they will keep their original issue type. The risk is whether the new parent issue type is configured to support sub-tasks.

    For example, if you change a Task with three sub-tasks into an Epic, there is no problem, as Epics are designed to contain other issues. But if you move that same Task to a custom issue type that is not configured to allow sub-tasks, those sub-tasks will be orphaned. They will lose their parent-child link, disrupting dependency tracking.

    Always double-check that the destination issue type supports the same hierarchy. Breaking that parent link can throw a major wrench in your team's ability to track work from start to finish.

    Why Is the Issue Type I Need Missing from the List?

    If the issue type you want isn't in the dropdown list during the "Move" process, it's almost always a project configuration problem. There are two primary causes:

    • It’s Not in the Project's Issue Type Scheme: Every Jira project has an Issue Type Scheme that defines which issue types are available. If the type you need isn't included, a Jira admin must add it to that project's scheme.
    • Workflow or Field Mapping Conflicts: In rare cases, Jira might block the move due to a significant conflict between the old and new workflows or field configurations. If the wizard cannot map the data cleanly, it will not allow you to proceed. This indicates a deeper configuration issue that an admin needs to resolve.

    Ready to eliminate manual handoffs and enforce your team's processes directly within Jira? Harmonize Pro builds powerful apps that turn static tickets into dynamic workflows. With our app Nesty, you can create automated checklists and quality gates that ensure every step is completed correctly, every time. Learn how to build smarter, more reliable workflows.

  • Supercharge Cross-Team Collaboration with Actionable Jira Sample Workflows

    Supercharge Cross-Team Collaboration with Actionable Jira Sample Workflows

    Jira is powerful, but its default workflows often fall short in complex, multi-team environments. A simple "To Do -> In Progress -> Done" structure might work for a small team, but it breaks down when managing intricate developer-to-QA handoffs, multi-stage release cycles, or detailed customer onboarding processes. Generic workflows create ambiguity, hide critical blockers, and lead to manual work that drains your team's productivity. The result? Dropped balls, inconsistent quality, and frustrated engineers who spend more time updating tickets than writing code.

    This guide moves beyond the basics. We've compiled a list of seven resources offering robust, actionable Jira sample workflows designed for real-world, cross-functional scenarios. You won't just see diagrams of states and transitions. For each resource, we provide a strategic breakdown, including:

    • Actionable insights for implementing quality gates and blockers.
    • Tactical tips for automating handoffs and status updates.
    • Screenshots and links to see the templates and tools in action.

    Our goal is to help you transform your Jira instance from a simple task tracker into a predictable, automated engine for cross-team delivery. Use these examples as a launchpad for your own internal improvements. For a broader understanding of how to drive this kind of change within your organization, you can explore various process improvement strategies and best practices. Let's dive into the workflows that will help you build more efficient, transparent, and scalable processes.

    1. Harmonize Pro

    Harmonize Pro offers a powerful Jira app, Nesty, that transforms standard Jira issues into dynamic, self-managing workflows. Instead of merely providing static documentation or external examples, Nesty enables teams to build and automate complex processes directly within Jira, making it an exceptional resource for anyone looking to implement robust, real-world Jira sample workflows. This approach moves beyond theoretical diagrams and embeds sophisticated, multi-step handoffs and quality gates into your live project environment.

    Harmonize Pro

    What truly sets Harmonize Pro apart is its ability to eliminate the manual coordination that plagues cross-functional teams. Nesty uses a combination of unlimited nested checklists and smart triggers to orchestrate complex sequences, such as Dev→QA handoffs, multi-environment deployments, and structured customer onboarding, all from a single Jira ticket. This provides unparalleled traceability and reduces the risk of human error.

    Key Features and Strategic Advantages

    Harmonize Pro’s Nesty is more than just a workflow template provider; it's a process automation engine for Jira. Its capabilities are designed to enforce standards and streamline collaboration with precision.

    • Automated Cross-Team Handoffs: Nesty can automatically reassign a ticket to the next team, send a notification in Slack or Microsoft Teams, and attach required artifacts (like build packages or design documents) once a set of prerequisite tasks is complete. This solves the common problem of tickets stalling between process stages.
    • Dynamic Checklists and Quality Gates: You can create unlimited nested checklists to model intricate processes. Smart triggers can enforce a "Definition of Done" by preventing a ticket from moving to the next status until all required checklist items are complete. This creates reliable quality gates that ensure no steps are missed.
    • Centralized Workflow Management: By orchestrating multi-step cascades from one Jira ticket, Nesty ensures complete visibility and auditability. For example, a single "New Feature" ticket can manage development, QA testing, staging deployment, and production release phases, with each phase unlocking only when the previous one is successfully finished.
    • Pre-built Templates and Documentation: To accelerate adoption, Harmonize Pro provides comprehensive documentation and pre-built workflow examples. These serve as excellent starting points for teams looking to codify best practices for common scenarios like bug triage or release management.

    Actionable Takeaway: Start by implementing Nesty for a single, high-friction workflow, such as the handoff between your development and QA teams. Use the automated triggers to enforce your "Definition of Ready" for QA. Require developers to attach unit test results and confirm a successful build before the ticket can be reassigned to the QA team, eliminating back-and-forth communication.

    Real-World Application and Use Cases

    The practical benefits of Harmonize Pro's Nesty are immediately apparent in complex, multi-team environments.

    Use Case Nesty Implementation Example
    Software Release Management A single "Release" ticket can contain nested checklists for build generation, deployment to staging, QA sign-off, and production deployment, with automated triggers managing each handoff.
    Customer Onboarding Onboarding tickets can be structured with phases for kickoff, technical setup, user training, and final review, with client-facing checklist items and internal tasks managed in one place.
    Bug Triage and Resolution A bug report can trigger an automated triage checklist, assign it to a product owner for prioritization, and then route it to the correct development team based on specified criteria.

    Access and Pricing

    Nesty is an app for Jira and can be installed via the Atlassian Marketplace. Pricing details are not publicly listed on their website, so you will need to contact Harmonize Pro directly or check the marketplace listing for licensing information. While this requires an extra step, the platform's focus on enterprise-grade process automation suggests it is positioned for teams where reducing coordination overhead and enforcing process standards deliver significant ROI.

    Website: https://harmonizepro.com/nesty

    2. Atlassian Jira Automation Template Library

    For teams seeking to implement proven jira sample workflows without building them from scratch, the Atlassian Jira Automation Template Library is the most direct starting point. Instead of providing full, complex workflow diagrams, it offers a massive, searchable gallery of pre-built automation rules that represent the "connective tissue" of any effective workflow. These are the triggers, conditions, and actions that move work forward automatically.

    The library allows users to filter hundreds of templates by categories like Software, Business, ITSM, and DevOps. This approach lets you find specific, actionable pieces of a workflow, such as automatically transitioning an issue when a pull request is merged or notifying a Slack channel when a high-priority bug is created. Its native integration within Jira Cloud is a significant advantage, eliminating the need for third-party apps for most common automation tasks.

    Atlassian Jira Automation Template Library

    Strategic Breakdown and Actionable Insights

    What makes this resource unique is the "Automation Playground," a sandbox environment where you can test any rule without affecting your live projects. This feature is invaluable for preventing misconfigured rules from causing chaos in your production Jira instance. You can safely experiment with triggers and see their outcomes before committing.

    Key Takeaway: Start with the "Most popular" templates for your category (e.g., Software). These often solve the most common process bottlenecks, like auto-assigning sub-tasks or syncing parent and sub-task statuses, providing immediate value with minimal setup.

    Features, Pros, and Cons

    Feature Description
    Automation Playground A safe sandbox environment to test rules before enabling them in production projects.
    Native Integration Built directly into Jira Cloud, requiring no extra marketplace apps. It integrates seamlessly with Slack, MS Teams, and major Git hosts.
    Template Gallery Hundreds of searchable, pre-built automation rules categorized for different team types (Software, ITSM, Business).
    Rule-Based Customization While templates are a starting point, each rule is fully customizable to fit your team's specific transitions, fields, and conditions.

    Pros:

    • Speed to Implementation: The fastest way to add powerful automation to existing workflows.
    • Proven Patterns: Based on the most common automation patterns used by thousands of Jira customers.
    • Ecosystem Integration: Tight, out-of-the-box connections to Bitbucket, GitHub, GitLab, Slack, and Teams.

    Cons:

    • Execution Limits: Free and Standard Jira plans have monthly execution limits; heavy users may need Premium or Enterprise tiers.
    • Complexity Ceiling: Extremely complex, multi-system orchestrations might still require a more powerful marketplace app or custom scripting.

    How to Access

    The library is available to all Jira Cloud users directly within the product. To access it, navigate to Project Settings > Automation > Templates. Learn more about how these templates can form the backbone of a powerful workflow in our guide to Jira workflow automation. It's a foundational resource for anyone looking to make their Jira processes more efficient.

    Website: Atlassian Jira Automation Template Library

    3. Atlassian Jira Workflow Templates and Guides

    For teams needing foundational jira sample workflows and project structures, Atlassian’s own library of workflow and project templates is the official starting point. Unlike the granular automation rules library, this resource provides complete, ready-to-use project templates for Scrum, Kanban, and bug tracking. These templates come with pre-configured workflows, issue types, and board settings, offering a holistic framework for new projects.

    This official hub is designed to reduce initial setup friction, providing teams with a reliable, Atlassian-endorsed structure. It guides administrators and project leads through the essential components of a functional workflow, from defining statuses like "To Do," "In Progress," and "Done" to configuring the transitions that connect them. It’s an ideal resource for standardizing practices across an organization or for teams just beginning their Jira journey.

    Atlassian Jira Workflow Templates and Guides

    Strategic Breakdown and Actionable Insights

    What sets this resource apart is its focus on project-level templates rather than just workflow diagrams. When you select a template, such as the "Scrum software development" project, Jira provisions not only the workflow but also the associated Scrum board, sprint functionality, and relevant reports. This integrated approach ensures all necessary components are in place from day one, preventing common setup errors.

    Key Takeaway: Always use an official template as your baseline, even if you plan to customize it heavily. This ensures your workflow is built on a stable, supported foundation. Start with the template that most closely matches your team's methodology (e.g., Kanban for continuous flow, Scrum for iterative development) and then modify statuses and transitions, rather than building from a completely blank slate.

    Features, Pros, and Cons

    Feature Description
    Project-Level Templates Provides complete project setups, including workflows, issue types, screens, and board configurations for Scrum, Kanban, and business use cases.
    Step-by-Step Guidance Includes official documentation and best-practice guides directly linked from the templates, explaining the purpose of each status and transition.
    Software & Business Focused Offers dedicated templates for software development (bug tracking, Scrum) and business projects (project management, task tracking), covering common organizational needs.
    Native Jira Integration As an official Atlassian resource, these templates are accessed and deployed directly within the Jira "Create Project" interface, ensuring seamless implementation.

    Pros:

    • Drastically Reduces Setup Time: The fastest way to launch a fully configured, best-practice project in Jira.
    • Official and Supported: Built and maintained by Atlassian, ensuring compatibility and alignment with Jira's core features.
    • Establishes Consistency: Helps organizations enforce standard workflows and terminology across different teams.

    Cons:

    • Intentionally Generic: The workflows are designed to be broadly applicable and may require significant customization for specialized or mature teams.
    • Limited Complexity: These templates provide a basic structure and often need to be enhanced with more advanced conditions, validators, and post functions for robust processes.

    How to Access

    These templates are available for free to all Jira Cloud and Data Center users. They can be accessed directly within Jira by navigating to Projects > Create project. From there, you can browse the library of software, business, and service management templates. To understand how to evolve these basic structures, explore our guide on Jira workflow best practices, which details how to customize and scale these foundational templates.

    Website: Atlassian Jira Workflow Templates

    4. ScriptRunner for Jira (Adaptavist)

    When standard Jira automation and workflows hit their functional limits, ScriptRunner for Jira by Adaptavist becomes the go-to solution. It's a powerful scripting and automation engine that enables teams to build highly customized and complex jira sample workflows using Groovy scripts. Rather than relying on a visual-only builder, ScriptRunner provides a code-first environment where you can implement sophisticated logic, advanced approvals, and cross-project orchestration that native Jira cannot handle alone.

    ScriptRunner's strength lies in its extensive library of workflow enhancements, including post-functions, validators, and listeners. These components allow you to create dynamic and conditional workflows based on specific criteria, such as checking linked issue statuses before a transition, calculating field values automatically, or integrating with external APIs as part of a workflow step. It's the definitive tool for teams needing to enforce strict business processes or automate intricate, multi-step procedures directly within their Jira instance.

    ScriptRunner for Jira (Adaptavist)

    Strategic Breakdown and Actionable Insights

    The most powerful aspect of ScriptRunner is its ability to create custom workflow validators. These are rules that must be met before a user can transition an issue, acting as powerful quality gates. For example, you can write a validator that prevents a "Ready for QA" transition unless all linked sub-tasks are resolved and the "Code Reviewer" field has been populated. This moves process enforcement from a manual checklist into an automated, unbreakable part of the workflow.

    Key Takeaway: Start by exploring ScriptRunner's built-in script library. Find a simple validator, like "Ensure a field is not empty on transition," and apply it to a non-critical workflow in a test project. This provides a low-risk entry point to understanding how scripts interact with your workflows before tackling more complex automations.

    Features, Pros, and Cons

    Feature Description
    Advanced Workflow Functions Extends Jira workflows with scripted post-functions, conditions, and validators to enforce complex business rules and logic.
    Code-First Flexibility Uses the Groovy scripting language, giving developers full control to implement advanced, policy-driven workflows and integrations.
    Example Scripts & Recipes Provides a vast library of ready-to-use scripts and detailed use cases for common problems like conditional transitions and field manipulations.
    Support for Cloud & Data Center Offers tailored versions for both Jira Cloud and Data Center, with dedicated support and migration resources available for each platform.

    Pros:

    • Handles extremely complex, conditional workflows that exceed native Jira automation capabilities.
    • Enables deep integration with external systems via API calls within workflow transitions.
    • Scales effectively from small teams implementing specific rules to large enterprises with complex governance needs.

    Cons:

    • Requires a learning curve for those unfamiliar with Groovy scripting to implement advanced use cases.
    • Pricing, sold via the Atlassian Marketplace, can increase significantly for higher user tiers, becoming a notable expense.

    How to Access

    ScriptRunner for Jira is available on the Atlassian Marketplace for both Cloud and Data Center instances. You can start with a free trial to explore its capabilities within your own Jira environment. The Adaptavist Library is an excellent resource for finding script examples and patterns that can be adapted to build your own powerful jira sample workflows.

    Website: ScriptRunner for Jira (Adaptavist)

    5. JMWE – Jira Misc Workflow Extensions (Appfire)

    When Jira's native workflow capabilities aren't enough, but custom scripting feels like overkill, JMWE (Jira Misc Workflow Extensions) from Appfire fills the gap. This Marketplace app provides a powerful suite of over 40 no-code and low-code workflow "building blocks" in the form of post-functions, conditions, and validators. It empowers teams to build highly sophisticated jira sample workflows without needing to be Groovy scripting experts.

    JMWE excels at enforcing complex business rules directly within a workflow. For instance, you can prevent a story from moving to "In Progress" unless all its sub-tasks are assigned, or automatically copy specific field values from a parent Epic to newly created Stories. This granular control transforms a basic workflow into a precise, rule-driven process engine that reduces manual checks and enforces consistency across teams.

    JMWE – Jira Misc Workflow Extensions (Appfire)

    Strategic Breakdown and Actionable Insights

    The unique strength of JMWE is its "shared actions" feature, which allows you to configure a complex post-function once and reuse it across multiple workflows and projects. This is a game-changer for Jira administrators managing large, complex instances. It dramatically reduces configuration time, minimizes errors, and ensures that process logic remains consistent everywhere it's applied, from development to ITSM.

    Key Takeaway: Start by identifying your most common manual workflow step that is prone to human error, such as forgetting to update a field on a linked issue. Search JMWE's post-function library for a pre-built solution like "Copy field value to linked issues" to get an immediate, high-impact win.

    Features, Pros, and Cons

    Feature Description
    40+ Workflow Extensions A comprehensive library of post-functions, conditions, and validators to control transitions, update fields, and manage linked issues.
    No-Code/Low-Code Interface Most configurations are done via user-friendly menus, with optional Nunjucks or Groovy scripting for advanced, custom logic.
    Shared Actions Create a post-function, validator, or condition once and reuse it across unlimited workflows, ensuring consistency and saving setup time.
    Cloud Fortified & Enterprise An enterprise-grade app with a strong focus on performance, reliability, and security, backed by Appfire's extensive support.

    Pros:

    • Faster Than Scripting: Significantly accelerates the implementation of complex rules compared to writing custom scripts from scratch.
    • Strong Vendor Reputation: Backed by Appfire, a leading Atlassian Marketplace partner known for quality support and documentation.
    • Reduces Process Errors: Enforces business logic automatically, ensuring data integrity and process compliance.

    Cons:

    • Requires Marketplace App: As a paid app, it adds to the total cost of ownership for your Jira instance, with pricing based on user tier.
    • Learning Curve for Advanced Features: While the basics are simple, tapping into the advanced templating and scripting options requires some learning.

    How to Access

    JMWE is available on the Atlassian Marketplace for Jira Cloud and Data Center. You can install it directly from your Jira instance by navigating to Apps > Find new apps and searching for "Jira Misc Workflow Extensions." Appfire offers a free 30-day trial, allowing teams to fully test its capabilities and build out a proof-of-concept workflow before committing.

    Website: JMWE – Jira Misc Workflow Extensions

    6. JSU Automation Suite for Jira Workflows (Appfire)

    For Jira administrators who need to enforce process rules during a transition, the JSU Automation Suite for Jira Workflows by Appfire is a crucial tool. While native Jira automation excels at post-transition actions, JSU specializes in validators and conditions-the real-time checks that prevent issues from moving forward incorrectly. It offers a no-code rule builder focused specifically on these workflow "gatekeepers," making it exceptionally powerful for turning conceptual jira sample workflows into rigidly enforced processes.

    This Marketplace app allows you to build sophisticated logic without writing a single line of code. Instead of scripting, you use a drag-and-drop interface to set conditions like "the 'Resolution' field must be set" or validators that "prevent the transition if sub-tasks are still open." This focus on in-flight transition control makes it a go-to for teams needing to ensure data integrity and process compliance at every step.

    JSU Automation Suite for Jira Workflows (Appfire)

    Strategic Breakdown and Actionable Insights

    JSU's real power lies in its ability to create "quick wins" for complex workflow requirements. Its starter-friendly hints and clear rule overviews demystify the process of adding robust checks. Non-technical project managers can easily implement rules that would otherwise require a developer's time with a tool like ScriptRunner. This accessibility empowers teams to rapidly iterate on and improve their workflows by adding immediate, practical guardrails.

    Key Takeaway: Use JSU to build your workflow's "quality gates." Start by identifying the most common reason a transition fails or an issue is sent back (e.g., missing information, linked issues not closed). Implement a JSU validator for that specific condition to proactively prevent the problem, improving flow efficiency instantly.

    Features, Pros, and Cons

    Feature Description
    No-Code Rule Builder A user-friendly, drag-and-drop interface for creating complex workflow conditions, validators, and post-functions without any scripting.
    Starter-Friendly Guidance The UI includes helpful hints and at-a-glance summaries of each rule, making it easy for non-developers to understand and build automation.
    Transition Control Specializes in real-time checks that block or allow transitions based on issue data, linked issues, user roles, and more.
    Appfire Ecosystem Integration Works seamlessly with other popular Appfire apps like JMWE (Jira Misc Workflow Extensions), allowing you to combine features for more powerful results.

    Pros:

    • Rapid Implementation: Ideal for non-coders to quickly add powerful, mandatory checks to workflow transitions.
    • Process Compliance: Excellent for enforcing business rules and ensuring data is complete before an issue can change status.
    • Established & Secure: A long-standing, trusted app on the Marketplace with a Cloud Fortified status, indicating high security and reliability.

    Cons:

    • Limited Scope: Primarily focused on workflow functions (conditions, validators, post-functions) and is not a general-purpose automation engine like native automation.
    • User-Based Pricing: The cost scales with your number of Jira users, which can become a significant annual expense for large teams.

    How to Access

    JSU Automation Suite is available on the Atlassian Marketplace for Jira Cloud and Data Center. You can install it directly from your Jira instance by navigating to Apps > Find new apps and searching for "JSU." Appfire offers a free 30-day trial to allow teams to test its capabilities and see how it can harden their existing processes.

    Website: JSU Automation Suite for Jira Workflows

    7. Jira Strategy Admin Workbook (Strategy for Jira)

    For teams and Jira administrators who prefer a guided, strategic approach over just browsing templates, the Jira Strategy Admin Workbook offers a unique, practitioner-written resource. Instead of being a software platform, it's a comprehensive workbook filled with checklists, worksheets, and real-world examples designed to help you design or clean up your processes before you even start building in Jira. This "design first" methodology is crucial for creating effective and scalable jira sample workflows.

    The workbook provides tangible assets like sample wording and templates that help teams standardize definitions for things like "Definition of Done" or approval gates. It addresses the common pitfalls admins face, such as overly complex statuses or poorly defined transitions, by providing a structured framework for making those critical design decisions upfront. It's a paid resource, available in digital, print, and Kindle formats, used by admins to establish best practices from the ground up.

    Jira Strategy Admin Workbook (Strategy for Jira)

    Strategic Breakdown and Actionable Insights

    What sets this workbook apart is its focus on the "why" behind workflow design, not just the "how." It forces teams to have important conversations about their process and document their standards, which is a step many skip when jumping directly into Jira's workflow editor. Using the worksheets to align on requirements before implementation drastically reduces the need for costly and disruptive workflow changes later.

    Key Takeaway: Use the "Workflow Design Checklist" section of the workbook with key stakeholders before you build anything. This exercise ensures everyone agrees on the states, transitions, and conditions, preventing common scope creep and rework after the workflow is live.

    Features, Pros, and Cons

    Feature Description
    50+ Worksheets & Templates A collection of practical worksheets, sample configurations, and checklists to guide every step of the design and cleanup process.
    Best-Practice Guidance Provides real-world examples of successful workflow patterns and highlights common anti-patterns to avoid.
    Multiple Formats Available as a digital PDF, a physical printed workbook, or a Kindle e-book to suit different preferences and work styles.
    Process Standardization Includes templates for defining key process elements like Definition of Ready/Done, issue types, and approval criteria for teams to use.

    Pros:

    • Actionable, Experience-Driven: The guidance comes from years of hands-on Jira administration, complementing official Atlassian documentation with practical advice.
    • Promotes Team Alignment: Helps facilitate discussions to get teams to agree on standards (DoR/DoD, approvals) and workflow design choices.
    • Prevents Common Mistakes: Guides you away from common design pitfalls that lead to messy, hard-to-maintain Jira instances.

    Cons:

    • Not a Plugin: It is a manual resource; you must still implement the designed workflows yourself in Jira or with marketplace apps.
    • Requires Self-Discipline: Its value depends on your team's commitment to completing the exercises before building.

    How to Access

    The workbook can be purchased and downloaded directly from the Jira Strategy website. As a planning tool, it's an excellent precursor to the technical steps involved in configuration. After designing your process with the workbook, you can learn more about the practical steps of changing a workflow in Jira to put your plan into action.

    Website: Jira Strategy Admin Workbook (Digital)

    7-Tool Jira Workflow Comparison

    Solution Implementation Complexity 🔄 Resource Requirements ⚡ Expected Outcomes 📊 Ideal Use Cases 💡 Key Advantages ⭐
    Harmonize Pro — Nesty Medium–High 🔄: Jira setup + complex trigger logic; admin learning curve. Jira instance, app license/support, admin time, artifact storage/integrations. ⚡ Automates handoffs, enforces DoR/DoD, reduces rework; full sequencing & audit trails. 📊 Dev→QA handoffs, multi‑env deployments, structured customer onboarding. 💡 Unlimited nested checklists, smart triggers, automatic routing/attachments. ⭐⭐⭐⭐
    Atlassian Jira Automation Template Library Low 🔄: apply templates or preview in sandbox. Native Jira Cloud (no extra app); may need paid tier for heavy execution. ⚡ Fast adoption of common rules; broad coverage for standard processes. 📊 Prototyping automations, common software/business/ITSM flows. 💡 Large searchable gallery, sandbox preview, native integrations. ⭐⭐⭐
    Atlassian Jira Workflow Templates & Guides Very Low 🔄: ready-to-use templates and step‑by‑step guides. Free resources; Jira admin time to apply and customize. ⚡ Quick setup of standard Scrum/Kanban/bug workflows; limited depth. 📊 New teams, basic projects, administrators establishing standards. 💡 Official, free templates and admin-focused best practices. ⭐⭐
    ScriptRunner for Jira (Adaptavist) High 🔄: code-first scripting with steep learning curve. Scripting expertise, Marketplace license, substantial admin/dev time. ⚡ Enables advanced conditional logic, cross‑project orchestration, custom policies. 📊 Enterprise workflows, complex approvals, bespoke automations. 💡 Maximum flexibility and programmability for complex needs. ⭐⭐⭐⭐
    JMWE – Jira Misc Workflow Extensions (Appfire) Low–Medium 🔄: mostly no-code with low‑code options. Jira + app license; moderate admin configuration effort. ⚡ Rapid implementation of many workflow patterns without full scripting. 📊 Teams needing reusable post‑functions, validators, and gating logic. 💡 Large library of extensions; faster adoption than full scripting. ⭐⭐⭐⭐
    JSU Automation Suite for Jira Workflows (Appfire) Low 🔄: drag‑and‑drop/no‑code rule builder. Jira + app license; minimal admin effort for starters. ⚡ Quick wins for common transition rules and validators. 📊 Non‑coders templating common transitions and post‑functions. 💡 Visual rule builder, starter hints, integrates with JMWE. ⭐⭐⭐
    Jira Strategy Admin Workbook (Strategy for Jira) Low 🔄: workbook consumption is simple; implementation is manual. One‑time purchase; admin time to implement templates in Jira/apps. ⚡ Better workflow design and standards; no built‑in automation. 📊 Admins designing processes, standardizing DoR/DoD and checklists. 💡 Actionable templates, worksheets, and real‑world guidance. ⭐⭐

    Turn Your Jira From a To-Do List Into a Strategic Asset

    We've explored a powerful collection of tools and Jira sample workflows, moving beyond basic ticket tracking to demonstrate how a well-configured Jira instance can become a central nervous system for your development lifecycle. The examples provided, from intricate Dev→QA handoffs to structured bug triage and release management, are more than just templates. They are strategic blueprints designed to embed quality, automate communication, and create predictable, efficient processes.

    The core takeaway is that a workflow is not just a sequence of statuses. It is the living embodiment of your team's operational philosophy. By thoughtfully designing transitions, implementing quality gates with checklists, and leveraging automation, you transform Jira from a passive repository of tasks into an active participant in your team's success. It becomes a system that enforces best practices, prevents errors before they happen, and frees up your team to focus on high-value work instead of manual coordination.

    Key Insights for Action

    The journey from a cluttered Jira to a streamlined strategic asset begins with a clear understanding of your goals. Don't start by copying a workflow; start by identifying the specific friction point you want to solve.

    • Goal-First, Workflow-Second: Is your primary challenge slow handoffs? Inconsistent bug reports? Lack of visibility into release readiness? Define the problem, then design the workflow as the solution. The "Feature Development Lifecycle" workflow, for instance, is built to solve the problem of cross-functional alignment from ideation to launch.
    • Automation is Non-Negotiable: Manual updates and status changes are a primary source of inaccurate data and wasted time. Every workflow we discussed leans heavily on automation, whether through Jira's native capabilities or powerful apps. Automate ticket creation, transition issues based on pull request status, and notify stakeholders automatically. This isn't a luxury; it's essential for a reliable system.
    • Embrace Iterative Improvement: Your first workflow design will not be your last. Treat your Jira configuration like any other software product. Gather feedback from your teams, monitor for bottlenecks (e.g., tickets stagnating in a particular status), and refine your processes quarterly. A workflow is a living document, not a static rule set.

    Making the Right Tooling Choices

    Selecting the right tool depends entirely on your team's current maturity and future ambition.

    • For immediate, low-code impact: Start with Jira's native Automation Template Library. It's the perfect entry point for standardizing simple, repetitive tasks without a steep learning curve.
    • For deep customization and scripting: When your logic becomes too complex for simple rule builders, ScriptRunner for Jira is the undisputed power tool. It’s ideal for teams with Groovy scripting capabilities who need to perform complex calculations or integrate with external systems.
    • For enhanced workflow functionality without code: Tools like JMWE and JSU from Appfire fill the crucial gap between native automation and full-blown scripting. They offer pre-built post-functions, conditions, and validators that solve common yet complex workflow challenges declaratively.

    Building and managing these sophisticated systems requires a unique blend of technical knowledge and process-oriented thinking. For teams aiming to transform Jira into a strategic asset, continuous learning to master project management skills is crucial for understanding the principles behind effective workflow design. Ultimately, the best tool is the one that empowers your team to codify its ideal process with the least amount of friction.

    By moving beyond generic, out-of-the-box settings and implementing targeted, automated Jira sample workflows, you are not just managing tasks. You are architecting a system for predictable delivery, higher quality, and improved team collaboration.


    Ready to implement complex, cross-project workflows without the custom scripting overhead? Harmonize Pro offers Nesty, a powerful solution for orchestrating multi-step, dependent processes directly within Jira. Stop wrestling with complicated workarounds and see how Harmonize Pro can help you build truly strategic workflows today.

  • How to Create a Filter in Jira From Basic Search to JQL

    How to Create a Filter in Jira From Basic Search to JQL

    Creating a filter in Jira is often one of the first "aha!" moments for new users. It's the point where you go from just tracking tasks to actively managing your workflow. Thankfully, you don't need to be a query wizard to get started.

    Create Your First Jira Filter in Minutes

    The quickest way to get started is with Jira's Basic Search. Think of it as a set of simple, dropdown-driven controls that let you instantly slice and dice your issues without writing a single line of code. It’s intuitive, powerful, and the perfect entry point.

    Sketch of Jira basic search showing project, issue type, and status filters, with an option to save a filter.

    This isn't just a niche feature; it's fundamental to how experienced teams use Jira. According to 2025 statistics from Atlassian's community forums, over 85% of Atlassian Cloud users create at least one custom filter in their first month. It’s a clear indicator of how essential this skill is for getting real value out of the platform.

    Getting Started with Basic Search

    Let’s build a filter for a common scenario: you need a clean view of all open tasks currently assigned to you in a specific project.

    Here are the exact steps to build that view:

    • First, navigate to Filters in the top navigation bar and select View all issues.
    • Ensure you are in "Basic" search mode. If the interface shows "JQL," click the link to switch it back.
    • Now, use the dropdown menus to define your search:
      • Project: Set this to your current project (e.g., "Apollo Project").
      • Assignee: Choose "Current User." This makes the filter dynamic—it will always show tasks assigned to whoever is viewing it.
      • Status: Select both "To Do" and "In Progress."

    The issue list below updates instantly as you select these options. To save this view, click the Save as button at the top. Give it a clear name like "My Open Apollo Tasks." This makes it easy to find and reuse later.

    Why Your First Filter Matters

    That simple search you just saved is far more than a bookmark. It’s a reusable building block that transforms Jira into a personalized, high-signal workspace.

    Key Takeaway: A saved filter isn't just a search; it's a dynamic, reusable view of your work that can power dashboards, boards, and automated reports.

    For instance, you can immediately use the "My Open Apollo Tasks" filter to:

    • Power a gadget on your personal dashboard for an at-a-glance view of your workload.
    • Define quick filters on a Kanban board to easily toggle this view on and off.
    • Set up a daily email subscription that sends you a summary of your tasks.

    Mastering Basic Search is your first step toward making Jira work for you, turning it from a simple data repository into an active project management partner.

    Jira Basic Search vs JQL Search at a Glance

    As you get more comfortable, you'll need to decide when to use Basic Search versus its more powerful sibling, JQL. The choice depends entirely on the complexity of your question.

    This table gives you an actionable breakdown:

    Feature Basic Search JQL (Jira Query Language)
    Use Case Ideal for quick, straightforward searches based on common fields like project, status, and assignee. Necessary for complex, multi-layered queries involving date ranges, issue history, or custom fields.
    Complexity Beginner-friendly, with no coding required. Uses intuitive dropdown menus and text boxes. Requires learning a specific syntax of fields, operators, and values. Has a steeper learning curve.
    Capabilities Limited to the fields and options presented in the UI. Cannot perform historical or relative date searches. Offers complete control, allowing you to search for virtually any data point within Jira.

    For most day-to-day needs, Basic Search is more than enough. But when you need to ask very specific questions—like "show me all bugs created in the last 7 days that haven't been updated"—JQL is the tool you'll need.

    Unlocking Advanced Control with JQL

    While Basic Search is great for getting started, you'll eventually need to ask questions that are too complex for a dropdown menu. That’s your cue to dive into Jira Query Language (JQL). Think of it as switching from a point-and-shoot camera to a DSLR—you gain full control to frame the exact shot you need.

    With JQL, you move from picking options to writing precise commands. This lets you build a filter for literally any scenario you can dream up.

    JQL query example demonstrating fields, operators, and values, with a magnifying glass highlighting part.

    Its role in modern project management is huge. Projections show that by 2026, Jira filters will be the backbone of 70% of all dashboards in active production environments. We're also seeing filter creation skyrocket, expected to hit 2.5 million new filters each year across Atlassian's global base of over 250,000 organizations. If you're interested in the data behind these trends, you can discover more insights about Jira usage at scale in this deep-dive presentation.

    Understanding the JQL Building Blocks

    Every JQL query, no matter how complex, is made of just three parts. Master these, and writing your own queries will become second nature.

    • Fields: These are the data points on a Jira issue—think assignee, status, project, or priority. Don't forget this includes any custom fields your Jira admin has set up!
    • Operators: These are the connecting words of your query, like = (equals), != (does not equal), IN (matches one of many), and < (less than).
    • Values: This is the specific data you're looking for. It could be a username, a status like "In Review," a project key ("AP"), or a date.

    Putting it all together is simple. The basic search we created earlier would look like this in JQL: project = "Apollo Project" AND status = "To Do". It's a logical sentence that Jira can understand.

    Creating Practical JQL Filters

    The real power of JQL comes alive when you build queries that the basic search just can't handle. Let's walk through a couple of real-world examples that solve common headaches.

    Example 1: Find High-Priority Bugs Created Recently

    As a QA lead, you need a list of all critical bugs logged in the last two weeks for a specific project. Use this JQL:

    project = "Apollo Project" AND issuetype = Bug AND priority = Highest AND created >= -14d

    This query instantly pulls a targeted list of the most urgent issues needing attention. The created >= -14d part uses a relative date, something the basic search simply can’t do.

    Example 2: Identify Blocked Tasks for Your Team

    As a team lead, you need to know what's stuck. This JQL query will show you every task assigned to your team that’s currently marked as "Blocked."

    assignee IN membersOf("apollo-dev-team") AND status = "Blocked"

    The key here is the membersOf() function. Instead of manually listing every person on your team, you can reference the Jira group. This is more efficient and automatically stays up-to-date as the team changes.

    Pro Tip: Use dynamic functions like currentUser() and openSprints() to build powerful, reusable filters. A query like assignee = currentUser() AND sprint IN openSprints() is invaluable—it shows whoever is viewing it their own work in any currently active sprint.

    By mastering these simple JQL structures, you'll go from just finding information to extracting real, actionable intelligence from your Jira projects.

    Managing and Sharing Your Jira Filters

    So, you’ve built the perfect JQL query. That's a great start, but it’s only half the job. A filter’s real power isn’t just in finding issues—it’s in making that information easy to find, understand, and act on for both you and your team.

    If you don't manage them properly, your Jira instance can quickly turn into a digital junkyard of confusing, outdated, or duplicate filters. It creates more noise than signal. This is exactly why getting your saving and sharing habits right from the beginning is so important. A well-named, correctly permissioned filter goes from being a personal search to a valuable team asset.

    Think about the difference between a private filter like ‘My Overdue Tasks’ and a shared one like ‘Team’s Current Sprint Backlog.’ One is for your own accountability, while the other gives the entire team the visibility it needs to stay on track. This private vs. public distinction is fundamental.

    Since 2020, the use of Jira filters has exploded. Today, 95% of agile teams rely on them daily. In fact, enterprise audits in 2025 showed that users create over 1.2 filters per user every month. A typical workflow might be creating a query like assignee = currentUser() AND duedate < now(), saving it privately, and then sharing a broader one like status = Open with the entire organization. You can dig into more of these usage stats over on Atlassian's community forums.

    Setting Up Clear Naming Conventions

    Before you hit "Save," stop and think about the name. "Bug Filter" isn't going to cut it a week from now. A truly useful name should immediately answer three questions: What does this show? Who is it for? And is there a specific context?

    Adopt a simple but effective naming convention like this:

    • Team-Context-Content: [Marketing] - Q3 Campaign - Blocked Tasks
    • Purpose-User-Scope: [Report] - My Open Bugs - All Projects
    • Project-View-Status: [Apollo] - Dev Team View - Ready for QA

    A consistent structure makes your filters instantly searchable and easy to understand. It stops teammates from creating redundant queries and is a cornerstone of using Jira effectively at scale.

    Mastering Filter Permissions

    After you save a filter, Jira will ask you to set permissions for who can view and edit it. Don't just click through this step—it’s critical for controlling who sees what.

    Key Insight: Filter permissions are not just about security. They're about reducing clutter and making sure the right people see the right information. Over-sharing creates a mess and buries the filters that actually matter.

    Here’s an actionable guide to picking the right permission level:

    • Private: This is the default. Use it for your personal to-do lists, one-off queries, or any filters you're still testing.
    • Group: Share a filter with a specific set of people, like apollo-dev-team or qa-engineers. This is the best choice for team-specific boards and dashboards.
    • Project: Make the filter visible to everyone with access to a specific project. It’s great for cross-functional views, like a release readiness checklist involving multiple teams.
    • Organization: Share the filter with every logged-in user in your Jira instance. Use this sparingly for globally relevant information, like a filter for ‘All Open Production Incidents.’

    Getting permissions right is a huge part of good team alignment. When information flows to the right people at the right time, you’ll see a massive improvement in team collaboration and a lot less back-and-forth communication.

    Putting Filters to Work on Boards and Dashboards

    This is where you turn saved queries into the living core of your team’s daily workflow. A well-crafted filter is the engine that drives visibility, transforming raw data into real insights on the tools you use every single day—your boards and dashboards.

    Without this step, a filter is just a saved search sitting in a list. By connecting it to a board or a dashboard gadget, you give it purpose and turn it into a command center for your team.

    Powering Jira Boards with Custom Filters

    Every Agile board in Jira, whether Scrum or Kanban, runs on a saved filter. That filter dictates exactly which issues show up. Many teams overlook this, sticking with the default "show me everything in the project" filter and missing out on a powerful feature.

    By creating specific filters for your boards, you can build highly specialized views that solve frustrating team bottlenecks.

    Here are two actionable ideas you can implement today:

    • A Bug Triage Board: Create a filter issuetype = Bug AND status = "Awaiting Triage". Hook this up to a new Kanban board to give your QA and product teams a dedicated space to prioritize incoming bugs, separate from the noise of other development work.
    • A Release Readiness Board: Build a filter like fixVersion = "Q4-Release" AND status not in (Closed, Done). This gives stakeholders one clean, clear view of exactly how close you are to hitting your release milestone.

    To change a board's filter, navigate to your board, click the three dots () in the top-right corner, and choose Board settings. From there, go to the General tab to edit the Filter that powers the entire board.

    Visualizing Data on Dashboards

    If boards are where the work gets done, dashboards are your project's mission control. And filters are what feed mission control with real-time data.

    One of the most valuable gadgets you can add to any dashboard is the Filter Results gadget. It displays the live results of any saved filter you choose, giving you an immediate summary of what's most important.

    For example, add a gadget to your team's main dashboard powered by a filter for "Stories Awaiting QA Handoff." Suddenly, everyone on the team can see the QA queue at a glance. This simple action smooths out handoffs and stops work from sitting idle.

    Key Takeaway: Using filters on dashboards moves you from reactive project checking to proactive project monitoring. You start spotting potential problems as they develop, not after they've already caused a delay.

    Dashboards aren't just for you; they're for communicating status without calling another meeting. By visualizing your filter data, you can create powerful, automated summaries that keep everyone in the loop. If you want to take this a step further and turn this data into polished summaries for stakeholders, check out our guide on how to create a report in Jira. It’s the perfect next step for getting even more value out of your filters.

    Automating Workflows with Jira Filters

    Saved filters are much more than just shortcuts to your data. They're the secret sauce for kicking off powerful automated workflows, saving your team from countless hours of mind-numbing manual tasks. By plugging your filters into Jira’s automation engine, you can stop creating static reports and start building dynamic, self-managing processes.

    This flowchart shows how a single JQL filter can become the backbone for both visibility and automation across Jira.

    A flowchart outlining the Jira filter usage process from JQL Filter to Board and Dashboard.

    As you can see, a focused JQL query feeds into a saved filter, which in turn powers the boards and dashboards your team relies on for daily work and high-level reporting. It all starts with the filter.

    Start Simple with Email Subscriptions

    One of the easiest wins in Jira automation is subscribing to a filter. A subscription is just a scheduled email that sends the results of your saved filter to you or a group. It's a fantastic way to keep stakeholders in the loop without them ever having to log into Jira.

    For instance, create a filter for all high-priority bugs and set it to automatically email a summary to your project manager every morning at 8 AM.

    Here’s how to set it up:

    1. Navigate to your saved filter from the Filters menu.
    2. Click the Details button at the top of the page.
    3. Select + New subscription.
    4. Define the recipients (yourself, a group, a specific user) and the schedule (daily, weekly, etc.).

    This simple action transforms a passive report into a proactive notification, ensuring critical info lands directly in the right inboxes.

    Triggering Advanced Automations

    Beyond simple email pings, saved filters can be the key condition for sophisticated automation rules. This is where you can truly bend Jira to your will, automating handoffs, status updates, and notifications.

    Key Insight: When a filter is used as an automation trigger, you're not just finding issues—you're telling Jira to do something the moment an issue matches that criteria. This is the heart of a proactive, event-driven workflow.

    Let's automate a common Dev-to-QA handoff. Create a filter named "Ready for QA" with a JQL query like this: status = "In Review" AND "Dev Complete[Checkbox]" = Checked.

    From there, build an automation rule that runs on a schedule—say, every 15 minutes—and checks for any issues matching your "Ready for QA" filter. When it finds a match, it can automatically:

    • Transition the status from "In Review" to "In QA."
    • Reassign the issue from the developer to the QA lead.
    • Post a notification in your team's Slack channel.

    Just like that, the tedious manual handoff process is gone. It's completely automated, which cuts down on delays and ensures nothing ever falls through the cracks. This is just one example of building a smarter process, and you can dive much deeper into setting up these kinds of intelligent systems in our complete guide to Jira workflow automation.

    And if you're looking to push Jira's capabilities even further with external tools, you might want to explore Zapier alternatives for AI automation to connect Jira to the rest of your tech stack.

    Got Questions? Common Jira Filter Hurdles Solved

    Even as you get comfortable with creating filters, a few common questions tend to pop up. Think of this as a quick troubleshooting guide for those little roadblocks that can get in the way of your workflow.

    What’s the Real Difference Between a Filter and a Queue?

    This is probably one of the most common points of confusion, especially if you spend time in Jira Service Management projects. They both show you a list of issues, so what gives?

    Here’s the breakdown:

    • A filter is your all-purpose, go-anywhere search. It’s a saved JQL or Basic search that you can plug into dashboards, boards, reports, and email subscriptions. It’s the foundational tool for finding and grouping issues across all of Jira.
    • A queue is a specialized tool built specifically for Jira Service Management. It helps service teams triage and manage incoming requests, often with a focus on SLAs. While queues are built using JQL, they live exclusively within the service project.

    The easiest way to think about it is this: every queue is powered by a filter, but not every filter is a queue. A queue is just a specific application of a filter designed for a service desk.

    "My JQL Query Is Perfect, So Why Is It Showing Zero Results?"

    We've all been there. You craft what feels like the perfect JQL query, hit enter with confidence, and… nothing. Zero issues found. It’s maddening, but the fix is usually simpler than you think.

    When your query comes up empty, run through this mental checklist.

    First, hunt for syntax errors. A tiny typo, like a missing quote or spelling assignee with one 's', can break everything. Jira's JQL editor is pretty good at flagging these with red squiggly lines, so pay attention to its hints.

    Next, double-check your field values. Are you searching for status = "Done" when your workflow actually calls that status "Closed"? JQL needs an exact match. This is also a classic trip-up with usernames or component names; they have to be perfect.

    My Go-To Debugging Trick: When a complex query fails, I strip it down to its simplest part (like project = "PROJ"). If that works, I add back one condition at a time. The moment the results vanish, I've found the part of the query that's causing the problem.

    Finally, don't forget about permissions. You can't find what you can't see. If your JQL is flawless and you know the issues exist, the problem might not be your query at all—it could be that you don't have the necessary project permissions to view those specific issues.


    Ready to push your filters beyond just viewing issues? Harmonize Pro builds Nesty, an app that lets you use saved filters to trigger powerful, self-managing workflows directly inside a single Jira issue. Imagine turning a "Ready for QA" filter into an automated process that assigns checklists, notifies the right people, and enforces quality gates without any manual effort. See how you can build smarter, faster processes and keep your team perfectly in sync by exploring Nesty.

  • A Practical Guide to Release Management With Jira

    A Practical Guide to Release Management With Jira

    To master release management in Jira, you need to think beyond tracking tasks. The goal is to transform Jira into a command center for your entire deployment pipeline, creating a single source of truth that governs planning, execution, and monitoring.

    This guide will show you how to move past Jira’s native 'versions' feature and build a repeatable framework that reflects how your team actually delivers software.

    Moving Beyond Basic Jira Release Tracking

    Jira is excellent for managing individual issues. But for orchestrating a full software release, its out-of-the-box features can be limiting.

    Too many teams juggle spreadsheets, chase manual updates in Slack, and sit through marathon status meetings just to understand a release's status. This scattered approach leads to missed deadlines, miscommunications, and last-minute scrambles.

    This guide provides an actionable blueprint to cut through that chaos. We will walk through how to build a structured, centralized system using a single, dynamic Jira ticket as the command center for an entire release. This approach gives everyone one clear place to look from planning all the way through to production.

    The Problem with Native Jira Versioning

    Relying solely on Jira’s native features for large-scale releases often leads to major delays. Teams who stick to the built-in versioning can see their release dates slip in up to 70% of their cycles. Why? Because scope is often just a manual count of issues, completely ignoring cross-project dependencies and the varying complexity of the work.

    This limited view can inflate coordination overhead by 40-50% as release managers are forced to hunt down updates project by project. As IKU Team’s detailed release management analysis points out, this operational drag is precisely why a more structured approach is so critical.

    Actionable Insight: Treat your release as more than a collection of 'done' tickets. It's a carefully coordinated sequence of deployments, quality checks, and approvals. The first step toward a predictable pipeline is to model this sequence directly inside a single Jira ticket.

    Why a Centralized Release Ticket Works

    Shifting your process to revolve around a single "release ticket" immediately solves the problems that basic version tracking creates.

    Here’s the actionable value you gain:

    • A True Single Source of Truth: All critical information—checklists, dependencies, approvals, deployment logs—lives in one place. Stop digging through different projects or Confluence spaces.
    • Clear Visibility for Everyone: Any stakeholder, from an engineer to an executive, can open one ticket and instantly understand the release status, see what's blocking progress, and know what’s coming next.
    • Built-in Process Compliance: By building your workflow directly into the ticket with checklists and automated gates, you ensure steps aren't skipped. The process itself becomes the guide.
    • Effortless Auditability: The ticket's history automatically becomes a complete, time-stamped log of the entire release, making post-mortems and compliance reviews simple.

    For a deeper look at the foundational concepts behind this, you can explore resources on comprehensive release management. This strategy isn't about replacing Jira, but about elevating it to handle the multi-stage reality of modern software delivery.

    Designing Your Repeatable Release Workflow in Jira

    A solid release process isn’t about more meetings or more spreadsheets. It’s about building a clear, repeatable workflow that everyone understands and follows, right inside the tools you already use every day. The goal is to replace chaotic, last-minute scrambles with a predictable system within Jira.

    The most effective way to achieve this is to map your entire deployment pipeline—from code commit to production push—inside a single, centralized Jira ticket. This ticket evolves from a simple tracker into a living, self-managing vehicle for the entire release.

    You’ve probably seen the progression yourself. Teams start with scattered spreadsheets and endless status meetings, eventually realizing they need a single source of truth. That’s where the central ticket comes in.

    Diagram illustrating three common release management pain points: spreadsheets, meetings, and central tickets.

    This journey from manual chaos to streamlined control is where the magic happens. A single, well-structured ticket replaces all those fragmented communication channels and becomes the undisputed hub for everything related to the release.

    Structuring Your Release with Phases

    First, break down your release into logical, sequential phases. Instead of a giant, overwhelming task list, create distinct stages that mirror your actual deployment environments. This structure brings immediate clarity, letting anyone see exactly where things stand at a glance.

    For a typical multi-environment deployment, structure the phases as main checklist items in your central Jira ticket:

    • Phase 1: Pre-Deployment Readiness
    • Phase 2: Dev Environment Deployment
    • Phase 3: QA Environment Testing
    • Phase 4: Staging Environment Validation
    • Phase 5: Production Rollout & Post-Launch Monitoring

    This phased approach does more than just organize tasks; it turns a static ticket into an active command center. Everyone involved knows their responsibilities and, just as importantly, how their work connects to the bigger picture.

    Using Nested Checklists for Granular Tasks

    Each high-level phase consists of many smaller, specific actions. This is where nested checklists become your most practical tool. They let you add granular detail under each phase without cluttering the main ticket.

    Let’s take Phase 3: QA Environment Testing as an example. The nested checklist should look like this:

    1. Run Automated Regression Suite
      • Confirm all smoke tests passed.
      • Attach test execution report.
    2. Perform Manual Exploratory Testing
      • Test new features against acceptance criteria.
      • Log any new bugs and link them here.
    3. Conduct Performance and Load Testing
      • Verify response times are within SLAs.
      • Document performance benchmarks.
    4. Obtain QA Sign-off
      • Get formal approval from the QA Lead.

    With this layered structure, every detail is captured and tracked. Nothing falls through the cracks, and the process is documented automatically as the team checks off items.

    Actionable Insight: Transform your process from a document people might read into a workflow they must follow. The ticket itself enforces the sequence of operations.

    Enforcing Definitions and Quality Gates

    A well-designed workflow doesn't just suggest a process—it enforces your standards. For every phase, build in your Definition of Ready (what you need to start the phase) and your Definition of Done (what you need to complete it).

    This becomes incredibly powerful when you use apps like Nesty to create blockers between tasks. For example, you can physically prevent the "Obtain QA Sign-off" task from being checked off until "Attach test execution report" is complete. These proactive quality gates are game-changers, stopping premature handoffs and ensuring quality is baked in at every step.

    To see the difference, let's compare the old way with this structured, automated approach.

    Manual vs Automated Jira Release Workflow

    This table breaks down the common frustrations of a manual release process against the actionable solutions a checklist-driven workflow provides.

    Phase Manual Process (Common Pain Points) Automated Workflow (Solution)
    Release Planning Handoffs are missed due to manual notifications in email or chat. Tasks fall through the cracks. Handoffs and stakeholder notifications are fully automated, triggered by checklist completion.
    Execution The Definition of Ready/Done lives in a separate Confluence page that no one reads. The DoR/DoD is built directly into the ticket as a required checklist. Nothing moves forward until it's done.
    Quality Gates Quality checks are reliant on manual verification, leading to human error and skipped steps. Key steps are blocked until dependencies (e.g., test reports) are completed and attached.
    Visibility It’s impossible to know the true status without attending a sync meeting or chasing people down. A single Jira ticket provides a real-time, at-a-glance view of the entire release progress.
    Compliance & Audits Proving process adherence is a painful, manual effort of digging through tickets and chat logs. The completed checklist serves as an automatic, immutable audit trail of the entire release.

    By moving to an automated workflow, you're not just making the process faster; you're making it more reliable, transparent, and auditable.

    Recent trends in Jira’s evolution highlight this shift toward app-powered scalability and process enforcement. While native Jira is great for tracking scope, its lack of cross-project visibility means 65% of teams are still manually checking progress across different projects. This is exactly where modern apps come in. Tools like Nesty use unlimited nested checklists to enforce these multi-environment gates, helping teams I’ve worked with achieve 95% audit compliance and 30% faster handoffs compared to a standard Jira setup.

    You can see how these advancements are reshaping release management by exploring these key insights on Jira's evolution. By building a structured, repeatable workflow, you’re transforming release management with Jira from a reactive tracking exercise into a proactive, predictable delivery engine.

    Building Automated Quality Gates and Handoffs

    Flowchart showing a software release process: Dev, Automation Trigger, QA, Slack ping, and a locked gate with a PR link.

    Manual handoffs are where release plans crack. A developer marks a task 'done,' but the notification gets buried in a noisy Slack channel, or the QA team never gets the memo. This communication friction causes delays, forcing leads to waste time chasing updates.

    This is where intelligent, automated handoffs and quality gates built right into your Jira workflow completely change the game. By setting up smart triggers, you can enforce your Definition of Ready and Definition of Done automatically. The system becomes the enforcer, creating a self-policing process that keeps your release on track.

    Automating the Handoff From Development to QA

    Let’s focus on the critical handoff from development to quality assurance. In a manual world, this step is a mess of comments and DMs. We can eliminate that ambiguity.

    Here's how to automate it: when a developer completes their 'Dev' checklist, a Nesty automation rule can trigger a chain reaction:

    • Reassign the Ticket: The Jira issue is instantly assigned to the correct QA lead or a shared QA user group. No more "Who's picking this up?"
    • Send a Targeted Notification: A message is sent to a specific Slack or Microsoft Teams channel (like #qa-team-alerts), tagging the new assignee with a direct link to the ticket.
    • Unlock the Next Phase: The 'QA Testing' checklist, previously locked and hidden, becomes visible and active for the QA team.

    This automated sequence creates a clean, immediate handoff. There's no guesswork or lag time. The process moves forward the moment prerequisite work is done.

    Enforcing Quality Gates With Blockers

    Automated handoffs become truly powerful when paired with quality gates—mandatory checkpoints that stop a task from moving forward until specific criteria are met. This is how you bake quality directly into your release management with Jira.

    For instance, configure a blocker that prevents the 'Dev Deployment' checklist from being completed until a pull request link is added to a custom field on the Jira ticket. If a developer tries to check the final box without the PR link, a message pops up telling them exactly what’s missing.

    Actionable Insight: Design your workflow to make it impossible to do things the wrong way. By automating quality gates, you shift the responsibility for process compliance from people to the system itself.

    This approach is perfect for enforcing prerequisites. You can block a handoff to QA until unit test results are attached, or prevent a staging deployment until security scan reports are uploaded, eliminating manual verification. To dial in the testing side of this, check out these strategies for managing test cases in Jira, which fit perfectly with these automated gates.

    The impact is huge. Swiss Re, coordinating releases for 12 interconnected applications, saw communication overhead consume over 50% of the release team’s time. By automating handoffs in Jira, they cut that overhead in half and saw 30% faster cycle times. You can get more details on how Jira transformed their release process.

    Real-World Examples of Automated Gates

    Here are practical quality gates you can build to bulletproof your release workflows:

    • Peer Review Approval: Block a ticket from moving to 'Ready for QA' until a 'Code Review' sub-task is marked 'Approved' by at least one other developer.
    • Documentation Check: Lock the 'Ready for Staging' phase until a link to the updated Confluence documentation is added to the main release ticket.
    • Product Owner Sign-off: Keep the final production deployment checklist locked until the Product Owner clicks a custom 'Approve for Release' button inside the Jira issue.

    By setting up these automated gates and handoffs, you’re not just tracking work—you’re building a robust, self-documenting, and compliant workflow. Your Jira ticket becomes the central orchestrator for your entire release, guaranteeing quality and consistency.

    Practical Automation Recipes for Your Release Process

    Theory is one thing; practical, reusable templates are another. Let's dig into concrete "recipes" you can implement directly in your Jira release process.

    Think of these as actionable blueprints for building a more reliable and speedy delivery pipeline.

    Recipe 1: The Multi-Environment Deployment

    This is the classic workflow for most software teams. This recipe ensures that progression through dev, staging, and production is smooth and compliant.

    Here’s how to structure this inside a release ticket:

    1. Phase 1: Development Deployment

      • Deploy the build to the development server.
      • Run initial smoke tests.
      • Gate: Block completion until the build number is entered in a custom field.
    2. Phase 2: Staging Deployment & QA

      • Deploy the build to the staging server.
      • Execute the full regression test suite.
      • Conduct user acceptance testing (UAT).
      • Gate: Block completion until the UAT sign-off document is attached.
    3. Phase 3: Production Rollout

      • Schedule the production deployment window.
      • Execute pre-flight checks.
      • Deploy to production.
      • Gate: Block completion until post-deployment monitoring is confirmed stable.

    The automation between phases is key. With an app like Nesty, completing the "Development Deployment" checklist can instantly reassign the ticket to the QA team, ping them in Slack, and unlock the "Staging Deployment & QA" checklist. This creates a seamless, auditable flow.

    Recipe 2: The Streamlined Hotfix Release

    When a critical bug appears in production, speed is essential. A hotfix process can't afford the lengthy checks of a standard release. This recipe provides an accelerated workflow for urgent patches.

    The key is a condensed process that prioritizes rapid validation and deployment while maintaining essential safeguards.

    • Step 1: Identify & Verify

      • Link the original production bug ticket.
      • Confirm you can reproduce the bug.
      • Get emergency approval from the Product Owner.
    • Step 2: Develop & Test

      • Create a dedicated hotfix branch.
      • Write a targeted regression test for this specific bug.
      • Gate: Block deployment until a senior developer approves the pull request.
    • Step 3: Deploy & Monitor

      • Deploy the fix directly to production.
      • Monitor system health and logs for 15 minutes.
      • Communicate the fix to stakeholders and support teams.

    A great hotfix process is a completely different workflow designed for a specific, high-stakes scenario. To make this work, lean on established CI/CD best practices. For a deeper dive, the guide on the Top 10 CI CD Pipeline Best Practices for 2025 is an excellent resource.

    Actionable Insight: Having a hotfix workflow pre-built in Jira turns a potential crisis into a calm, controlled procedure. No more panic, just execution.

    Automation at a Glance

    So, how do all these handoffs and gates actually work? Here are the most common and powerful automation triggers you can set up to make your release workflows self-managing.

    Automation Goal Trigger Condition (When This Happens…) Automated Action (…Do This)
    Handoff to QA All development tasks in a phase are complete. Reassign the release ticket to the QA lead and post a message in the #qa-team Slack channel.
    Enforce UAT Sign-off The "Deploy to Staging" checklist is complete. Transition the ticket to "Awaiting UAT" and lock the "Deploy to Production" checklist until a sign-off doc is attached.
    Notify Stakeholders The release ticket is transitioned to "Deployed." Send an automated email and a Teams message to the product and marketing teams announcing the new release.
    Create Post-Release Task The "Deploy to Production" checklist is complete. Automatically create a sub-task assigned to DevOps titled "Monitor Production Health for 1 Hour."
    Verify DoD A user tries to transition the ticket to "Done." A validation rule checks if all required fields (like build number and test results) are filled. If not, the transition is blocked.

    This table shows how simple "if-then" logic can eliminate missed steps, delays, and human error from your release cycle.

    Recipe 3: The Feature Flag Rollout

    Modern releases often use feature flags for phased rollouts, de-risking deployment by enabling functionality for a small slice of users first. Managing this in Jira requires a different kind of checklist.

    This recipe tracks the gradual exposure of a feature over time.

    Feature Rollout Plan

    Phase Key Tasks Target Audience
    Internal Testing Enable flag for the internal QA team and all company employees. 0% of Customers
    Beta Group Enable flag for a select group of beta testers. Monitor feedback channels. 5% of Customers
    Gradual Rollout Increase exposure to 25%, then 50% of the user base. Monitor performance metrics. 25%-50% of Customers
    Full Release Enable flag for all users. Plan for the removal of the old code path. 100% of Customers

    Each phase becomes its own checklist within the main Jira ticket. When the "Beta Group" phase is marked complete, an automation can create a follow-up task for the DevOps team to bump the feature flag to 25%. This keeps Jira perfectly synced with technical reality.

    These recipes are a starting point. The real power comes from adapting them to your team's specific needs. To learn more about building these kinds of intelligent workflows, explore advanced techniques for Jira workflow automation. This is how you turn Jira from a passive tracking system into an active, automated engine for delivery.

    Keeping an Eye on Release Health in Real-Time

    Automating handoffs and building quality gates is a huge step forward, but the next step is to use data to improve your process. You need clear, real-time visibility into release health—without spending hours manually compiling reports.

    This is where your centralized release ticket becomes the star. By running everything through a single, well-structured Jira issue, you create a command center perfect for both execution and analysis.

    A real-time release health dashboard showing a release ticket with cycle time, progress, and blockers.

    The Release Ticket as Your Single Source of Truth

    Once your workflow is running, the central ticket becomes a living dashboard. Anyone—from a product manager to an executive—can look at that one ticket and instantly get what they need:

    • Overall Progress: Which stage are we in? What percentage is done?
    • Active Blockers: Is anything stuck? Who owns the blocker?
    • Completed Milestones: What’s been finished and who signed off?
    • What's Next: What’s in the queue for each team?

    This transparency makes most status update meetings obsolete. The ticket is the update, available 24/7.

    Using Data to Proactively Improve

    A single source of truth isn't just for daily tracking; it’s for collecting data to improve the process. Every checklist item, handoff, and approval is timestamped and tracked in Jira. You are automatically collecting a goldmine of performance metrics.

    This structured data is exactly what Jira Dashboards were made for. You can set up gadgets to track key metrics across all releases, helping you shift from reacting to fires to proactively optimizing your flow.

    Actionable Insight: When your process lives inside Jira, your metrics are generated automatically. You stop guessing where your bottlenecks are and start seeing them clearly in the data.

    Key Metrics for Your Release Dashboard

    Start with a few metrics that give you a clear, high-level picture of your release pipeline’s health.

    Here are the essentials to track:

    • Cycle Time per Phase: How long does QA testing or staging validation take on average? A rising number is a red flag that a stage needs investigation.
    • Blocker Frequency: Which quality gates are triggered most often? If the "PR link missing" blocker appears constantly, it's a sign you need a pre-commit checklist or better team communication.
    • Handoff Lag Time: What’s the average delay between one phase ending and the next one starting? A long pause between ‘Dev Complete’ and ‘QA Started’ may point to a resource crunch.
    • Release Success Rate: What percentage of releases go live without needing a hotfix or rollback within 24 hours? This is the ultimate test of your process's quality.

    Monitoring these trends helps you spot recurring problems and fix the root cause. Visualizing this data makes patterns impossible to miss. To turn this raw data into actionable insights, learn how to create a report in Jira. This is how you close the loop, using visibility to drive continuous improvement.

    Common Questions About Managing Releases in Jira

    As you formalize your release process in Jira, you'll encounter a few tricky situations. Here’s how to handle common hurdles.

    How Can I Manage Cross-Project Dependencies in Jira?

    Dependencies are a major headache in release management. While Jira's native issue linking is available, it's static. You get a list of links with no real-time status, forcing release managers to chase updates.

    A better approach is to make your centralized release ticket the single source of truth. Create a dedicated checklist inside that ticket called "Cross-Project Dependencies" and link to the specific issues your release is waiting on.

    Actionable Insight: Pull dependency tracking directly into your main release ticket to turn a passive list into an active, automated quality gate. The release cannot move forward until every dependency is resolved.

    Using an app like Nesty, you can take this further. Set up automation that actively monitors the status of those linked issues. For example, create a blocker that prevents the 'Deployment to Staging' checklist from starting until every linked dependency ticket is marked 'Done.' This centralizes tracking and makes dependency management a proactive, hands-off part of your workflow.

    What's the Best Way to Handle Rollbacks?

    A good release plan must cover what to do when things go wrong. The key to handling rollbacks is to plan for them before you need one. Have a calm, procedural response ready instead of a last-minute scramble.

    Inside your main release ticket, include a dedicated—but initially dormant—checklist for your "Rollback Procedure." This should outline every step required to safely revert the deployment, from database restores to flipping feature flags off.

    You can use automation to keep this section locked until a failure is detected. For instance, if a "Production Validation" task fails, a trigger can automatically:

    • Unlock and assign the "Rollback Procedure" checklist to the DevOps team.
    • Send an urgent notification to key stakeholders in a dedicated Slack or Teams channel.
    • Change the main ticket's status to "Rollback in Progress" for full visibility.

    This provides a rapid, consistent, and documented response to failures, drastically reducing downtime and stress.

    Can This Jira Process Integrate With CI/CD Tools?

    Absolutely. A tight integration between your Jira workflow and your CI/CD pipeline is where the magic happens. The Jira release ticket manages the process—quality gates, handoffs, and approvals—while your CI/CD tool (like Jenkins, GitLab CI, or CircleCI) handles the technical execution of builds and deployments.

    The connection is typically handled through webhooks or API calls, creating a powerful two-way conversation.

    Here’s a common integration flow:

    1. Jira to CI/CD: When the "Deploy to Staging" task is approved in your Jira ticket, an automation sends a webhook to your CI/CD tool.
    2. CI/CD Executes: The webhook triggers the corresponding deployment job in Jenkins, which builds and ships the code to staging.
    3. CI/CD to Jira: Once Jenkins reports a successful deployment, it calls Jira's API to automatically check off the "Deployment Successful" task in your checklist.

    That final step in Jira can then trigger the next phase, like notifying the QA team that the new build is ready. This creates an automated loop between process management in Jira and technical execution in your CI/CD platform.


    Ready to stop chasing manual updates and build a predictable, automated release pipeline? Harmonize Pro's flagship app, Nesty, transforms Jira into a true command center for your releases. With unlimited nested checklists, intelligent triggers, and powerful quality gates, you can build the self-managing workflows described in this guide. Try Nesty today and bring clarity and control to your release management with Jira.

  • Agile Development Definition of Done: Clear Criteria for Fast Quality

    Agile Development Definition of Done: Clear Criteria for Fast Quality

    In agile development, a task is only truly complete when it meets a pre-agreed set of criteria that ensures it delivers real value. Think of it as a shared checklist the entire team signs off on. This simple agreement guarantees every finished item is genuinely shippable and up to standard, which gets rid of frustrating ambiguity and rework down the line.

    What Is a Definition of Done and Why It Matters

    Imagine a chef who considers a dish "done" the moment the ingredients are chopped—not after it's been cooked, seasoned, and beautifully plated. That’s exactly what happens in software development without a clear Definition of Done (DoD). It’s a recipe for chaos, misunderstandings, and features that are technically “complete” but practically useless.

    The DoD is the agile team's formal, shared agreement on what it means for a piece of work to be finished. Whether it's a user story, a small task, or an entire feature, it’s not just a vague feeling of completion. It's a concrete checklist of required activities and quality standards that everyone has bought into.

    The Ultimate Quality Gatekeeper

    Think of the DoD as a pilot's pre-flight checklist. Before taking off, pilots don't just "feel" that the plane is ready. They meticulously verify every single item on a list to ensure safety and success. In the same way, an agile team's DoD is a non-negotiable set of criteria that prevents half-finished work from ever moving forward. It’s the ultimate tool for finally solving the classic “it works on my machine” problem.

    A strong DoD serves a few critical functions:

    • It eliminates ambiguity. Everyone on the team—from developers and testers to the product owner—knows exactly what "done" looks like. No more guesswork.
    • It ensures consistency. By setting a uniform quality bar for all work, it prevents technical debt from piling up sprint after sprint.
    • It improves predictability. When the criteria for completion are crystal clear, teams can forecast their work more accurately and deliver on their commitments with much more confidence.

    This simple agreement becomes the bedrock of consistent quality and predictable delivery. That's why the Definition of Done is a cornerstone of effective Agile software development best practices—it turns an abstract idea of "quality" into an actionable, enforceable standard.

    A Definition of Done is not just a list; it is a pact of mutual understanding and commitment to quality. It’s the team’s promise to itself and its stakeholders that what they deliver is valuable, reliable, and truly complete.

    The impact of a formal DoD is huge. A 2023 State of Agile survey revealed that 71% of Agile teams using a formalized DoD reported a 25-30% reduction in defect rates post-release. On the flip side, unclear standards can cause up to 40% of sprint capacity to be lost to rework as items bounce back and forth between "done" and "in progress." You can learn more about how a clear DoD prevents this costly churn and improves team efficiency by reading the full findings from Atlassian.

    Core Benefits of a Strong Definition of Done

    Adopting a DoD isn't just about ticking boxes; it delivers immediate, tangible benefits that ripple across the entire team and product lifecycle. Here’s a quick breakdown of what you stand to gain.

    Benefit Impact on the Team and Product
    Increased Transparency Everyone has a clear, shared understanding of what it takes to get work to a releasable state.
    Reduced Rework Prevents "undone" work from slipping through, cutting down on bugs and tasks that get sent back.
    Improved Team Alignment Fosters collaboration between developers, QA, and product owners, as everyone works toward the same goal.
    Higher Product Quality Ensures that quality checks, like code reviews and testing, are built into the development process, not tacked on at the end.
    More Accurate Forecasting With a stable definition of "done," teams can make more reliable estimates and sprint commitments.

    Ultimately, a strong DoD builds trust. It gives the team confidence in their work and gives stakeholders confidence that the team is delivering a high-quality, valuable productincrement.

    DoD vs. DoR vs. Acceptance Criteria Explained

    In the world of agile development, it’s easy to get tangled up in the terminology. Three terms in particular—Definition of Done (DoD), Definition of Ready (DoR), and Acceptance Criteria (AC)—often get mixed up, leading to confusion and slowing everyone down. Getting these straight is crucial for a smooth workflow. Think of it like this: confusing them is like mistaking the architect's blueprint for the final inspection report. Both are vital for building a house, but they serve completely different purposes at very different times.

    Let's stick with that house-building analogy to make things crystal clear.

    Definition of Ready: The Blueprint

    The Definition of Ready (DoR) acts as the entry gate for any development work. It’s your approved architectural blueprint and all the necessary building permits, all signed, sealed, and delivered. Before a single foundation is poured, the construction crew needs to know the plans are final, the materials are on site, and all the legal boxes are checked.

    In agile terms, a user story is considered "Ready" only when it meets the team's DoR. This typically means:

    • The story is clearly written and understood by everyone on the team.
    • All dependencies are known and accounted for.
    • The team has estimated the work and agrees it can be done within a sprint.

    If a story doesn't meet the DoR, it doesn't get pulled into a sprint. Period. This simple rule prevents the team from getting bogged down by work they can't actually finish.

    Acceptance Criteria: The Room-Specific Features

    If the DoR is the blueprint for the entire house, then Acceptance Criteria (AC) are the detailed specs for a single room. These are the unique, pass/fail conditions a specific user story must meet to be considered functionally complete from the end-user's point of view.

    For instance, the AC for the "build the master bathroom" story might look like this:

    • The shower maintains a consistent water temperature.
    • The vanity has two sinks, and both have hot and cold running water.
    • The heated flooring can be activated by a wall switch.

    Every user story has its own set of AC that spells out its exact behavior and expected outcomes. They're unique to the task at hand.

    Definition of Done: The Final Inspection

    Finally, we have the Definition of Done (DoD), which is the universal exit gate for all work. This is the final inspection of the entire house. The inspector isn't just checking the master bathroom; they're ensuring the plumbing, electrical, and structural systems for the whole house meet a consistent quality standard. They're making sure it's safe and ready for someone to move in.

    A strong DoD isn't just about ticking boxes; it's a commitment to quality that brings clarity and predictability to the whole process.

    A concept map showing how Quality enhances clarity, increases predictability, and reduces rework.

    The DoD is one comprehensive checklist that applies to every single user story. It's the team's shared promise that even after a story meets its specific AC, it also lives up to the team's broader quality standards—things like "code has been peer-reviewed," "all unit tests are passing," and "documentation is updated."

    An item isn't truly done just because it works. It's done when it works, meets all acceptance criteria, and satisfies the team’s shared quality standards defined in the DoD.

    Nailing down these three concepts is fundamental. The entry gate (DoR), the story-specific requirements (AC), and the final quality gate (DoD) work together to create a powerful framework. This ensures work is properly vetted before it begins and is truly complete—not just "code complete"—when it's finished.

    Crafting a Powerful Definition of Done Checklist

    A generic, one-size-fits-all Definition of Done just doesn't work. To create an effective DoD, build a practical, multi-layered checklist tailored to your team's specific skills, standards, and product. The most actionable approach is to create nested quality gates for individual stories, the entire sprint, and the final release. This layered strategy ensures quality is baked in at every single step, not just tacked on at the end.

    A 'Team DoD' (Definition of Done) checklist showing tasks for Dev, QA, and PO with completion status.

    Building Your DoD From the Ground Up

    The best Definition of Done checklists are built by the team, not handed to the team. To make this happen, schedule a workshop with developers, QA engineers, product owners, and anyone else involved. This shared ownership is what turns a simple document into a real commitment.

    Start by brainstorming every single activity needed to get a piece of work from "in progress" to "potentially shippable." If you're looking for a solid foundation for software craftsmanship, diving into Robert C. Martin's Clean Code principles can provide an excellent framework for these conversations.

    A great Definition of Done answers one simple question for everyone on the team: "How do we know we're really done?" It transforms assumptions into explicit, verifiable steps that build trust and predictability.

    Once you have a brain-dump of activities, group them by scope. This is where you'll define your distinct checklists—one for user stories, another for sprints, and a final one for releases.

    Sample Checklist Templates to Get You Started

    To make this concrete, use these examples as a starting point for your team's workshop. Adapt them to fit your specific needs.

    Level of Work Sample DoD Checklist Item
    User Story Code is peer-reviewed and approved by at least one other developer.
    User Story Unit and integration tests pass with at least 90% code coverage.
    User Story All acceptance criteria are fully met and verified by QA.
    User Story Product Owner has reviewed and formally accepted the functionality.
    Sprint All stories in the sprint meet the User Story DoD.
    Sprint End-to-end regression testing is complete with no major failures.
    Sprint The sprint increment is successfully deployed to a UAT environment.
    Release Final security and vulnerability scans are complete and passed.
    Release Deployment plan is reviewed and signed off by DevOps/SRE.
    Release A go/no-go decision is made with all key stakeholders.

    Remember, these are just templates. The real value comes from your team debating these points and creating a DoD that truly reflects how you work and the quality you want to deliver.

    Level 1: The User Story DoD

    This is your ground-level checklist, applied to every single task the team picks up. Use it as the first line of defense for quality.

    • For the Developer:
      • Code is written and committed to the correct feature branch.
      • Unit and integration tests are written and passing, hitting at least 90% code coverage.
      • Code has been peer-reviewed and approved by at least one other developer.
      • The feature works as expected in a local development environment.
    • For the QA Engineer:
      • The story’s acceptance criteria are fully met and verified.
      • Manual and automated tests for the critical path have been run.
      • No new priority-1 or priority-2 bugs have been introduced.
      • The story has passed testing in a shared staging environment.
    • For the Product Owner:
      • The new functionality has been reviewed and formally accepted.
      • Any relevant user guides or API docs have been updated.

    Keeping track of testing is a huge part of this. For teams on Jira, figuring out an efficient way of https://harmonizepro.com/blog/managing-test-cases-in-jira is a critical step that directly feeds into a strong DoD.

    Level 2: The Sprint DoD

    At the end of a sprint, use this checklist to ensure the collection of "done" stories forms a cohesive, valuable whole.

    • All user stories committed to the sprint meet their own DoD.
    • The sprint's output has been successfully deployed to a staging or UAT environment.
    • End-to-end regression testing has finished without any show-stopping failures.
    • The Product Owner has approved the entire sprint increment during the sprint review.
    • Performance and load tests show no degradation compared to the last release.

    Level 3: The Release DoD

    This is the final gate before your hard work goes live to customers. This checklist ensures production readiness and stakeholder alignment.

    • All sprint-level DoD items are met.
    • Final security scans (like vulnerability checks) have been completed and passed.
    • Release notes and all other external communications are written and approved.
    • The deployment plan has been reviewed and signed off by the DevOps/SRE team.
    • A formal "go/no-go" decision has been made with all key stakeholders present.

    By structuring your Definition of Done this way, you build a system of checks and balances that scales naturally. It makes a developer's code review just as crucial as the final sign-off from the product owner, weaving quality into the fabric of your team's process from start to finish.

    Common Pitfalls and Anti-Patterns to Avoid

    A well-crafted agile development definition of done can be a team's best friend, a shared pact that keeps quality high and everyone on the same page. But when it's mismanaged, that same DoD can turn into a source of serious friction, creating more problems than it ever solved.

    It's easy to fall into a few common traps that completely undermine the DoD's purpose. Instead of building alignment, these anti-patterns sow confusion, point fingers, or just bring progress to a standstill. Knowing what these look like is the first step to steering clear of them.

    The Gold-Plated DoD

    This is a DoD that's more of a wish list than a checklist. It’s so ambitious and packed with exhaustive checks that actually finishing anything feels like a monumental task. Instead of ensuring quality, it paralyzes the team, and velocity grinds to a halt.

    Actionable Strategy: Start with the absolute minimum criteria needed for an item to be "potentially shippable." Evolve your DoD incrementally. During retrospectives, if the team identifies a recurring problem, propose adding a new checklist item to prevent it. Let your DoD grow organically from real-world lessons, not from an idealistic fantasy.

    The Forgotten DoD

    This is painfully common. A team writes a brilliant DoD, saves it to a dusty corner of their wiki, and it's never looked at again. As the team’s tools, skills, and processes change, the DoD becomes a fossil—a relic of a process that no longer exists.

    Actionable Strategy: Make the DoD a visible, active part of your workflow. Print it out and post it on your physical board. Better yet, build it directly into your digital tools like Jira. During daily stand-ups, reference the DoD when discussing ticket progress. An active DoD prevents technical debt, which according to a 2022 study, can be cut by 42% by Scrum teams who actively use their DoD. To dive deeper, you can learn more about mastering the agile scrum Definition of Done.

    The Weaponized DoD

    This is the most toxic anti-pattern of them all. The "Weaponized DoD" happens when the checklist stops being about shared ownership and starts being about blame. You'll hear things like, "Well, I did my part of the DoD. It's not my fault the release broke." This kind of behavior shatters trust and poisons team culture.

    A Definition of Done should be a shield that protects the team's quality standards, not a sword to be used against fellow team members. Its purpose is to foster collective responsibility, not to create silos of individual blame.

    Actionable Strategy: Reinforce that the DoD is a team commitment. The entire team owns the outcome. When something goes wrong, frame the conversation as, "How can we adjust our process to catch this next time?" instead of "Whose checklist item failed?" This shifts the focus from individual blame to collective process improvement, which is the heart of agile.

    How to Enforce Your DoD in Jira Automatically

    A Definition of Done gathering dust on a Confluence page isn't a commitment; it's a suggestion. To make it a real, unbreakable contract with quality, you must bake it directly into your daily workflow in Jira. This transforms your DoD from a passive document into an active, automated quality gate.

    This is how you make your DoD an active, enforceable part of your team's daily muscle memory.

    Starting with Jira’s Native Features

    Jira offers built-in tools that provide a solid starting point for enforcing basic guardrails. The two key features to use are workflow conditions and validators.

    • Workflow Conditions: Use these to control who can move a ticket. For example, set a condition that only someone in the "QA-Team" user group can transition an issue from "In Review" to "Done." This creates a simple, role-based gatekeeper.

    • Workflow Validators: Use these to check that certain fields are filled out before a transition happens. For example, add a validator to block a ticket from moving to the QA column until the "Code Reviewer" field is populated.

    These native features are effective for enforcing simple, procedural rules. However, to implement a detailed, multi-step DoD checklist, you need more powerful tools.

    Elevating Your DoD with Marketplace Apps

    To truly automate a rich DoD, you need to turn that list of bullet points into a series of mandatory, in-your-face blockers. Apps from the Atlassian Marketplace, like Nesty from Harmonize Pro, let you build the sophisticated quality gates your team actually needs.

    Instead of just checking if a field is filled, you can embed a dynamic checklist right inside a Jira issue. More importantly, you can make specific items on that checklist mandatory blockers, preventing the ticket from moving forward until they are ticked off.

    Imagine a developer trying to push a ticket to "Done," but the system physically stops them with a clear message: the "PO has reviewed and approved the functionality" box is still unchecked.

    This provides instant, contextual feedback that’s impossible to ignore. The system itself stops incomplete work dead in its tracks.

    A Practical Guide to Automated Enforcement

    Here’s a step-by-step playbook for wiring a robust, automated DoD directly into your Jira workflow using an advanced checklist app.

    1. Digitize Your DoD Checklist: First, build a checklist template that perfectly mirrors your team’s Definition of Done for a user story. A great template often has sections for dev, QA, and product owner tasks. For a detailed guide on this, check out our post on how to build a powerful checklist in Jira.

    2. Configure Blockers: Pinpoint the absolute non-negotiables in your DoD. For each one, configure it as a "blocker" that prevents a specific transition. For example, make "Code has been peer-reviewed" a hard stop for moving an issue from "In Progress" to "In QA."

    3. Automate Handoffs: Use the app's automation features to smooth out the flow of work. You could set a trigger so that when the final developer checklist item is ticked, the issue is automatically assigned to a QA engineer and a heads-up is posted in your team's Slack channel.

    4. Apply Templates Automatically: Configure your Jira project to automatically add the DoD checklist template to every new user story. This makes sure your quality standard is baked in from the very beginning, eliminating any chance of it being forgotten.

    By embedding your Definition of Done directly into Jira's workflow, you are not just documenting a process; you are building a self-enforcing system of quality. It moves the responsibility from individual memory to the process itself, guaranteeing that standards are upheld every single time.

    An automated approach doesn't just enforce rules—it oils the gears of collaboration. When the handoff from developer to tester is automated, there’s no more guesswork about whether a task is really ready for review. The system orchestrates the handoffs, freeing up your team to focus on what they do best: building and testing a fantastic product. This is how you make your Definition of Done a living, breathing part of your delivery pipeline.

    Measuring the Real-World Impact of Your DoD

    Getting a solid Definition of Done in place is a huge win for any agile team. But the real victory? Proving its value to the business. To get lasting buy-in from stakeholders, you need to move beyond saying your process is better and start showing it with hard data.

    By tracking the right metrics, you can tell a compelling story about how your DoD isn't just improving code—it's improving the bottom line. Suddenly, abstract ideas like "quality" become concrete gains in efficiency, predictability, and customer satisfaction.

    Key Metrics to Track

    To demonstrate your DoD's effectiveness, focus on these high-impact metrics that paint a clear picture of your development process's health.

    • Escaped Defects: This is your primary quality metric. Track the number of bugs found in production after a release. Your goal is a consistent downward trend, which proves you're building quality in from the start.

    • Rework Percentage: Measure the percentage of your team's capacity spent on work that was previously marked "Done" and came back. You can track this by hours or story points. A dropping rework percentage is a clear sign your DoD is catching issues earlier, saving valuable time.

    • Velocity Predictability: While a team's velocity will naturally ebb and flow, its predictability should improve. A stable, consistent velocity shows the team can reliably forecast what they can deliver in a sprint. This stability is a direct result of everyone having the same clear understanding of what "Done" truly means.

    A Definition of Done transforms quality from a subjective ideal into a measurable outcome. When you can show a 20% reduction in production bugs, you’re no longer just talking about a better process—you’re talking about a stronger business.

    Visualizing Your Success

    Data is only powerful if people can see it. Create simple, at-a-glance dashboards to visualize your DoD's impact.

    Jira dashboards are perfect for this. Set up gadgets to chart escaped defects over time or show the sprint-over-sprint reduction in rework. If you need a hand getting started, our guide on how to create a report in Jira can walk you through the process.

    When you tie your process improvements to these kinds of measurable results, you build an undeniable case that a disciplined Definition of Done leads to higher-quality products, more reliable delivery, and a healthier workflow for everyone.

    Your Top Questions About the DoD, Answered

    As teams start to get their heads around the agile development definition of done, a few common questions always pop up. It's natural to wonder about who owns it, how to keep it fresh, and how it applies when you've got multiple teams running around. Getting these answers straight is key to making sure your DoD is a living, breathing tool for quality, not just another document gathering dust in a forgotten corner of Confluence.

    Let's tackle the big ones.

    Who Actually Writes the Definition of Done?

    Short answer: The entire development team. This isn't a top-down mandate from a manager or something the Scrum Master cooks up alone.

    Actionable Insight: The Scrum Master should facilitate a workshop where developers, testers, designers, and the Product Owner collaborate to define the criteria. This shared creation process is what creates real buy-in and a genuine commitment to hitting that quality bar together.

    How Often Should We Update Our DoD?

    Your DoD should never be set in stone. It's a living document that needs to grow and change right along with your team and your product.

    Actionable Insight: Make reviewing the DoD a standard agenda item in your Sprint Retrospective. Ask specific questions: "Did any 'undone' work slip through this sprint?" or "Is any item on our DoD causing unnecessary friction?" Use the answers to make immediate, incremental improvements. Your DoD should evolve as your team learns and your project's needs shift.

    Treat your DoD like a piece of software—it needs regular maintenance and updates to stay useful. If it feels stale, it's time for the team to refactor it.

    Can We Have Different DoDs for Different Teams?

    Not only can you, but you probably should. It’s common for a company to have a baseline DoD—a minimum standard of quality that any "shippable" piece of work has to meet. But that's just the starting line.

    Actionable Insight: Start with an organizational baseline DoD that covers universal standards like security and legal compliance. Then, empower each team to add their own specific criteria relevant to their tech stack, domain, or unique dependencies. The one golden rule is that the team's DoD must always meet or exceed the company-wide one. It can be tougher, but never weaker. This gives you consistency across the organization while allowing for context-specific quality checks.


    Ready to turn your Definition of Done from a static wiki page into an automated, unbreakable part of your workflow? Harmonize Pro's Nesty app for Jira transforms your checklists into dynamic quality gates with mandatory blockers and automated handoffs. Eliminate manual checks and ensure your quality standards are enforced on every single ticket.

    Learn how to build a self-enforcing DoD.

  • Boost Jira Workflows with checklists in jira: Simple, Repeatable, Done

    Boost Jira Workflows with checklists in jira: Simple, Repeatable, Done

    Managing complex Jira projects often feels like a choice between drowning in subtasks or using to-do lists everyone ignores. Both approaches create friction, leading to missed steps, messy handoffs, and delayed releases. This guide will show you how to shift from passive tracking to active, actionable process management directly within your Jira issues.

    Why Your Jira Issues Need More Than a To-Do List

    If your team is scribbling to-do lists in the description field or creating a mountain of subtasks for every feature, you're creating unnecessary work. A simple markdown checklist can't enforce your process. Conversely, dozens of subtasks for a single workflow add clutter and administrative overhead, making it impossible to see a task's true status at a glance.

    Visualizing the stark contrast between overwhelming paper to-do lists and an organized digital checklist with assigned team tasks.

    Consider a standard developer-to-QA handoff. A developer resolves the ticket, but did they run all unit tests? Update documentation? Merge the final code? Without a structured process embedded in the ticket, these crucial steps are easily forgotten, leading to a frustrating back-and-forth that wastes time and hurts quality.

    From Passive Tracking to Active Management

    The core problem is that basic lists are passive reminders, not requirements. An effective process must be active—it must guide users, enforce standards, and automate the next step. This is where modern checklists in Jira fundamentally change how you work. Instead of just listing what needs to be done, they become an interactive part of the workflow itself.

    Your goal is to transform a static Jira issue into a dynamic, self-guiding workflow. Build your process directly into the task to enforce quality and keep everyone aligned.

    This shift is critical for scaling operations. As your teams grow and projects become more complex, relying on memory or manual checks is unsustainable. Embed structured, repeatable processes directly into your Jira issues to build a system that actively prevents errors before they happen.

    The Real-World Impact of Poor Processes

    Unstructured workflows create real problems that extend beyond simple frustration. Addressing these common pain points demonstrates the immediate need for a better system.

    • Inconsistent Onboarding: New hire onboarding can be a chaotic mix of random emails and shoulder taps. Implement a structured checklist to ensure every step—from IT setup to HR paperwork—is completed in the correct order, every time.
    • Chaotic Deployments: A release process involves multiple teams and critical steps. Forgetting a single action, like a final security scan, can cause a major production incident. Use a checklist as a mandatory quality gate.
    • Ambiguous "Done": Without a clear, enforceable Definition of Done, teams argue over whether a task is truly complete, leading directly to rework and scope creep.

    By standardizing these internal workflows, you not only improve efficiency but also build a more resilient and predictable delivery pipeline.

    What Can You Do with Jira's Built-in Checklists?

    Before exploring the Atlassian Marketplace, understand what Jira offers natively. Out of the box, Jira provides a basic way to create to-do lists using Markdown in an issue’s description or comment fields. This can be a sufficient starting point for teams with very straightforward needs.

    To create one, simply use brackets. For example, typing [ ] Task one and [x] Task two renders as a clickable to-do list. Anyone with edit permissions can check the boxes, providing a quick visual on progress for minor tasks. Use this approach for ad-hoc, non-critical items that are not part of a repeatable process. Think of it as a digital sticky note for an issue.

    How to Create a Markdown Checklist

    To add a basic checklist, edit the issue description or add a comment using the following syntax:

    • For an unchecked item: [ ] Action item to complete.
    • For a checked item: [x] This action item is done.

    For instance, a developer can add a personal reminder list to a bug fix ticket to ensure small cleanup tasks—like removing debug code or updating a comment—are completed before resolving the issue. This keeps the main ticket clean while still allowing for task breakdown.

    However, this simplicity is its greatest weakness. These native checklists in Jira are purely informational and are completely disconnected from the Jira workflow engine. This is a major limitation for any team trying to build a reliable, enforceable process.

    Native Jira checklists are like suggestions on a whiteboard—useful for quick notes, but they can't stop someone from bypassing the process. They lack enforcement power.

    This fundamental gap is where teams encounter problems. As processes become more complex and involve more people, relying on a system with no built-in controls becomes a significant risk. You are simply hoping everyone remembers to follow a static block of text.

    Where Native Jira Checklists Fall Short

    When your process is critical to quality, the limitations of native functionality become clear. These are not minor inconveniences; they directly impact your team's efficiency, consistency, and ability to scale.

    Here are the primary problems you will face:

    • No Automation: You cannot trigger any action based on checklist completion. Finishing a list cannot automatically assign the ticket to QA, send a Slack notification, or update a field. Every subsequent step must be manual.
    • No Reusable Templates: For standard processes like deployments or new hire onboarding, you must manually copy and paste the checklist into every new ticket. This is tedious, error-prone, and makes updating the process a nightmare.
    • Can't Block Transitions: This is the most critical failure. A native checklist cannot stop a user from moving an issue to the next status. A developer can push an issue to "In QA" even if the entire "Pre-flight Check" list is unchecked, completely undermining the concept of a quality gate.
    • No Reporting: There is no way to see how many checklist items are complete across multiple issues. You cannot track process adherence or identify bottlenecks hidden within your checklists.

    These limitations mean that while native tools are adequate for personal reminders, they are not designed for creating dependable, scalable workflows. They cannot enforce your Definition of Done or Definition of Ready, leaving your entire process vulnerable to human error.

    How to Supercharge Your Workflows with Checklist Apps

    Jira’s built-in checklists are a starting point, but they cannot enforce critical, repeatable processes. To truly transform your workflows and integrate quality from the start, you must leverage dedicated checklist apps from the Atlassian Marketplace. These apps are designed to solve the problems that native functionality cannot address.

    A hand-drawn checklist for Dev to QA handoff, showing merge incomplete and blocking progress to QA.

    The difference is significant. You move from a static text list to an interactive, intelligent tool embedded directly within your Jira issue. The adoption of checklists in Jira has surged by over 150% among enterprise teams since 2020 because they prevent critical steps from being missed.

    A 2023 study revealed that teams using these add-ons cut task completion errors by 40%. Project managers could finally stop creating hundreds of subtasks and instead rely on integrated, step-by-step guidance. You can read more about these findings on the App Central forums. This approach allows you to build your process directly into the ticket, turning a simple task into a self-managing workflow that catches errors before they happen.

    Unlocking Advanced Checklist Features

    By implementing a powerful app like Nesty by Harmonize Pro, you gain access to features designed to eliminate ambiguity and enforce your team's standards. These capabilities are the foundation for building scalable, high-quality processes.

    Here are the features that provide immediate value:

    • Reusable Templates: Create a "New Feature DoD" checklist once and configure it to automatically apply to every new "Story" issue type. With templates, you standardize your process across the entire team, ensuring everyone follows the exact same steps, every time.
    • Mandatory Completion Gates: This is the most impactful feature. These apps can physically block a Jira issue from transitioning to the next status until specific checklist items are completed. A developer cannot move a ticket to "In QA" if the "Peer Review" item is still unchecked.
    • Unlimited Nesting: Real-world processes are rarely a flat list. Use nesting to break down large, complex items into smaller, more manageable sub-tasks. For example, a "Deploy to Staging" item can be expanded to reveal all necessary sub-steps, adding clarity without cluttering the main view.

    These features combine to create an environment where the right way to do things is also the easiest way. It removes guesswork and reliance on memory, which is essential for maintaining quality as you scale.

    By turning your procedural standards into automated requirements within Jira, you're not just tracking work—you're actively guiding it. The checklist becomes a quality gatekeeper, not just a suggestion.

    Understanding how Jira's app ecosystem extends its core capabilities is crucial when looking at different platform philosophies. For those weighing how Jira stacks up against other project management tools, a Weekblast vs. Jira comparison offers some great insights into these differing approaches.

    Real-World Scenario: The Dev-to-QA Handoff

    Let's walk through a common and often painful workflow: a developer handing off a feature to the QA team. Without a solid process, this is a constant source of friction.

    We've all seen it: a developer marks a ticket "Done" and moves it to "Ready for QA." The QA engineer begins testing, only to discover the code wasn't merged, unit tests are failing, or documentation is outdated. The ticket is bounced back, and the cycle of frustration and wasted time begins.

    Here’s how to use a Nesty checklist to transform that broken process into a smooth, error-proof handoff. First, create a "Dev Complete Checklist" template. Next, configure it as a mandatory gate for any ticket moving into the "Ready for QA" status.

    Now, when a developer finishes their work, they see a clear, actionable list in the Jira issue:

    • Code & Testing
      • All unit tests passing (12/12)
      • Code peer-reviewed and approved
      • Feature branch merged to develop
    • Documentation & Assets
      • Technical documentation updated
      • UI/UX assets attached to ticket
    • Final Confirmation
      • Deployed to staging environment successfully

    The developer methodically works through the list, and the progress is transparent to everyone. The real power is revealed when the developer tries to transition the issue. If even one box is unchecked, Nesty blocks the transition and displays a clear message: "Please complete all mandatory checklist items before moving to QA."

    This simple gate eliminates the painful back-and-forth. The QA team receives the ticket with full confidence that all prerequisites are met, allowing them to focus on testing instead of administrative cleanup. This is how you use checklists in Jira to build quality directly into your workflow, saving hours and preventing costly mistakes.

    Automating Handoffs and Key Process Triggers

    Once you master advanced checklists in Jira, the next step is to eliminate the manual work between process steps. Manual handoffs are a primary cause of process failure—someone forgets to reassign a ticket, notify the next person, or moves an issue forward prematurely. Automation makes these handoffs a reliable, invisible part of your workflow.

    With an app like Nesty, use smart triggers to orchestrate these transitions automatically. This is about more than saving a few clicks; it's about building a system that enforces your process, provides a perfect audit trail, and frees your team from tedious administrative tasks.

    Creating Intelligent Workflow Triggers

    The principle is straightforward: when a specific checklist or item is completed, Jira performs an action on your behalf. This turns a static to-do list into an active component of your workflow, ensuring the right person gets the right information at the right time.

    Set up these flexible triggers to react to different events:

    • Checklist Completion: Trigger an action when an entire checklist, like a "Developer DoD," is finished.
    • Item Completion: Fire an automation when a single critical item, such as "Deploy to Staging," is checked off.
    • Status Change: Automatically load a new checklist when an issue transitions to a new status.

    Use these to build powerful "if-this-then-that" rules directly inside your Jira issues, effectively programming your process without writing any code.

    Here’s how to design a typical automated handoff, moving from a developer's deployment tasks to assigning QA and notifying the team.

    Automated handoff process flow showing steps for code deployment, assigning QA, and Slack notification.

    What was once a series of manual actions becomes a single, smooth sequence, dramatically reducing the opportunity for human error.

    Comparing Native Jira Checklists vs Nesty for Harmonize Pro

    When deciding how to implement checklists, it's helpful to see what you get out-of-the-box versus with a dedicated app. Here's a quick breakdown:

    Feature Native Jira Checklists Nesty Checklists
    Basic To-Do Items Yes Yes
    Nested Checklists (sub-items) No Yes, with multiple levels
    Automated Triggers No Yes (on item/checklist completion)
    Saved Templates No Yes
    Conditional Logic No Yes
    Due Dates per Item No Yes
    Progress Tracking Basic Advanced (visual progress bars)
    Cross-Project Templates No Yes

    While Jira's built-in checklists are fine for simple, personal to-do lists, Nesty is designed for team processes where consistency and automation are crucial.

    Practical Automation Scenarios

    Let's apply this to real-world examples that technical teams face daily. These scenarios show how to use automation to fix common communication bottlenecks and process gaps.

    Scenario 1: The Dev → QA Handoff

    A developer just finished their "Deployment to Staging" checklist. The final item is "Confirm successful deployment."

    • Trigger: The "Confirm successful deployment" item is checked.
    • Action 1: The Jira issue is instantly reassigned from the developer to the lead QA engineer.
    • Action 2: A message is posted to the #qa-team Slack channel: "Ticket [KEY-123] is ready for testing in staging."

    This simple automation eliminates the risk of the ticket languishing in a queue. The QA lead is notified immediately, and the developer can move on to their next task.

    Automation transforms your process from a set of guidelines your team should follow into a self-managing system that ensures they do. It removes ambiguity and enforces consistency.

    Scenario 2: New Employee Onboarding

    An IT manager is setting up a new hire using an onboarding ticket. They have just completed the "IT Setup" checklist.

    • Trigger: The "IT Setup" checklist is fully completed.
    • Action 1: A new, linked Jira issue is automatically created from a template named "HR Training Session."
    • Action 2: This new ticket is assigned to the HR department with a due date set for three days from today.

    Here, automation orchestrates a handoff between two different departments. HR is engaged at the precise moment they are needed, and the IT manager doesn't have to remember to create and assign a separate ticket. This creates a smoother experience for the new employee. For a wider view on how checklists fit into the bigger picture, this business process automation checklist is a great resource.

    The Impact of Automated Quality Gates

    When you implement automated triggers, the impact on team performance and output quality is tangible. Data from Atlassian's 2023 DevOps trends report showed that 72% of software teams using Jira checklists saw a 30% drop in deployment failures, which they credited to structured quality gates and automated workflow triggers.

    For teams using Nesty, these benefits are even more pronounced. Our internal data shows teams achieve 40% less manual coordination and hit their deadlines more often, with a 22% higher on-time delivery rate, by centralizing their multi-step processes in one ticket.

    Automating handoffs and process triggers isn't a luxury; it's how you build a resilient, predictable system that scales with your team and ensures quality is integrated from start to finish.

    How to Actually Enforce Your Definition of Ready and Done

    Every Agile team discusses its Definition of Ready (DoR) and Definition of Done (DoD). These agreements are the foundation of a healthy workflow, establishing a shared understanding of what it means to start and finish work.

    Too often, however, these definitions live on a forgotten Confluence page, treated as suggestions rather than standards.

    Checklists in Jira change this dynamic. By embedding your DoR and DoD directly into every issue, you convert abstract concepts into tangible, required actions. You are building quality gates directly into your workflow, which reduces ambiguity and rework.

    Two checklists, 'Definition of Ready' and 'Definition of Done', illustrating a project workflow with approval and release.

    The goal is to move from a culture of "I think it's ready" to one of "I can prove it's ready."

    Building Your Definition of Ready Checklist

    Your DoR protects your development team from poorly defined requirements and scope creep. It is the gatekeeper that ensures every user story is fully fleshed out before any code is written.

    Using a checklist app, you can automatically add a DoR checklist to every new user story. Here is a practical template to start with:

    • Story & Scope
      • User story is clearly written from the user's perspective.
      • Acceptance criteria are defined and testable.
      • The Product Owner has reviewed and approved the story.
    • Technical & Design
      • UI/UX mockups are attached and finalized.
      • Dependencies on other teams have been identified.

    This is not just for show. With a tool like Nesty, you can enforce a hard rule: an issue cannot be moved into "To Do" or "In Progress" until every one of those boxes is ticked. This simple automation forces the right conversations to happen at the right time. For teams dealing with complex testing, this becomes even more essential. You can learn more about how this connects to the bigger picture by exploring best practices for managing test cases in Jira.

    Creating an Ironclad Definition of Done

    Once a story is in progress, the DoD checklist becomes your final quality checkpoint, ensuring every feature meets your team's standards before release. This is how you prevent the "it's done, but…" scenario that leads to weekend bug hunts.

    A DoD isn't a formality; it's a commitment to quality. By embedding it as a mandatory checklist in Jira, you transform that commitment into an automated, repeatable action that protects your entire delivery pipeline.

    A standard DoD checklist for a development team might include:

    • Code Quality & Review
      • Code has been peer-reviewed and approved.
      • All unit and integration tests are passing.
      • Feature branch has been successfully merged.
    • Testing & Documentation
      • QA has completed testing and approved the feature.
      • All relevant technical documentation has been updated.
    • Release Confirmation
      • Deployment to production is confirmed.

    Like the DoR, configure this checklist to block the issue from being moved to the "Done" status until it’s complete. This is an incredibly powerful way to turn your team’s agreements into an unskippable part of the process.

    This strategy is effective for projects of all sizes. Over 80% of Jira Cloud migrations in 2023 used checklists to standardize workflows and onboarding. Atlassian’s own guide indicated a 35% faster ramp-up time for users when checklists were used to cover basic tasks, demonstrating how structure accelerates adoption. You can dig into these findings on Atlassian's adoption guide.

    Have Questions About Jira Checklists? We've Got Answers.

    When teams begin implementing checklists in Jira, several common questions arise. Answering them upfront will help you avoid headaches and make the transition smoother. Let's address the most frequent practical concerns and demonstrate why a dedicated app is often the key to unlocking true process management.

    Can I Create Standard Templates for Different Issue Types?

    Yes, and you absolutely should. This is a primary benefit of a dedicated checklist app like Nesty. Instead of manually retyping your "Definition of Done" for every bug, build a template once. Then, configure it to apply automatically based on the issue type.

    Set up your Jira project to:

    • Automatically add the "Bug Triage & DoD" checklist to every new Bug.
    • Create every Story with the "Definition of Ready" checklist already in place.
    • Pre-load every IT Task with the "New Hardware Setup" checklist.

    This saves a massive amount of time and, more importantly, enforces consistency. It guarantees your standard processes are followed on every ticket, eliminating "I forgot that step" errors.

    Building and automatically applying templates is the first step toward a scalable, standardized workflow. It ensures everyone on the team operates from the same playbook.

    How Are Nested Checklists Different from Subtasks?

    It is crucial to understand the difference between these two features. Both nested checklists and subtasks break down work, but they solve different problems.

    A subtask is a separate Jira issue. It has its own assignee, status, and can move through a workflow independently of its parent ticket. Use subtasks to break a large piece of work into smaller chunks that different people will handle at different times.

    A nested checklist, in contrast, adds detail to a single step within the parent issue. It does not have a separate assignee or status. It is a simple way to outline the sequence of smaller actions required to complete a main checklist item.

    Use this rule of thumb:

    • Use subtasks when a piece of work requires its own lifecycle, assignee, and detailed tracking.
    • Use nested checklists when you need to clarify the "how-to" for a single task within the parent issue. It is for adding process clarity, not creating more tickets to manage.

    What's the Best Way to Report on Checklist Progress?

    Native Jira checklists offer no meaningful reporting capabilities. This is a major reason to adopt an advanced app.

    The only effective way to report on progress is to use the JQL (Jira Query Language) functions provided by a capable checklist app. These custom functions allow you to build powerful filters and dashboard gadgets for a clear view of your operations. For example, with Nesty, you can run queries to find:

    • All issues where the "Deployment" checklist is more than 50% complete.
    • Any "High Priority" bugs where the "Security Review" checklist item is still unchecked.
    • A list of all onboarding tickets currently stalled on the "HR Paperwork" step.

    Pull these JQL queries into a Jira dashboard to give project managers and team leads a real-time, at-a-glance view of process status. This allows you to highlight gaps and potential bottlenecks before they become major problems.


    Ready to stop chasing down updates and start building intelligent, automated processes? Harmonize Pro's Nesty app turns your Jira issues into self-guiding workflows. Create reusable templates, enforce quality gates, and automate handoffs to eliminate errors and keep your teams perfectly aligned. Discover what Nesty can do for your team.

  • Boost Jira Automation Rules: A Practical Guide to Streamlining Workflows

    Boost Jira Automation Rules: A Practical Guide to Streamlining Workflows

    Repetitive Jira updates are a massive time-sink. Your team's most valuable asset is their focus, and manual ticket-nudging drains it dry. The solution is Jira automation rules. Think of them as simple if-this-then-that recipes that handle the grunt work for you. They’re designed to eliminate manual chores, prevent errors, and give your team their creative energy back. This guide provides actionable steps to get you started immediately.

    Stop Wasting Time on Repetitive Jira Tasks

    A visual metaphor of automation streamlining tasks on a conveyor belt, saving time and improving efficiency.

    This image nails the core idea: automation turns a chaotic, hands-on process into a smoothly flowing system. It's the difference between focusing on innovation and drowning in administration.

    Manual ticket management isn't just boring; it’s a major source of project friction. Every minute spent changing a status, reassigning an issue, or pinging someone for an update is a minute not spent on coding, testing, or planning. This "work about work" causes delays, invites human error, and leads to inconsistent workflows.

    The core problem is that manual updates don't scale. As your team grows and projects get more complex, the administrative overhead explodes, creating a bottleneck that slows everything down.

    This is exactly where Jira automation rules come into play. They act as a tireless assistant, executing tasks based on triggers you define. Once set up, your processes are followed perfectly every time, without anyone having to think about it.

    Why Automation Is No Longer Optional

    Jira automation became a game-changer after Atlassian acquired Code Barrel's "Automation for Jira" app in 2019. By 2022, this powerful no-code tool was built directly into Jira Cloud and modern Data Center versions.

    This native integration means you can start building impactful rules right now. Here’s what you stand to gain:

    • Enforce Process Consistency: Ensure every ticket moves through your workflow the same way, from "Ready for Dev" to "Done." This brings a new level of predictability.
    • Eliminate Handoff Errors: Automatically assign tickets to the next team, attach the right documents, and send a notification. Nothing gets lost in the shuffle.
    • Reclaim Valuable Time: Some teams save over 150 hours per month by automating administrative tasks. That’s time freed up for work that actually matters.
    • Improve Cross-Team Collaboration: Keep everyone in the loop with automated updates and notifications, cutting down on status meetings. To understand the broader concepts, read our guide on what workflow automation is all about.

    For any software team, a high-impact action is linking Jira to GitHub. This unlocks powerful automation, allowing you to trigger rules based on commits, pull requests, and merges, directly connecting your code to your project board.

    Building Your First High-Impact Automation Rules

    Theory is great, but the real "aha!" moment comes when you solve actual problems. It's time to put that knowledge into practice. We're going to walk through building three incredibly practical rules that any software team can use right away to reduce manual work and make their processes more reliable.

    These aren't just simple examples. They're proven automations that fix common headaches in development, project management, and client onboarding. Let's dig in.

    Rule 1: The Seamless Dev-to-QA Handoff

    One of the most frustrating bottlenecks is the handoff from development to QA. A developer finishes their work, but the ticket sits there, waiting for someone to reassign it and move it to the "In QA" column. This gap creates delays and risks that tickets get lost.

    This automation closes that gap. When an issue is moved to "Ready for QA," the rule instantly assigns it to your QA lead and drops a comment to notify the team.

    Here’s the step-by-step setup:

    • Trigger: Issue Transitioned. Be specific. Configure it to fire only when the status moves from any other status to "Ready for QA." This prevents the rule from running unexpectedly.
    • Action 1: Assign Issue. Set this to automatically assign the ticket to your QA lead or the main point of contact. This immediately establishes ownership.
    • Action 2: Add Comment. Notify the wider team. Use a simple, clear comment like: Ready for testing. @qa-team, please take a look. This pings the group so someone can pick it up even if the main assignee is busy.

    This simple rule enforces your workflow, creates a perfect audit trail, and ensures you never lose momentum between coding and testing. It's a cornerstone of a healthy CI/CD pipeline.

    Rule 2: The Polite Stale Issue Nudge

    We've all seen tickets that haven't been updated in a week, collecting digital dust. Is it blocked? Forgotten? Chasing down these updates is a massive time-sink for project managers.

    This rule acts as an automated assistant. It scans for inactive issues and sends a gentle reminder to the assignee in Slack, asking for an update without any manual intervention.

    Here's how to build this "nudge" rule:

    • Trigger: Scheduled. Run this daily or every other day. You'll need a JQL query to define what "stale" means. A great starting point is status not in (Done, "Won't Do") AND updated < -7d.
    • Action: Send Slack Notification. Connect Jira to Slack and craft a helpful message: "Hey {{issue.assignee.displayName}}! Just a friendly nudge on {{issue.key}}. It hasn't seen any updates in over a week. Is everything okay?"

    Using smart values like {{issue.assignee.displayName}} makes it personal, and including a direct link with [{{issue.key}}]({{issue.url}}) makes it easy for them to jump in and provide an update.

    Rule 3: The Client Onboarding Sub-Task Creator

    A consistent onboarding process is critical for new clients. But it usually involves the same checklist every time: "Schedule Kickoff," "Set Up Accounts," "Send Training Docs." Creating these sub-tasks manually for every new client is tedious and error-prone.

    This rule standardizes the entire process. When a new "Client Onboarding" epic is created, it automatically generates your entire predefined checklist of sub-tasks.

    Here’s the configuration:

    • Trigger: Issue Created. The rule fires the moment the new issue appears.
    • Condition: Issue Fields Condition. This is crucial. Ensure the rule only runs on the right issue type. Set the condition to Issue Type = Epic and add another condition to check the summary, like Summary ~ "Onboarding for".
    • Action: Create Sub-tasks. Add a "Create sub-task" action for every step of your process.

    For instance, your list of sub-tasks might look like this:

    • Schedule Kickoff Meeting
    • Grant System Access
    • Deliver Welcome Packet
    • Conduct Initial Training Session
    • Schedule First Check-in Call

    By turning your onboarding into a Jira automation rule, you build a repeatable, scalable system that delivers a consistent experience to every new client.

    To tackle more complex processes, our guide on Jira workflow automation dives into more advanced strategies. Mastering these foundational rules will give you a solid base to build from.

    Advanced Automation for Complex Workflows

    Once you've nailed the basics, you can use Jira automation to tackle your organization's most complex, multi-step processes. Advanced features—smart values, rule branching, and rule chaining—allow you to build sophisticated systems that handle complex handoffs without manual intervention.

    This is about transforming a convoluted manual process into a self-managing system. It frees up your team to focus on high-value work instead of playing project traffic controller.

    Let’s walk through a common and often messy DevOps workflow to see these concepts in action.

    Building a Multi-Environment Deployment Rule

    Coordinating deployments across development, staging, and production is a massive headache. The process is often a chaotic mix of manual ticket updates, Slack pings, and the risk of someone dropping the ball. A well-designed Jira automation rule can orchestrate this entire sequence.

    The goal is to create a system where a single trigger—like merging a pull request—kicks off a cascade of updates, assignments, and notifications across several related tickets representing each environment.

    This visualization shows the core flow for many automations, from handling handoffs to nudging people and creating new tasks.

    A visual representation of a three-step Jira automation process flow: Handoff, Nudge, and Create.

    A single event can set off a chain reaction that keeps work moving forward without manual intervention.

    To build our deployment rule, we’ll use a few advanced components:

    • Smart Values: Dynamic variables that pull data from your Jira issues. We’ll use them to copy info from a parent ticket to its sub-tasks. For instance, {{triggerIssue.fields.summary}} grabs the summary from the issue that kicked off the rule.
    • Lookup Issues Action: A powerful action that lets your rule search for other issues using JQL. It's the key to connecting our main development ticket to its staging and production counterparts.
    • Rule Branching: This lets the rule perform actions on multiple related issues, like those found with "Lookup Issues." It’s like running a mini-rule for each issue in a list.

    Orchestrating the Deployment Flow

    Let's say our setup is a main feature story with sub-tasks like "Deploy to Staging" and "Deploy to Production." Our automation will kick in the moment the development work is finished.

    The trigger is a Pull Request Merged event from your connected code repository. When a developer merges their code, the magic begins.

    First, the rule uses the Lookup Issues action with a JQL query like this: parent = {{triggerIssue.key}} AND summary ~ "Deploy to". This finds all sub-tasks under the story whose summaries are about deployment.

    Next, we use a Branch rule / related issues action. Inside this branch, the rule will execute a set of actions for each sub-task it found.

    Within the branch, we can add an If/else block to check the summary of each sub-task.

    • If {{issue.summary}} contains "Staging," the rule can transition that sub-task to "In Progress" and assign it to the DevOps team.
    • If {{issue.summary}} contains "Production," it can add a comment like: Ready for production deployment pending successful staging validation.

    By using branching and conditions, a single trigger intelligently updates multiple tickets according to their specific purpose. This creates a clear, automated audit trail and ensures the right team is notified at exactly the right moment.

    Leveraging Scheduled Triggers and Smart Values

    Advanced Jira automation rules are also perfect for proactive cleanup and reporting. For these routine jobs, use scheduled triggers.

    Imagine you need a weekly report of all production bugs that have been sitting idle. A scheduled rule can run every Friday, find those issues, and send a summary to a Slack channel.

    Here’s a quick recipe for that rule:

    1. Trigger: Scheduled (e.g., weekly on Friday at 9 AM).
    2. JQL Condition: project = "PROD" AND type = Bug AND status != Done AND updated < -7d.
    3. Action: Send Slack message. Use smart values to build a formatted list: *Weekly Stale Bug Report:* {{#lookupIssues}} - {{key}} - {{summary}} {{/lookupIssues}}.

    The {{#lookupIssues}} block loops through all the issues found by the JQL, creating a neat, clickable list in Slack. This proactive reporting keeps critical issues from falling through the cracks, with zero manual effort.

    Mastering these workflows is a core part of effective process orchestration. To go deeper on connecting separate tasks into a cohesive system, you might be interested in learning more about process orchestration and its applications.

    By combining smart values, branching, and scheduled triggers, you can build robust systems that manage your team's most challenging workflows.

    Keeping Your Automation Rules From Breaking Jira

    As your team builds more Jira automation rules, you'll see a massive leap in productivity. But here's the catch: inefficient rules can slow your entire Jira instance to a crawl and chew through your monthly execution limits.

    Visual comparison: Inefficient Jira rules clog a pipe, while optimized rules ensure smooth Jira Cloud performance.

    Good governance and smart optimization are non-negotiable. The goal is to build rules that are not just effective but also incredibly efficient.

    Understanding Jira Automation Limits

    Your ability to run automations isn't unlimited. Atlassian sets monthly execution limits based on your Jira Cloud plan.

    In late 2023, a big change occurred: Atlassian moved away from a shared pool of executions. Now, each product has its own quota. Only successful actions count toward this limit now, but a few high-volume rules can still drain your allowance fast. Get the full rundown on these Atlassian automation changes and what they mean for your team.

    The key takeaway is that every execution counts. A single poorly configured rule triggering hundreds of times a day can exhaust a month's worth of executions in a week.

    Regularly auditing your rules is essential maintenance. The first place to check is your automation settings under the "Usage" tab. This dashboard shows you exactly which rules are using the most executions. Look for rules with sky-high counts; those are your prime candidates for optimization.

    A Practical Guide to Optimizing Your Rules

    Once you’ve identified your most resource-hungry rules, it’s time to optimize them. The core strategy is to make them more specific so they only fire when absolutely necessary. Think of it as using a scalpel instead of a sledgehammer.

    Here are some quick wins for rule optimization.

    Rule Optimization Quick Wins

    Inefficient Method (High Usage) Optimized Method (Low Usage) Why It Works
    Trigger: Issue Updated Trigger: Issue Transitioned Fires only on status changes, not every minor edit, comment, or field update.
    One rule with no conditions A rule with a JQL condition or If/else block Adds a gatekeeper. The rule stops if the issue doesn't match specific criteria, saving an execution.
    A rule that fires on every individual event A Scheduled trigger processing issues in bulk Instead of 100 executions for 100 events, you get one execution that handles all 100 issues at once.

    This table shows how easy it is to slash your execution count by being more precise.

    Here are the techniques in action:

    • Swap Broad Triggers for Specific Ones: The Issue Updated trigger is the number one offender. If you only care about status changes, swap it for the much leaner Issue Transitioned trigger.
    • Add More Conditions: Use an If/else block or a sharp JQL condition to double-check that the issue is exactly what you're looking for. For example, check if the Assignee field is empty before trying to assign the ticket.
    • Process Issues in Batches: Instead of a rule that reacts to every event, switch to a Scheduled trigger. A daily rule that runs a JQL query to find all "stale" tickets is far more efficient than an "Issue Updated" rule checking every modification across your instance.

    Establishing Team-Wide Best Practices

    To prevent performance problems, establish clear ground rules for creating Jira automation rules.

    Implement these guidelines for your team:

    1. Enforce a Naming Convention: A standard like [Project Key] - [Trigger] - [Action] makes it instantly clear what a rule does.
    2. Require Descriptions: Every rule needs a simple description covering its purpose and who to contact if it breaks.
    3. Perform Peer Reviews: Before a new global or multi-project rule goes live, have another person review it. This quality check is great for catching potential performance hogs.

    By proactively managing and optimizing your automations, you ensure they remain a powerful asset instead of becoming a performance liability.

    Getting Your Automation Rules to Work Flawlessly

    An automation rule is only useful if you can trust it to work every single time. This is why treating your rules like any other piece of code is essential. They need solid testing before deployment and ongoing monitoring once they're live.

    A sketch illustrates a magnifying glass, log actions, and a flowchart of checks, warnings, and smart values.

    Thankfully, Jira gives you a powerful tool for this: the audit log. It's your command center for figuring out what’s really going on.

    The Audit Log Is Your Best Friend

    The audit log is the black box recorder for your Jira automation rules. Found in each rule's settings, it keeps a detailed history of every time that rule has tried to run. It tells you what happened, when, and why.

    When a rule misbehaves, the audit log should be your first stop. It gives you a play-by-play of the trigger, each condition, and every action, flagging the exact point of failure with an "ERRORED" status. This is a lifesaver for troubleshooting.

    Using the Log Action for Smarter Debugging

    What about when a rule runs successfully but produces the wrong outcome? This often happens when a smart value isn't behaving as expected. The best trick here is to temporarily add a Log action to the rule.

    This action prints the value of any smart value directly into the audit log. It’s the Jira equivalent of a print statement in code. It’s perfect for seeing what values are actually being used at runtime for things like {{issue.fields.summary}} or {{now.plusDays(5)}}.

    By adding a temporary Log action, you can see precisely what your smart values contain before the rule commits to its final action. It's a clean, non-disruptive way to confirm your logic is sound.

    Monitoring usage is also critical for managing your execution limits. Since the 2023 limit changes, some teams have discovered that a single inefficient rule was eating up 50-80% of their monthly quota. A runaway rule can burn through a free or standard plan's limits in days. Learn more about how to manage your Jira automation usage from Atlassian.

    Keep Your Automation Library Clean

    A healthy automation setup needs regular housekeeping. Don't let your rule list become a junkyard of old, disabled, or redundant automations.

    Set a quarterly reminder to review all your global and project-specific rules. As you review each one, ask:

    • Is this still relevant? Workflows evolve. A rule that was a lifesaver last year might be obsolete today.
    • Can this be more efficient? Could a broad trigger be narrowed down to save executions?
    • Does this have an owner? Every rule should have someone responsible for it.

    By disabling or deleting rules that are no longer serving a purpose, you'll declutter your instance and stop them from chipping away at your monthly execution limits.

    Got Questions About Jira Automation? We've Got Answers.

    As you build more sophisticated Jira automation rules, questions will pop up. That’s a good sign—it means you're pushing past the basics. Here are clear, straightforward answers to some of the most common questions.

    Think of this as your go-to reference to get you unstuck and help you build smarter, more reliable automations.

    Can Jira Automation Rules Work Across Different Projects?

    Yes, and this is one of Jira Automation's most powerful capabilities. You can create global rules that aren't tied to a single project. These are fantastic for standardizing processes across your entire organization, like a rule that automatically closes any stale ticket in any project after 30 days of inactivity.

    When creating a rule, select "Global" for its scope. A word of caution: a poorly configured global rule can cause widespread chaos, so they demand extra testing and a solid understanding of your execution limits.

    What Are the Most Common Reasons a Rule Fails to Run?

    When an automation rule doesn't fire, it's usually one of a few common culprits. Check these first:

    • Permissions Problems: The rule runs with the permissions of the user who triggered the action or a designated "rule actor." If that account can't edit a field or transition an issue, the rule will fail. This is the most common issue.
    • A Flawed JQL Condition: A typo or logical error in your JQL query will stop a rule in its tracks. Always test your JQL in Jira’s advanced issue search before plugging it into a rule.
    • Mismatched Statuses: The "Issue Transitioned" trigger is very literal. It will only fire if the issue moves directly from the exact "From" status to the "To" status you defined.

    How Many Automation Rules Can I Have?

    There's no hard limit on the number of rules you can create in Jira Cloud. You could have hundreds of rules in a single project.

    The real constraint isn't the number of rules, but the number of times they execute each month. Atlassian's limits are based on rule executions, which is why optimizing your rules to run only when necessary is so critical.

    A single, inefficient rule that runs constantly can chew through your monthly quota way faster than 50 well-designed, efficient ones. It’s all about efficiency, not volume.

    Is It Possible to Trigger a Rule from an External Tool?

    Yes, using an Incoming Webhook trigger. This gives you a unique URL that an external system can call to kick off a Jira automation.

    A great example is connecting your CI/CD pipeline. After a successful deployment, a tool like Jenkins or GitHub Actions could send a webhook to Jira. Your rule catches that signal, then automatically transitions the related tickets to "Done" and adds a comment with the release version. It's a powerful way to link your development work directly to your project tracking.


    Ready to move beyond basic rules and orchestrate complex, multi-step handoffs right inside your Jira issues? Harmonize Pro's Nesty app transforms your tickets into self-managing workflows with unlimited nested checklists, intelligent triggers, and automated quality gates. Eliminate missed steps and manual coordination for good.

    Discover how Nesty can extend your Jira automation capabilities today.

  • How to Create Filters in Jira to Streamline Your Workflow

    How to Create Filters in Jira to Streamline Your Workflow

    To create a filter in Jira, navigate to the Issues dropdown menu and select Search for issues. Use the basic search dropdowns for a quick query, or switch to the advanced Jira Query Language (JQL) editor for more specific criteria. Once you see the results you need, click Save as, give your filter a descriptive name, and save it for future use.

    Why Mastering Jira Filters Is a Game Changer

    Before we jump into the step-by-step, let's establish why filters are critical. They are the building blocks that power your team's Kanban board, executive dashboards, and automated workflows. Mastering filters is the first step in transforming Jira from a simple task list into a powerful work management engine.

    Well-crafted filters cut through the noise, creating focused, actionable views for daily stand-ups and long-term planning.

    • Software Teams: Use filters to isolate bugs for an upcoming sprint, track all stories linked to a feature epic, or create a view of everything currently blocked or awaiting code review.
    • QA Engineers: Build bug triage queues with filters that instantly surface new, critical defects. Set up views for regression testing cycles or monitor tickets sent back to development.
    • Product Managers: Create release-health dashboards, track feature progress across multiple teams, and spot scope creep by filtering for issues added after a sprint has started.

    The Foundation of Jira's Most Powerful Features

    Learning how to create filters is essential because these saved queries are the core logic behind Jira's most advanced features. The same filter that shows you a list of overdue tasks can also be the trigger for a powerful automation rule.

    For example, a filter that finds all issues in a "Ready for QA" status for more than 24 hours can trigger an automation to reassign the ticket and notify the team on Slack. This turns a passive list into a proactive workflow, smoothing out the developer-to-QA handoff. This level of process control is a key part of learning how to improve team collaboration within Jira.

    Filters aren't just for you; they become the shared language your team uses to define work. A clearly named filter like "P1 Bugs – Current Release" ensures everyone—from a junior dev to the VP of Engineering—is looking at the exact same set of issues. It eliminates confusion and keeps everyone aligned on what matters most.

    Powering Dashboards and Reporting

    The impact of good filters extends to management and executive reporting. Since Jira's launch in 2002, filters have remained a core feature. In most organizations, over 70% of dashboards rely on at least one saved filter to populate gadgets like Issue Statistics or the Two-Dimensional Filter Statistics chart. These gadgets are the primary lens executives use to gauge progress.

    For tools like Harmonize Pro’s Nesty, these filters define which issues are pulled into automated nested workflows. You can find practical discussions and insights on this topic at the Atlassian Community.

    Building Your First Filter: From Basic Search To JQL

    Your journey into mastering Jira filters starts with the Basic Search. This is the most direct way to get started, letting you select criteria from simple dropdown menus. Use it to quickly find what you need without learning any special syntax.

    To begin, select a Project, Issue Type, Status, and Assignee. In just a few clicks, you can generate a list of all "To Do" bugs assigned to you in the "Phoenix Project." This is perfect for immediate, one-off searches.

    However, your questions will become more complex. What if you need to see issues from two different projects? Or find tasks updated in the last 48 hours that are still open? This is where Basic Search is limited, and you'll need a more powerful tool.

    Transitioning to Advanced Search With JQL

    Switch to the Advanced search mode to unlock Jira Query Language (JQL). While the empty search bar can seem intimidating, JQL is the key to building precise, reusable filters that drive professional workflows. It’s more like writing a specific, logical sentence than coding.

    Every JQL query consists of a few key components:

    • Fields: The attribute you're searching for, like project, status, assignee, or priority.
    • Operators: The relationship between a field and its value, such as = (equals), != (is not), IN (is one of), and > (is greater than).
    • Values: The specific data you want to find, like the project name 'Phoenix Project' or a status like 'In Progress'.
    • Keywords: The logic that connects your criteria, primarily AND and OR.

    For example, a simple JQL query might look like this: project = "Phoenix Project" AND status = "To Do". This provides the same result as our basic search but creates a foundation you can expand upon.

    The Anatomy of a Powerful JQL Query

    JQL's real power lies in handling complexity and change. Instead of searching for static values, you can use functions to create filters that are always current.

    Let’s walk through a real-world example. A team lead needs to see all critical bugs from two projects, "Phoenix" and "Orion," but only those that have been untouched for a week or more.

    Here is the JQL to accomplish this:
    project IN ("Phoenix", "Orion") AND issuetype = Bug AND priority = Highest AND updated <= -7d

    Let's break this down. project IN ("Phoenix", "Orion") efficiently searches both projects at once. The key part is updated <= -7d. This dynamic function finds any issue that has not been modified in the last seven days. This type of dynamic search is impossible with basic dropdowns.

    Pro Tip: Start typing directly in the JQL editor. Jira provides instant feedback, showing a green checkmark for correct syntax and a red 'x' with helpful suggestions for errors. This real-time validation is the fastest way to learn.

    A saved filter is a living tool that can power your most important Jira features. This flow shows how a single, well-crafted filter can define your team's board, feed your dashboard gadgets, and even kick off automations.

    A process flow diagram illustrating Jira filter uses for Kanban boards, dashboards, and automation.

    This demonstrates why learning JQL is a worthwhile investment. It makes your boards, reports, and workflows more intelligent and responsive to your team's activities. An entire Agile board is defined by its JQL filter; changing the query instantly updates the view for the entire team. To see how other teams solve similar challenges, explore the Atlassian community forums for practical examples.

    To help you get comfortable with JQL, here is a quick reference table with some of the most common operators and functions.

    Common JQL Operators and Functions at a Glance

    This table is a handy cheat sheet for the building blocks of JQL. Keep it nearby as you start constructing your own queries.

    Element Purpose Example Usage
    Operators
    = Finds exact matches. status = "In Progress"
    != Excludes specific values. assignee != "John Smith"
    IN Searches for any value within a given list. project IN ("Project A", "Project B")
    NOT IN Excludes all values within a given list. issuetype NOT IN (Bug, Sub-task)
    ~ Finds issues where a text field contains a specific word. summary ~ "deployment"
    > or < Finds values greater than or less than a specified value (dates/numbers). votes > 5
    IS Checks if a field has a value or is empty. description IS NOT EMPTY
    Functions
    currentUser() Represents the user who is currently logged in. assignee = currentUser()
    now() Represents the current date and time. duedate < now()
    -7d or 4h Represents a duration (days, hours) used with date fields. created >= -14d (created in the last 14 days)
    startOfDay() Represents the beginning of the current day. updated >= startOfDay()
    membersOf() Finds issues assigned to any member of a specific user group. assignee IN membersOf("jira-developers")

    Familiarizing yourself with these elements will dramatically accelerate your ability to translate complex questions into clean, effective JQL queries.

    Naming, Saving, and Sharing Your Filters

    You’ve built the perfect JQL query. Now you need to save and share it effectively. A brilliant filter that only you can find is just digital noise. The goal is to turn your query into a shared, single source of truth for your projects.

    A sketch of a filter setup window for 'Critical Bugs - Team A' showing visibility options.

    Once your query returns the exact results you need, click the Save as button above the search results. A dialog box will appear, prompting you for a name.

    Do not rush this step. A vague name like "My Filter" is a future problem. Be descriptive and consistent. A practical naming convention is [Project/Team] - [Purpose] - [Key Criteria].

    For example:

    • API Team – Sprint Planning – Unestimated Stories
    • QA – P1 Bugs – Current Release
    • All Projects – Overdue Tasks – No Recent Updates

    This simple habit makes your filter list instantly understandable to you and anyone else who uses it.

    Controlling Who Can See (and Break) Your Filter

    After naming your filter, you must define its access permissions. By default, new filters are private. To make them useful, you need to share them.

    The Viewers and Editors settings control who can see the filter's results and who can modify its JQL query.

    Consider your audience to determine the correct permissions. Is this filter for your personal use, a key team resource, or a high-level report for the entire company?

    You have several sharing options:

    • Private: Only you can see or edit it.
    • Group: Share with a specific user group, like jira-developers or product-managers.
    • Project: Make it accessible to all members of a specific project.
    • Organization: Open it to anyone with an account in your Jira instance.

    Here’s a pro-tip: restrict edit permissions. Allow others to view the filter, but be highly selective about who can change the JQL. This prevents someone from accidentally breaking a query that powers a critical dashboard before a major planning session.

    Building a Library of "Golden Filters"

    Over time, your team will develop a set of "golden filters." These are the definitive queries that everyone relies on for tracking key metrics like release readiness, bug backlogs, or team workload.

    Establishing these core filters is crucial for data consistency. It ensures that when your manager asks for a list of all critical bugs, they are viewing the exact same data as the development and QA teams. This eliminates conversations that start with, "Well, my search showed something different."

    These trusted filters should have clear names, concise descriptions, and tightly controlled edit rights. Investing a small amount of effort in governing your most important filters aligns everyone and ensures they are speaking the same data language. Once saved, these become the building blocks for your most valuable boards, dashboards, and reports.

    You’ve built and saved your filters. Now it's time to put them to work on your team’s boards and dashboards. A filter sitting unused in your "My Filters" list is a wasted opportunity. Plug it into the high-traffic areas your team uses daily to make a real impact.

    Jira-like workflow showing how a saved filter transforms a kanban board into a dashboard report.

    This is how you transform a simple list of issues into a dynamic, real-time view of your project's health. You are instructing Jira to display specific issues in a way that provides meaningful insights.

    Powering Your Jira Dashboards

    For most teams, the Jira dashboard is mission control. It provides a bird's-eye view of everything happening across projects. The secret to an effective dashboard is its gadgets, and nearly all of them are powered by your saved filters.

    Saved filters are the lifeblood of dashboards. Gadgets like Filter Results, Issue Statistics, Pie Charts, and Two-Dimensional Filter Statistics all require you to select a filter. From there, you can slice that data by assignee, status, priority, or any other field. Advanced tools like Harmonize Pro’s Nesty even use filters to drive complex cross-team workflows, pushing issues through nested checklists and automated handoffs. Explore discussions in the Atlassian Community to see how teams are pushing the boundaries with filters and automation.

    To create a quick visual of your team's workload, follow these steps:

    1. Add a Pie Chart gadget to your dashboard.
    2. Point it to a saved filter, such as "API Team – Current Sprint."
    3. Set the statistic type to "Assignee."

    This instantly generates a chart showing who is responsible for what percentage of the sprint's tasks. Change the statistic to "Status" to get a live view of what's To Do vs. In Progress vs. Done. This is how you convert raw data into actionable insights without running manual searches. To get even more from these visualizations, review our guide on how to create a report in Jira.

    Redefining Your Agile Boards

    The relationship between a filter and an Agile board is one of the most critical concepts in Jira. Every board, whether Scrum or Kanban, is built on one filter. That filter defines the board's entire scope. If an issue does not match the filter's JQL, it will not appear on the board.

    This provides you with an incredible amount of control. By adjusting the board's underlying filter, you can completely change what your team sees and focuses on.

    For instance, a Kanban team can prevent their "Done" column from becoming cluttered with old tasks. Navigate to Board Settings > General and click Edit Filter Query. By adding a clause like AND (status != Done OR updated >= -14d), any ticket that has been Done for more than two weeks will disappear from the board, keeping the focus on active work.

    A Word of Caution: Modifying a board's filter is a significant change. It affects the view for every person who uses that board, so proceed with care. A small typo in the JQL can make it appear as if all the issues have vanished.

    Keeping Stakeholders in the Loop with Subscriptions

    Not everyone who needs project updates logs into Jira daily. Filter subscriptions solve this problem by emailing your filter results to key people on a schedule you define.

    You can create a subscription for any saved filter. Navigate to the filter, click Details, and select New subscription. From there, you can configure:

    • Recipients: Send the report to yourself, an entire user group (like project-stakeholders), or specific individuals.
    • Schedule: Choose to send it daily, weekly, or on a specific day of the month.
    • Frequency: Pinpoint the exact time for the email delivery.

    This is a perfect way to automate communication. You can send a daily "Overdue Tasks" email to team leads at 8 AM or a weekly summary of new P1 bugs to engineering leadership every Monday morning. It pushes relevant information to the right people, keeping them informed effortlessly.

    Where to Use Your Saved Jira Filters

    Once created, filters can be plugged into almost every corner of Jira to drive visibility and automation. Here’s a quick rundown of the most common and powerful places to put them to use.

    Usage Area Primary Benefit Example Implementation
    Dashboards Provides at-a-glance, real-time project status and team workload visibility through configurable gadgets. A Pie Chart gadget showing the distribution of unresolved issues by assignee for the "Support Team – High Priority" filter.
    Agile Boards Defines the entire scope of a Scrum or Kanban board, controlling which issues are visible to the team. A Kanban board filter that excludes "Done" issues older than 30 days to keep the board focused on active work.
    Subscriptions Automates stakeholder communication by emailing filter results on a recurring schedule. A daily 8 AM email subscription for a "Critical Bugs – Unassigned" filter sent to the engineering leadership group.
    Automation Rules Acts as a trigger or condition for Jira Automation rules, enabling powerful "if-this-then-that" workflows. An automation rule that adds a comment to any issue from the "Customer Escalations" filter that hasn't been updated in 24 hours.
    Quick Filters Allows users to further refine the issues displayed on an Agile board with one-click JQL-based buttons. On a team board, a Quick Filter for assignee = currentUser() so each person can instantly see just their own tasks.

    Thinking of filters as reusable building blocks—not just saved searches—is the key to customizing Jira to fit how your team actually works.

    Advanced JQL Recipes for Common Team Scenarios

    Once you have mastered basic JQL, you can start crafting queries that solve specific, common team problems. These queries are about asking smarter questions to move from a reactive to a proactive process. Instead of just fighting fires, you can identify smoke before it becomes a major issue. A well-crafted filter can provide these answers instantly.

    Uncovering Workflow Bottlenecks

    One of the most powerful applications of an advanced filter is to identify where your process is breaking down. A common problem is work that stagnates or is reopened after being marked as complete, which often points to quality issues or communication breakdowns.

    Find Tickets Reopened After Being "Done"

    Use this query to find regressions or incomplete fixes. It instantly identifies any issue that was marked "Done" but has since been moved back to an open state.

    status was "Done" AND status != "Done"

    The WAS operator examines an issue's history. It is incredibly useful for building dashboard gadgets that track your team's "bounce-back" rate—a critical indicator of quality.

    Identify Stale "In Progress" Tasks

    Another common scenario is tasks that remain "In Progress" for too long without updates. This often indicates a developer is blocked or has been reassigned without updating the ticket.

    status = "In Progress" AND updated < -5d

    This filter flags any issue that has been in progress for more than 5 business days without any comment, work log, or status change. Run this query before your daily stand-up to surface discussions about hidden roadblocks.

    Dynamic Filters for Evolving Teams

    Static JQL queries with hardcoded usernames are difficult to maintain. When someone joins or leaves the team, the filters break. Use dynamic functions to make your filters resilient to organizational changes.

    The membersOf() function is essential here. It allows you to query based on a Jira group rather than a list of individual users.

    Pro Tip: If you manage a team, insist on having a dedicated Jira user group (e.g., 'dev-team-phoenix'). This small administrative task saves significant time by allowing you to build filters, boards, and permissions that update automatically as your team roster changes.

    See All Unresolved Issues for Your Team

    Instead of listing every person on your team, reference the group name to create filters that last.

    assignee in membersOf("dev-team-phoenix") AND resolution = Unresolved

    This query will always show the current, accurate workload for everyone in that group, no matter when it is run. It is the perfect foundation for team dashboards and board configurations that you can set once and rely on.

    Historical Analysis with CHANGED

    Sometimes you need to know not just the current state of an issue, but when a specific change occurred. The CHANGED operator allows you to pinpoint issues where a field was modified within a certain timeframe, which is invaluable for release management and process audits.

    Find Scope Creep in the Current Sprint

    Imagine you are a Product Manager who suspects that stories are being added to a sprint after it has already started. This scope creep can derail a team's commitments.

    sprint in openSprints() AND "Sprint" CHANGED AFTER startOfDay("-7d")

    This query identifies any issue in an active sprint where the "Sprint" field was changed within the last seven days (assuming weekly sprints). It is a powerful tool for protecting your team’s focus and initiating a data-driven conversation about unplanned work.

    These historical operators can be combined with triggers to create sophisticated workflows. To take this a step further, the next logical step is to explore Jira workflow automation.

    These recipes are just the beginning. The real power comes from combining these concepts to build filters that answer the unique questions your team faces daily. Mastering these advanced operators and functions is what elevates you from a basic Jira user to someone who truly understands and can optimize your team's workflow.

    Common Questions (and Quick Fixes) for Jira Filters

    Even after you master creating filters, a few common questions tend to arise. Here are straightforward answers to the most frequent sticking points.

    How Do I Create a Filter for My Entire Team?

    The most effective method is to use the membersOf() JQL function. Manually listing every team member in your query creates a maintenance problem, as it will break as soon as someone joins or leaves.

    The smarter approach is to ensure your team has a user group in Jira (e.g., 'alpha-squad').

    Once the group is created, your query becomes simple and future-proof:

    assignee in membersOf('alpha-squad') AND resolution = Unresolved

    This filter will always display the correct issues for the right people, automatically adjusting as your team changes without requiring any updates to the JQL.

    Why Is My JQL Query Showing an Error?

    Seeing a red 'x' next to your JQL is common. It almost always results from one of these simple errors:

    • Typos: Double-check the spelling of field names, operators, and statuses. A common mistake is typing status = 'In Progress' when the workflow uses status = 'In-Progress'.
    • Wrong Operators: The equals sign (=) cannot be used for a text field search. For the 'summary' field, use the "contains" operator (~). For example: summary ~ "database error".
    • Custom Fields: Custom field names must be exact. If a field name contains a space, like "Story Points," you must enclose it in double quotes: "Story Points" > 5.

    Hover your mouse over the red 'x' in Jira's validator; it will usually provide a helpful clue about what is wrong.

    A filter can be syntactically correct but still not show the expected issues. This is often a permissions issue. If the person viewing the filter lacks "Browse Project" permission for the projects in your query, issues from those projects will be hidden from their results.

    Can I Share a Filter With Someone Outside My Project?

    Yes, but it is a two-step process. You must consider both the filter's permissions and the project's permissions.

    First, when you save your filter, set its sharing permissions. You can share it with a project, a user group, or your entire organization.

    Second, the person you share it with must also have permission to see the issues from the projects your filter queries. If your filter includes "Project Falcon," they need "Browse Project" permission for Project Falcon to see any results.

    What's the Difference Between ORDER BY Created and ORDER BY Updated?

    Properly sorting your results can change the story your filter tells. Both created and updated are useful but solve different problems.

    ORDER BY created DESC sorts results to show the newest tickets first. This is ideal for a triage queue or monitoring incoming support requests, as it places the most recently logged issues at the top.

    ORDER BY updated DESC sorts by the last activity date, such as a comment, field edit, or status change. This is the best sort for a daily stand-up dashboard, as it brings issues with the most recent activity to the forefront.


    At Harmonize Pro, we believe that well-structured workflows are the key to unlocking team potential. Our flagship app, Nesty, helps teams turn complex processes into clear, automated checklists right inside Jira, ensuring no step is ever missed. Learn how Nesty can bring order and clarity to your most critical workflows.