Tag: definition of done

  • Boost Jira Workflows with checklists in jira: Simple, Repeatable, Done

    Boost Jira Workflows with checklists in jira: Simple, Repeatable, Done

    Managing complex Jira projects often feels like a choice between drowning in subtasks or using to-do lists everyone ignores. Both approaches create friction, leading to missed steps, messy handoffs, and delayed releases. This guide will show you how to shift from passive tracking to active, actionable process management directly within your Jira issues.

    Why Your Jira Issues Need More Than a To-Do List

    If your team is scribbling to-do lists in the description field or creating a mountain of subtasks for every feature, you're creating unnecessary work. A simple markdown checklist can't enforce your process. Conversely, dozens of subtasks for a single workflow add clutter and administrative overhead, making it impossible to see a task's true status at a glance.

    Visualizing the stark contrast between overwhelming paper to-do lists and an organized digital checklist with assigned team tasks.

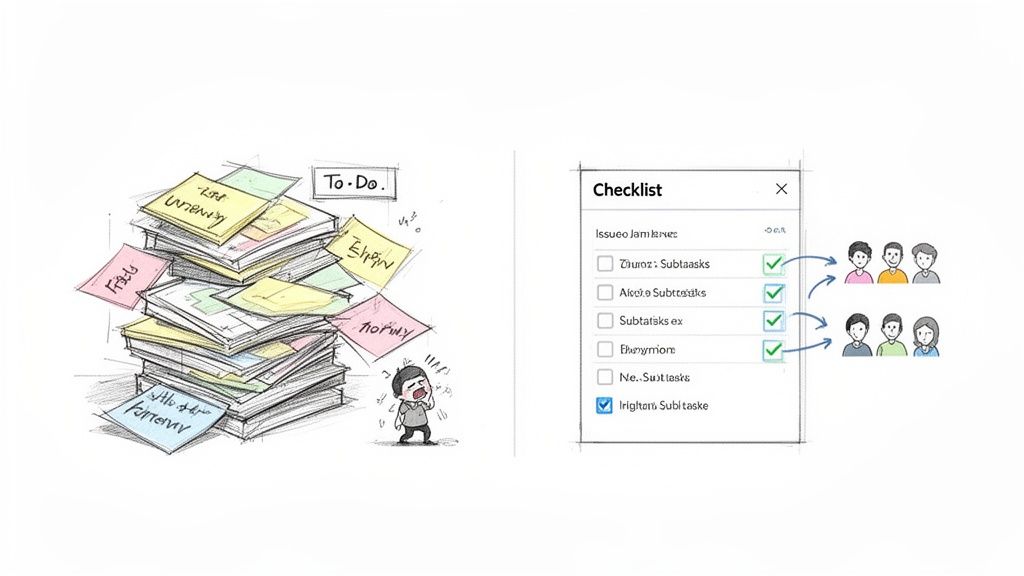
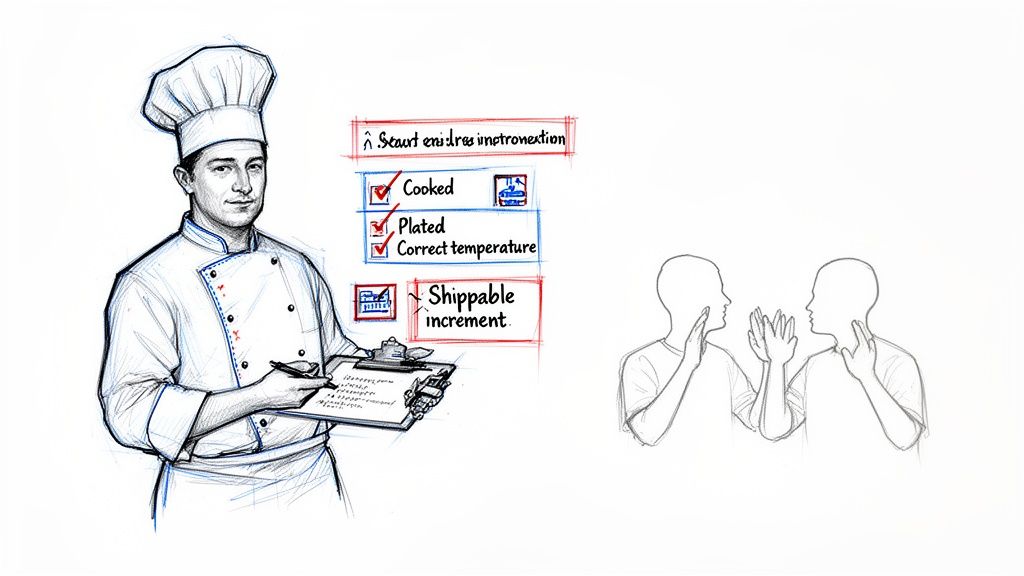
    Consider a standard developer-to-QA handoff. A developer resolves the ticket, but did they run all unit tests? Update documentation? Merge the final code? Without a structured process embedded in the ticket, these crucial steps are easily forgotten, leading to a frustrating back-and-forth that wastes time and hurts quality.

    From Passive Tracking to Active Management

    The core problem is that basic lists are passive reminders, not requirements. An effective process must be active—it must guide users, enforce standards, and automate the next step. This is where modern checklists in Jira fundamentally change how you work. Instead of just listing what needs to be done, they become an interactive part of the workflow itself.

    Your goal is to transform a static Jira issue into a dynamic, self-guiding workflow. Build your process directly into the task to enforce quality and keep everyone aligned.

    This shift is critical for scaling operations. As your teams grow and projects become more complex, relying on memory or manual checks is unsustainable. Embed structured, repeatable processes directly into your Jira issues to build a system that actively prevents errors before they happen.

    The Real-World Impact of Poor Processes

    Unstructured workflows create real problems that extend beyond simple frustration. Addressing these common pain points demonstrates the immediate need for a better system.

    • Inconsistent Onboarding: New hire onboarding can be a chaotic mix of random emails and shoulder taps. Implement a structured checklist to ensure every step—from IT setup to HR paperwork—is completed in the correct order, every time.
    • Chaotic Deployments: A release process involves multiple teams and critical steps. Forgetting a single action, like a final security scan, can cause a major production incident. Use a checklist as a mandatory quality gate.
    • Ambiguous "Done": Without a clear, enforceable Definition of Done, teams argue over whether a task is truly complete, leading directly to rework and scope creep.

    By standardizing these internal workflows, you not only improve efficiency but also build a more resilient and predictable delivery pipeline.

    What Can You Do with Jira's Built-in Checklists?

    Before exploring the Atlassian Marketplace, understand what Jira offers natively. Out of the box, Jira provides a basic way to create to-do lists using Markdown in an issue’s description or comment fields. This can be a sufficient starting point for teams with very straightforward needs.

    To create one, simply use brackets. For example, typing [ ] Task one and [x] Task two renders as a clickable to-do list. Anyone with edit permissions can check the boxes, providing a quick visual on progress for minor tasks. Use this approach for ad-hoc, non-critical items that are not part of a repeatable process. Think of it as a digital sticky note for an issue.

    How to Create a Markdown Checklist

    To add a basic checklist, edit the issue description or add a comment using the following syntax:

    • For an unchecked item: [ ] Action item to complete.
    • For a checked item: [x] This action item is done.

    For instance, a developer can add a personal reminder list to a bug fix ticket to ensure small cleanup tasks—like removing debug code or updating a comment—are completed before resolving the issue. This keeps the main ticket clean while still allowing for task breakdown.

    However, this simplicity is its greatest weakness. These native checklists in Jira are purely informational and are completely disconnected from the Jira workflow engine. This is a major limitation for any team trying to build a reliable, enforceable process.

    Native Jira checklists are like suggestions on a whiteboard—useful for quick notes, but they can't stop someone from bypassing the process. They lack enforcement power.

    This fundamental gap is where teams encounter problems. As processes become more complex and involve more people, relying on a system with no built-in controls becomes a significant risk. You are simply hoping everyone remembers to follow a static block of text.

    Where Native Jira Checklists Fall Short

    When your process is critical to quality, the limitations of native functionality become clear. These are not minor inconveniences; they directly impact your team's efficiency, consistency, and ability to scale.

    Here are the primary problems you will face:

    • No Automation: You cannot trigger any action based on checklist completion. Finishing a list cannot automatically assign the ticket to QA, send a Slack notification, or update a field. Every subsequent step must be manual.
    • No Reusable Templates: For standard processes like deployments or new hire onboarding, you must manually copy and paste the checklist into every new ticket. This is tedious, error-prone, and makes updating the process a nightmare.
    • Can't Block Transitions: This is the most critical failure. A native checklist cannot stop a user from moving an issue to the next status. A developer can push an issue to "In QA" even if the entire "Pre-flight Check" list is unchecked, completely undermining the concept of a quality gate.
    • No Reporting: There is no way to see how many checklist items are complete across multiple issues. You cannot track process adherence or identify bottlenecks hidden within your checklists.

    These limitations mean that while native tools are adequate for personal reminders, they are not designed for creating dependable, scalable workflows. They cannot enforce your Definition of Done or Definition of Ready, leaving your entire process vulnerable to human error.

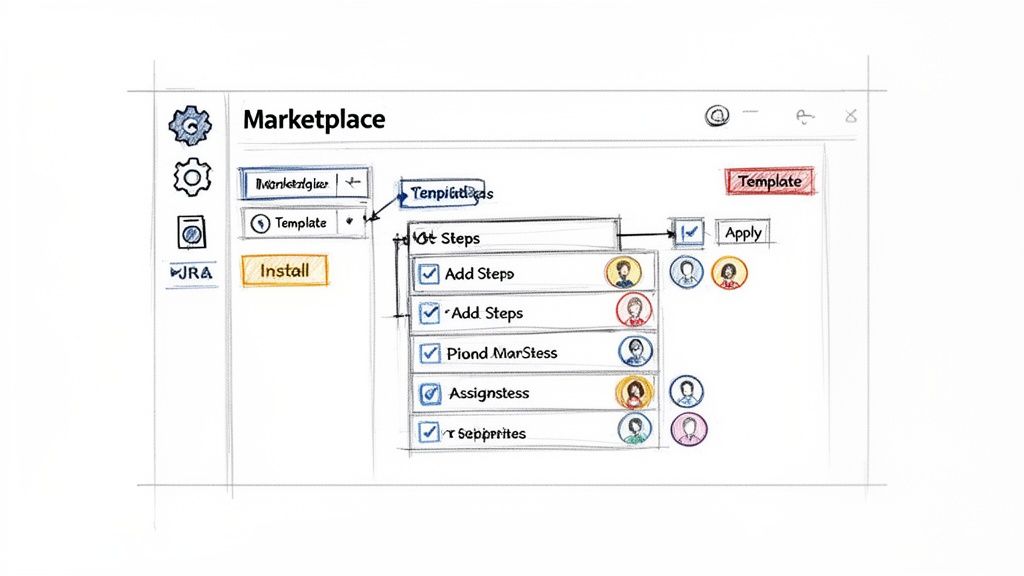
    How to Supercharge Your Workflows with Checklist Apps

    Jira’s built-in checklists are a starting point, but they cannot enforce critical, repeatable processes. To truly transform your workflows and integrate quality from the start, you must leverage dedicated checklist apps from the Atlassian Marketplace. These apps are designed to solve the problems that native functionality cannot address.

    A hand-drawn checklist for Dev to QA handoff, showing merge incomplete and blocking progress to QA.

    The difference is significant. You move from a static text list to an interactive, intelligent tool embedded directly within your Jira issue. The adoption of checklists in Jira has surged by over 150% among enterprise teams since 2020 because they prevent critical steps from being missed.

    A 2023 study revealed that teams using these add-ons cut task completion errors by 40%. Project managers could finally stop creating hundreds of subtasks and instead rely on integrated, step-by-step guidance. You can read more about these findings on the App Central forums. This approach allows you to build your process directly into the ticket, turning a simple task into a self-managing workflow that catches errors before they happen.

    Unlocking Advanced Checklist Features

    By implementing a powerful app like Nesty by Harmonize Pro, you gain access to features designed to eliminate ambiguity and enforce your team's standards. These capabilities are the foundation for building scalable, high-quality processes.

    Here are the features that provide immediate value:

    • Reusable Templates: Create a "New Feature DoD" checklist once and configure it to automatically apply to every new "Story" issue type. With templates, you standardize your process across the entire team, ensuring everyone follows the exact same steps, every time.
    • Mandatory Completion Gates: This is the most impactful feature. These apps can physically block a Jira issue from transitioning to the next status until specific checklist items are completed. A developer cannot move a ticket to "In QA" if the "Peer Review" item is still unchecked.
    • Unlimited Nesting: Real-world processes are rarely a flat list. Use nesting to break down large, complex items into smaller, more manageable sub-tasks. For example, a "Deploy to Staging" item can be expanded to reveal all necessary sub-steps, adding clarity without cluttering the main view.

    These features combine to create an environment where the right way to do things is also the easiest way. It removes guesswork and reliance on memory, which is essential for maintaining quality as you scale.

    By turning your procedural standards into automated requirements within Jira, you're not just tracking work—you're actively guiding it. The checklist becomes a quality gatekeeper, not just a suggestion.

    Understanding how Jira's app ecosystem extends its core capabilities is crucial when looking at different platform philosophies. For those weighing how Jira stacks up against other project management tools, a Weekblast vs. Jira comparison offers some great insights into these differing approaches.

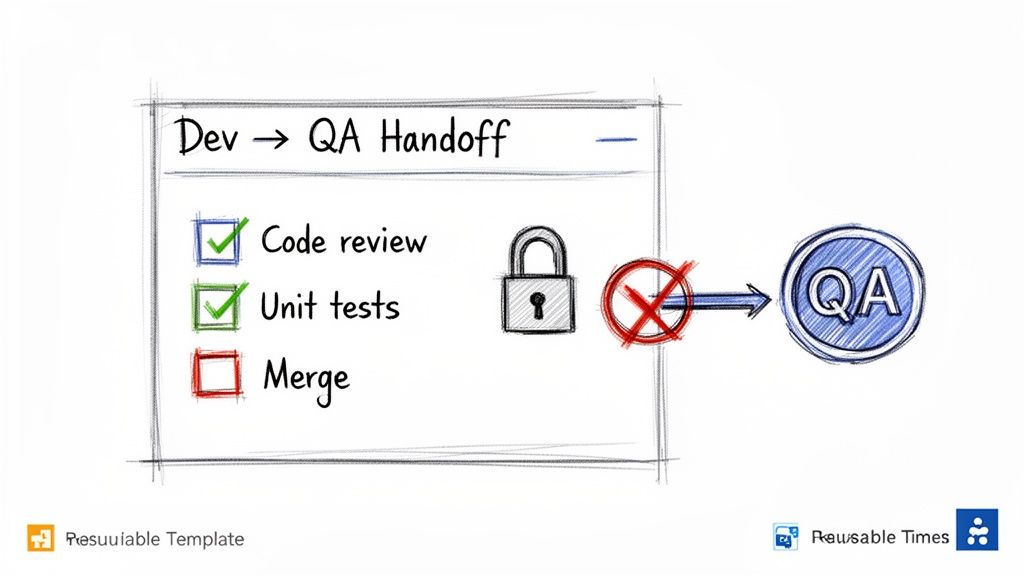
    Real-World Scenario: The Dev-to-QA Handoff

    Let's walk through a common and often painful workflow: a developer handing off a feature to the QA team. Without a solid process, this is a constant source of friction.

    We've all seen it: a developer marks a ticket "Done" and moves it to "Ready for QA." The QA engineer begins testing, only to discover the code wasn't merged, unit tests are failing, or documentation is outdated. The ticket is bounced back, and the cycle of frustration and wasted time begins.

    Here’s how to use a Nesty checklist to transform that broken process into a smooth, error-proof handoff. First, create a "Dev Complete Checklist" template. Next, configure it as a mandatory gate for any ticket moving into the "Ready for QA" status.

    Now, when a developer finishes their work, they see a clear, actionable list in the Jira issue:

    • Code & Testing
      • All unit tests passing (12/12)
      • Code peer-reviewed and approved
      • Feature branch merged to develop
    • Documentation & Assets
      • Technical documentation updated
      • UI/UX assets attached to ticket
    • Final Confirmation
      • Deployed to staging environment successfully

    The developer methodically works through the list, and the progress is transparent to everyone. The real power is revealed when the developer tries to transition the issue. If even one box is unchecked, Nesty blocks the transition and displays a clear message: "Please complete all mandatory checklist items before moving to QA."

    This simple gate eliminates the painful back-and-forth. The QA team receives the ticket with full confidence that all prerequisites are met, allowing them to focus on testing instead of administrative cleanup. This is how you use checklists in Jira to build quality directly into your workflow, saving hours and preventing costly mistakes.

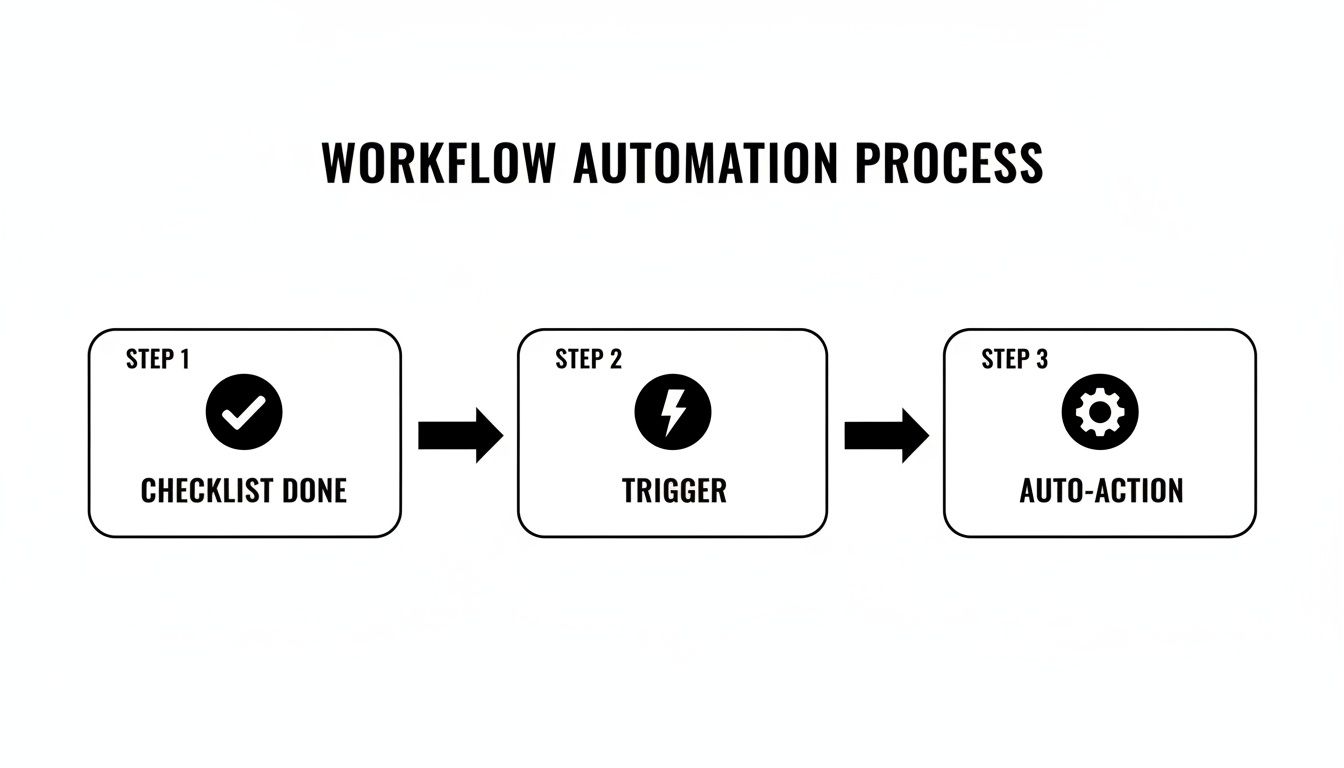
    Automating Handoffs and Key Process Triggers

    Once you master advanced checklists in Jira, the next step is to eliminate the manual work between process steps. Manual handoffs are a primary cause of process failure—someone forgets to reassign a ticket, notify the next person, or moves an issue forward prematurely. Automation makes these handoffs a reliable, invisible part of your workflow.

    With an app like Nesty, use smart triggers to orchestrate these transitions automatically. This is about more than saving a few clicks; it's about building a system that enforces your process, provides a perfect audit trail, and frees your team from tedious administrative tasks.

    Creating Intelligent Workflow Triggers

    The principle is straightforward: when a specific checklist or item is completed, Jira performs an action on your behalf. This turns a static to-do list into an active component of your workflow, ensuring the right person gets the right information at the right time.

    Set up these flexible triggers to react to different events:

    • Checklist Completion: Trigger an action when an entire checklist, like a "Developer DoD," is finished.
    • Item Completion: Fire an automation when a single critical item, such as "Deploy to Staging," is checked off.
    • Status Change: Automatically load a new checklist when an issue transitions to a new status.

    Use these to build powerful "if-this-then-that" rules directly inside your Jira issues, effectively programming your process without writing any code.

    Here’s how to design a typical automated handoff, moving from a developer's deployment tasks to assigning QA and notifying the team.

    Automated handoff process flow showing steps for code deployment, assigning QA, and Slack notification.

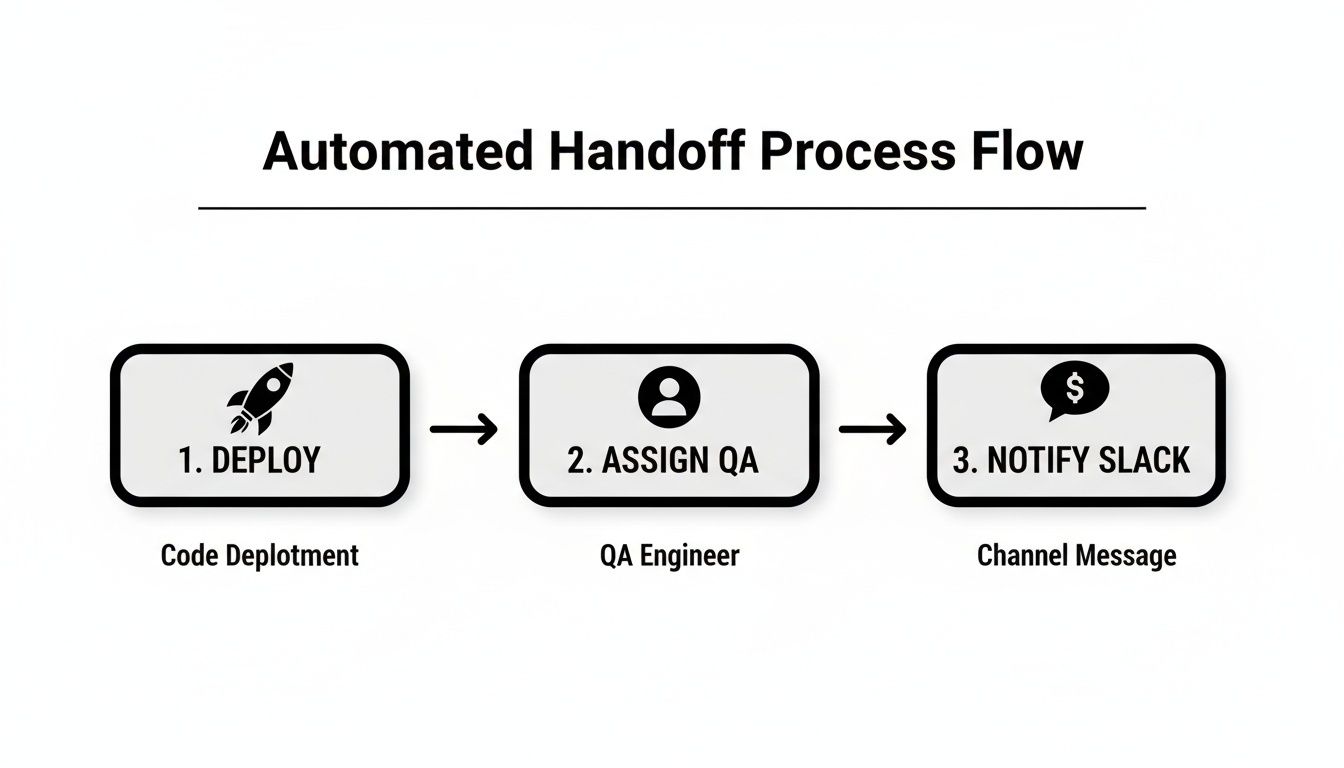
    What was once a series of manual actions becomes a single, smooth sequence, dramatically reducing the opportunity for human error.

    Comparing Native Jira Checklists vs Nesty for Harmonize Pro

    When deciding how to implement checklists, it's helpful to see what you get out-of-the-box versus with a dedicated app. Here's a quick breakdown:

    Feature Native Jira Checklists Nesty Checklists
    Basic To-Do Items Yes Yes
    Nested Checklists (sub-items) No Yes, with multiple levels
    Automated Triggers No Yes (on item/checklist completion)
    Saved Templates No Yes
    Conditional Logic No Yes
    Due Dates per Item No Yes
    Progress Tracking Basic Advanced (visual progress bars)
    Cross-Project Templates No Yes

    While Jira's built-in checklists are fine for simple, personal to-do lists, Nesty is designed for team processes where consistency and automation are crucial.

    Practical Automation Scenarios

    Let's apply this to real-world examples that technical teams face daily. These scenarios show how to use automation to fix common communication bottlenecks and process gaps.

    Scenario 1: The Dev → QA Handoff

    A developer just finished their "Deployment to Staging" checklist. The final item is "Confirm successful deployment."

    • Trigger: The "Confirm successful deployment" item is checked.
    • Action 1: The Jira issue is instantly reassigned from the developer to the lead QA engineer.
    • Action 2: A message is posted to the #qa-team Slack channel: "Ticket [KEY-123] is ready for testing in staging."

    This simple automation eliminates the risk of the ticket languishing in a queue. The QA lead is notified immediately, and the developer can move on to their next task.

    Automation transforms your process from a set of guidelines your team should follow into a self-managing system that ensures they do. It removes ambiguity and enforces consistency.

    Scenario 2: New Employee Onboarding

    An IT manager is setting up a new hire using an onboarding ticket. They have just completed the "IT Setup" checklist.

    • Trigger: The "IT Setup" checklist is fully completed.
    • Action 1: A new, linked Jira issue is automatically created from a template named "HR Training Session."
    • Action 2: This new ticket is assigned to the HR department with a due date set for three days from today.

    Here, automation orchestrates a handoff between two different departments. HR is engaged at the precise moment they are needed, and the IT manager doesn't have to remember to create and assign a separate ticket. This creates a smoother experience for the new employee. For a wider view on how checklists fit into the bigger picture, this business process automation checklist is a great resource.

    The Impact of Automated Quality Gates

    When you implement automated triggers, the impact on team performance and output quality is tangible. Data from Atlassian's 2023 DevOps trends report showed that 72% of software teams using Jira checklists saw a 30% drop in deployment failures, which they credited to structured quality gates and automated workflow triggers.

    For teams using Nesty, these benefits are even more pronounced. Our internal data shows teams achieve 40% less manual coordination and hit their deadlines more often, with a 22% higher on-time delivery rate, by centralizing their multi-step processes in one ticket.

    Automating handoffs and process triggers isn't a luxury; it's how you build a resilient, predictable system that scales with your team and ensures quality is integrated from start to finish.

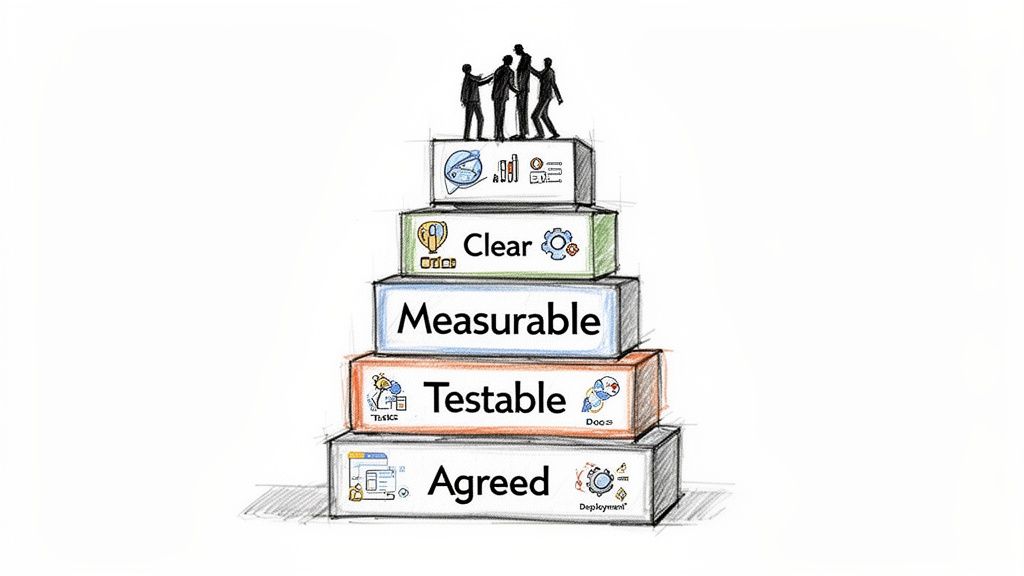
    How to Actually Enforce Your Definition of Ready and Done

    Every Agile team discusses its Definition of Ready (DoR) and Definition of Done (DoD). These agreements are the foundation of a healthy workflow, establishing a shared understanding of what it means to start and finish work.

    Too often, however, these definitions live on a forgotten Confluence page, treated as suggestions rather than standards.

    Checklists in Jira change this dynamic. By embedding your DoR and DoD directly into every issue, you convert abstract concepts into tangible, required actions. You are building quality gates directly into your workflow, which reduces ambiguity and rework.

    Two checklists, 'Definition of Ready' and 'Definition of Done', illustrating a project workflow with approval and release.

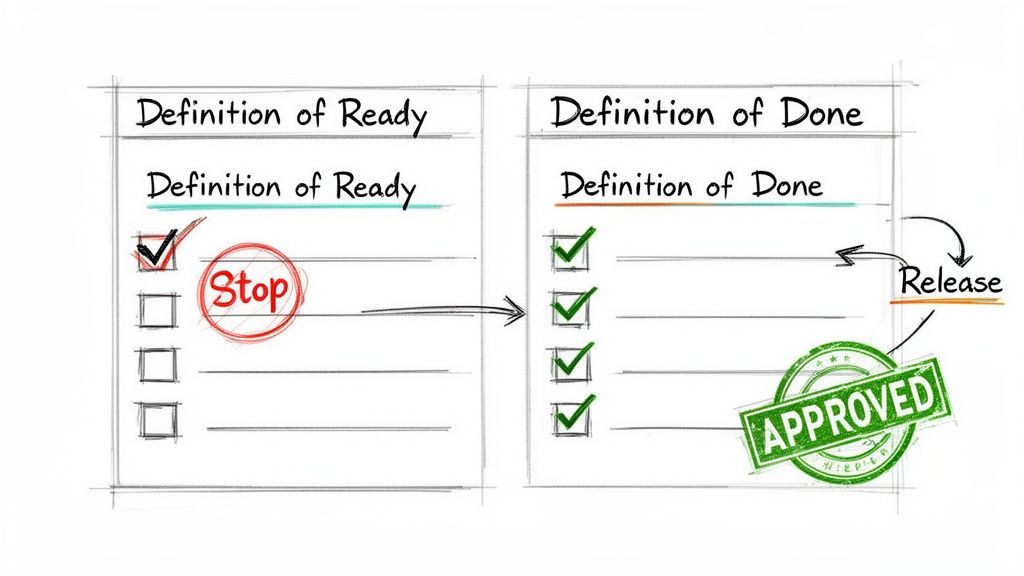
    The goal is to move from a culture of "I think it's ready" to one of "I can prove it's ready."

    Building Your Definition of Ready Checklist

    Your DoR protects your development team from poorly defined requirements and scope creep. It is the gatekeeper that ensures every user story is fully fleshed out before any code is written.

    Using a checklist app, you can automatically add a DoR checklist to every new user story. Here is a practical template to start with:

    • Story & Scope
      • User story is clearly written from the user's perspective.
      • Acceptance criteria are defined and testable.
      • The Product Owner has reviewed and approved the story.
    • Technical & Design
      • UI/UX mockups are attached and finalized.
      • Dependencies on other teams have been identified.

    This is not just for show. With a tool like Nesty, you can enforce a hard rule: an issue cannot be moved into "To Do" or "In Progress" until every one of those boxes is ticked. This simple automation forces the right conversations to happen at the right time. For teams dealing with complex testing, this becomes even more essential. You can learn more about how this connects to the bigger picture by exploring best practices for managing test cases in Jira.

    Creating an Ironclad Definition of Done

    Once a story is in progress, the DoD checklist becomes your final quality checkpoint, ensuring every feature meets your team's standards before release. This is how you prevent the "it's done, but…" scenario that leads to weekend bug hunts.

    A DoD isn't a formality; it's a commitment to quality. By embedding it as a mandatory checklist in Jira, you transform that commitment into an automated, repeatable action that protects your entire delivery pipeline.

    A standard DoD checklist for a development team might include:

    • Code Quality & Review
      • Code has been peer-reviewed and approved.
      • All unit and integration tests are passing.
      • Feature branch has been successfully merged.
    • Testing & Documentation
      • QA has completed testing and approved the feature.
      • All relevant technical documentation has been updated.
    • Release Confirmation
      • Deployment to production is confirmed.

    Like the DoR, configure this checklist to block the issue from being moved to the "Done" status until it’s complete. This is an incredibly powerful way to turn your team’s agreements into an unskippable part of the process.

    This strategy is effective for projects of all sizes. Over 80% of Jira Cloud migrations in 2023 used checklists to standardize workflows and onboarding. Atlassian’s own guide indicated a 35% faster ramp-up time for users when checklists were used to cover basic tasks, demonstrating how structure accelerates adoption. You can dig into these findings on Atlassian's adoption guide.

    Have Questions About Jira Checklists? We've Got Answers.

    When teams begin implementing checklists in Jira, several common questions arise. Answering them upfront will help you avoid headaches and make the transition smoother. Let's address the most frequent practical concerns and demonstrate why a dedicated app is often the key to unlocking true process management.

    Can I Create Standard Templates for Different Issue Types?

    Yes, and you absolutely should. This is a primary benefit of a dedicated checklist app like Nesty. Instead of manually retyping your "Definition of Done" for every bug, build a template once. Then, configure it to apply automatically based on the issue type.

    Set up your Jira project to:

    • Automatically add the "Bug Triage & DoD" checklist to every new Bug.
    • Create every Story with the "Definition of Ready" checklist already in place.
    • Pre-load every IT Task with the "New Hardware Setup" checklist.

    This saves a massive amount of time and, more importantly, enforces consistency. It guarantees your standard processes are followed on every ticket, eliminating "I forgot that step" errors.

    Building and automatically applying templates is the first step toward a scalable, standardized workflow. It ensures everyone on the team operates from the same playbook.

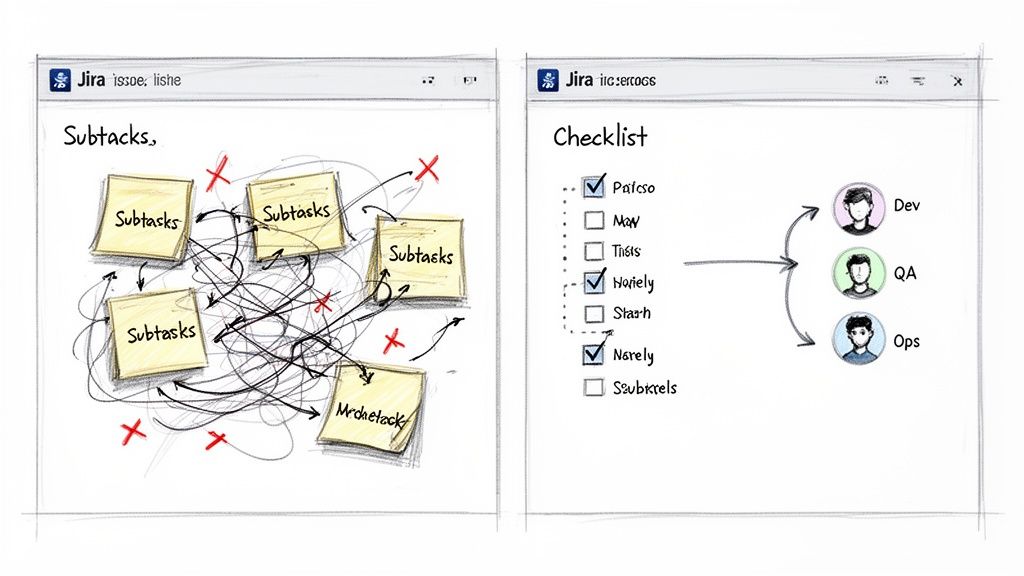
    How Are Nested Checklists Different from Subtasks?

    It is crucial to understand the difference between these two features. Both nested checklists and subtasks break down work, but they solve different problems.

    A subtask is a separate Jira issue. It has its own assignee, status, and can move through a workflow independently of its parent ticket. Use subtasks to break a large piece of work into smaller chunks that different people will handle at different times.

    A nested checklist, in contrast, adds detail to a single step within the parent issue. It does not have a separate assignee or status. It is a simple way to outline the sequence of smaller actions required to complete a main checklist item.

    Use this rule of thumb:

    • Use subtasks when a piece of work requires its own lifecycle, assignee, and detailed tracking.
    • Use nested checklists when you need to clarify the "how-to" for a single task within the parent issue. It is for adding process clarity, not creating more tickets to manage.

    What's the Best Way to Report on Checklist Progress?

    Native Jira checklists offer no meaningful reporting capabilities. This is a major reason to adopt an advanced app.

    The only effective way to report on progress is to use the JQL (Jira Query Language) functions provided by a capable checklist app. These custom functions allow you to build powerful filters and dashboard gadgets for a clear view of your operations. For example, with Nesty, you can run queries to find:

    • All issues where the "Deployment" checklist is more than 50% complete.
    • Any "High Priority" bugs where the "Security Review" checklist item is still unchecked.
    • A list of all onboarding tickets currently stalled on the "HR Paperwork" step.

    Pull these JQL queries into a Jira dashboard to give project managers and team leads a real-time, at-a-glance view of process status. This allows you to highlight gaps and potential bottlenecks before they become major problems.


    Ready to stop chasing down updates and start building intelligent, automated processes? Harmonize Pro's Nesty app turns your Jira issues into self-guiding workflows. Create reusable templates, enforce quality gates, and automate handoffs to eliminate errors and keep your teams perfectly aligned. Discover what Nesty can do for your team.

  • A Practical Guide to the Definition of Done in Agile Methodology

    A Practical Guide to the Definition of Done in Agile Methodology

    In agile development, the Definition of Done (DoD) is your team's shared quality contract. It's an actionable checklist that confirms a task meets every standard before it's called "done." This isn't just about finishing code; it’s a formal agreement that moves work from 'in progress' to genuinely 'complete,' eliminating ambiguity and ensuring everyone is aligned.

    What Is a Definition of Done and Why Does It Matter?

    A chef checks a list of criteria including 'Shippable increment,' illustrating the Definition of Done.

    Imagine a busy restaurant kitchen. Before any dish goes out, the head chef ensures it's cooked perfectly, plated correctly, and garnished just right. This guarantees every customer receives the same high-quality meal. Your team's Definition of Done (DoD) provides that same quality guarantee for your product.

    It’s the team’s collective agreement on what it means for a user story or task to be truly finished. This simple concept stops a developer from claiming, "I'm done," when the code hasn't been tested, documented, or merged. Instead, "done" becomes a tangible state: the code is written, peer-reviewed, has passed all tests, is documented, and successfully integrated.

    The Real-World Impact of a Clear DoD

    We’ve all experienced the "it's done, but…" scenario. This is the direct result of a missing or weak DoD. Work gets handed off, only to be rejected because it fails to meet unspoken expectations. This is a direct path to friction, rework, and missed deadlines.

    A strong Definition of Done turns fuzzy goals into a concrete, verifiable checklist. It becomes the team's single source of truth, aligning developers, QA, and product owners so that what gets delivered is always what was expected.

    This alignment has a measurable impact. Agile teams without a clear DoD often see 20-30% of their work return as rework. Conversely, teams that enforce a robust DoD report sprint completion rates jumping by as much as 47%, boosting overall output by 25%.

    Why It's a Foundational Practice

    At its core, a DoD builds a reliable engine for delivering value. It’s one of the most effective strategies to improve team productivity because it creates a foundation of trust and predictability.

    Here are the actionable benefits a solid DoD provides:

    • Builds Quality In: It prevents bugs and technical debt by ensuring every feature meets a non-negotiable quality bar from the start.
    • Aligns Expectations: It eliminates assumptions and ensures everyone—from junior developers to senior stakeholders—shares the same definition of "complete."
    • Improves Forecasting: When "done" means the same thing every time, sprint planning and release forecasting become dramatically more accurate.
    • Increases Transparency: Stakeholders gain confidence in what they're receiving, which fosters better communication and trust.

    The Building Blocks of a Powerful Definition of Done

    An effective Definition of Done (DoD) is more than a to-do list; it's a shared quality contract. It’s the team’s collective promise that work is actually finished, not just "code complete."

    Like a house needs a solid foundation, a strong DoD is built on essential characteristics. These pillars transform a vague idea of "completeness" into a concrete, reliable standard that everyone can execute against.

    A pyramid of criteria blocks: Agreed, Testable, Measurable, Clear, with people on top.

    This approach delivers tangible results. A 2022 Scaled Agile Framework (SAFe) survey of 500 Agile Release Trains found that teams with a consistent definition of done in agile methodology saw a 28% drop in integration failures. You can dive deeper into these core agile principles on the Agile Alliance website.

    The Four Essential Characteristics

    To create a DoD that works, ensure it has four non-negotiable traits. Each one builds on the last, creating an airtight agreement that prevents confusion.

    • Clear and Unambiguous: Use language so straightforward that a new team member can understand it instantly. Avoid vague terms like "tested" or "reviewed." Be specific: "Automated unit tests passed with 90% code coverage" or "Peer-reviewed by two other developers."

    • Measurable and Verifiable: Every item on your DoD checklist must have a clear pass/fail outcome. "Documentation updated" is weak. "User guide updated with new screenshots and a 'how-to' section" is verifiable and actionable.

    • Testable and Demonstrable: The team must be able to prove each criterion has been met. This could be showing a passed test suite, demoing the feature live to the Product Owner, or pointing to a merged pull request with required approvals.

    • Unanimously Agreed Upon: This is crucial. The entire team—developers, QA, product owners, designers—must build and commit to the DoD together. If it's dictated from management, it will fail. It must be a team-owned document.

    Expanding Your DoD Beyond Just Code

    A common mistake is making the DoD a developer-only checklist. A truly comprehensive Definition of Done covers the entire lifecycle of a user story, ensuring every aspect of the work is genuinely finished.

    A mature DoD acts as a quality gate for more than just code. It ensures that testing is complete, documentation is ready, and the feature is prepared for deployment, guaranteeing that "done" means ready to deliver value.

    To build a more robust checklist, structure your criteria across different domains.

    1. Code and Build Quality:

    • Code peer-reviewed and merged into the main branch.
    • Static code analysis checks pass without critical errors.
    • The feature builds successfully on the continuous integration server.

    2. Testing and Validation:

    • Unit and integration tests are written and passing.
    • Product Owner has verified all acceptance criteria are met.
    • QA has signed off after completing manual and exploratory testing.

    3. Documentation and Readiness:

    • End-user documentation and release notes are updated.
    • Technical documentation (e.g., API specs) is complete.
    • The feature is deployable with a single command or button click.

    Crafting Your DoD With Real-World Checklist Examples

    Knowing the theory behind the definition of done in agile methodology is one thing; putting it into practice is another. The most effective way to make a DoD useful is to build it as a series of practical checklists that scale with the work. A simple bug fix shouldn't face the same hurdles as a major feature release.

    An effective DoD isn’t a monolithic document. It's a living set of standards that adapts to the task's scope. This tiered approach prevents teams from getting bogged down on small jobs while ensuring major releases are rock-solid.

    A Tiered Approach to DoD Checklists

    Your DoD should be like a builder's blueprint—you use different plans for a single room versus the entire building. Let's break down three actionable tiers—User Story, Sprint, and Release—to see how the quality checks build on each other.

    Example DoD for a User Story

    This is the most detailed level, focused on a single piece of functionality. The goal is to confirm this one piece is built correctly and ready for integration.

    • Code Complete: All code is written and adheres to the team's coding standards.
    • Peer Review Passed: At least one other developer has reviewed and approved the code. To build a solid review process, use a guide like The Ultimate Code Review Checklist.
    • Unit Tests Written and Passing: Automated unit tests cover the new code and meet the team's minimum of 85% code coverage.
    • Acceptance Criteria Met: The Product Owner has confirmed the feature functions as required.
    • Code Merged to Main Branch: The feature branch is successfully merged into the main or develop branch without conflicts.

    Scaling Up to a Sprint-Level DoD

    At the end of a sprint, "done" means the entire package of work functions together as a cohesive, potentially shippable product increment. This DoD layer adds checks focused on integration and stakeholder sign-off.

    • All User Story DoDs Met: Every story committed to in the sprint has met its individual DoD.
    • Integration Testing Passed: All new features work together without introducing new bugs.
    • Regression Testing Complete: The automated regression suite has run, confirming existing functionality remains unbroken.
    • Sprint Demo Completed: The team has demonstrated the new functionality to the Product Owner and key stakeholders.
    • Product Owner Sign-Off: The Product Owner has formally accepted the entire sprint's output.

    A sprint-level DoD is the quality gate that transforms individual features into a valuable, working product increment. It shifts the focus from "did we build the pieces right?" to "did we build the right pieces together?"

    The Final Gate: A Release-Level DoD

    This is the final checkpoint before pushing a new version to customers. The focus here widens to include performance, security, and operational readiness.

    • All Sprint DoDs Met: The work from all sprints in the release meets the sprint-level DoD.
    • Performance and Load Testing Passed: The application holds up under expected and peak user loads.
    • Security Scan Completed: A security audit is done, and no high-priority vulnerabilities exist.
    • User Documentation Updated: All help guides, FAQs, and release notes are written and published.
    • Go-Live Plan Approved: The deployment plan has been reviewed and signed off by all relevant parties (e.g., DevOps, leadership).

    By structuring your definition of done in agile methodology across these tiers, you create a clear path to quality. This makes processes like managing test cases in Jira much more straightforward. This layered approach guarantees every detail is checked at the right time, leading to a smoother, more reliable delivery cycle.

    Common DoD Mistakes and How to Avoid Them

    Even with the best intentions, teams often make mistakes when first implementing a Definition of Done. The good news is these pitfalls are common and avoidable. Recognizing these anti-patterns early allows you to correct course before they derail your team. The key is to treat your DoD as a living agreement that helps everyone get work across the finish line, not a rigid set of laws.

    The "Boil the Ocean" DoD

    One of the most frequent mistakes is creating a DoD that’s too ambitious. A checklist that is too long or perfect is nearly impossible to complete within a sprint. This leads to missed sprint goals or, worse, teams cutting corners, which defeats the purpose.

    How to Sidestep This:

    • Start small and iterate. Begin with a simple, achievable DoD covering the absolute must-haves.
    • Use your retrospectives. Regularly discuss the DoD. Ask the team, "Which item on this list saved us last sprint? Which one created unnecessary friction?" This lets you refine your DoD based on real-world experience.

    Your Definition of Done should be a tool that empowers your team, not a cage that makes it impossible to ship. Aim for steady improvement, not immediate perfection.

    The Top-Down Mandate

    A Definition of Done forced on a team without their input is destined to fail. If developers and QA engineers don't help create the standards they're measured against, they won’t feel any ownership. The DoD becomes just another piece of bureaucratic red tape.

    To get genuine buy-in, the entire team—developers, testers, and product owners—must build the DoD together. This fosters a culture of shared responsibility.

    The "Set It and Forget It" Artifact

    A common failure is when a team crafts the perfect DoD, then files it away in a digital folder, never to be seen again. As soon as a sprint gets stressful, that forgotten checklist is the first thing to be ignored.

    To make your DoD effective, you must integrate it into your team’s daily workflow.

    How to Make It Stick:

    1. Keep it visible. Post your DoD checklist where everyone sees it, like a physical whiteboard or the team’s digital dashboard.
    2. Discuss it daily. Reference DoD criteria during stand-ups, especially when a story is nearing completion.
    3. Integrate it into your tools. Use a tool like Jira to add the DoD as a checklist template to every user story. This makes it impossible to ignore.

    By avoiding these common mistakes, your Definition of Done can transform from a static document into a dynamic guide that strengthens alignment, boosts quality, and ensures that "done" truly means done.

    Bringing Your DoD to Life in Jira

    A Definition of Done that exists only in a Confluence page is a suggestion, not a standard. To make it effective, you must weave it directly into your team's daily workflow. For teams using Jira, this means turning your DoD from a passive list into an active, unskippable quality gate.

    By building your DoD right into Jira, you create a system that upholds your standards and makes handoffs between team members smooth and predictable. The goal is to make doing things the right way the easiest way.

    Start Simple: Manual Enforcement in Jira

    Before automating, build solid habits using Jira's native features. The most effective starting point is an issue checklist. Add your DoD criteria as a checklist to your Jira issue templates, making it an unmissable part of every task.

    This manual approach provides immediate benefits:

    • Total Visibility: The entire team sees the exact requirements to complete a task, directly within the ticket.
    • Clear Accountability: Team members must physically check off each item, creating a simple but effective record of completion.
    • Built-in Consistency: Every user story starts with the same quality expectations, reducing "one-off" exceptions.

    For a detailed guide on this, learn how to set up a powerful checklist in Jira. It's a foundational step toward a more airtight, automated system.

    The Real Game-Changer: Automated Quality Gates

    Manual checklists are a great start, but they can be skipped. True enforcement comes from automation. Specialized Jira apps like Nesty from Harmonize Pro allow you to build quality gates that physically prevent tickets from moving forward until every DoD criterion is met.

    Imagine a developer tries to move a ticket from "In Progress" to "Ready for QA." With an automated DoD, Jira blocks the status change until every item on the developer’s checklist is complete. It’s no longer a suggestion; it's a hard rule embedded in the workflow.

    This is critical for breaking the common failure cycle many teams experience with their DoD.

    A flowchart illustrating DoD acquisition pitfalls: Too Ideal, Forced, then Abandoned, in a cycle.

    As shown, a DoD that is too idealistic or forced on the team is often abandoned. Automated enforcement breaks this cycle permanently.

    Automation turns your Definition of Done from a "should do" into a "must do." It shifts quality control from individual discipline to the process itself, ensuring nothing falls through the cracks—even during a crunch.

    Automating Handoffs, Artifacts, and All the Details

    True automation goes beyond blocking a status change. A properly configured system can trigger a sequence of events as soon as the final DoD item is checked.

    For example, once the checklist is complete:

    1. The ticket can be automatically reassigned from the developer to the lead QA engineer, eliminating manual handoffs.
    2. A notification can be instantly sent to the #qa-team Slack channel, informing them a story is ready for review.
    3. The system can verify that required artifacts, like a link to a build log or test plan, are attached before allowing the handoff.

    This automation creates a direct, tangible link between your Definition of Done and your team's output, saving time and guaranteeing process adherence.

    For teams on Jira, using an app like Nesty to build these automated gates can significantly reduce Dev-to-QA handoff times, often by as much as 40%, by ensuring all required information is present from the start.

    By integrating your DoD into your daily tools, you create a self-policing system that defends quality, reduces manual check-ins, and keeps the entire team synchronized.

    How to Evolve Your DoD for Continuous Improvement

    A great Definition of Done is not static. Treat it as a living document that grows with your team, adapting to new challenges and becoming more effective over time. The real power of a DoD is unlocked when it becomes a central part of your continuous improvement cycle.

    This evolution is driven by feedback. Just as you monitor an application's performance, you must monitor your process performance. Tracking the right metrics provides a data-backed view of how well your DoD is working.

    Using Metrics to Measure Your DoD’s Effectiveness

    To determine if your DoD is helping or hindering, focus on outcomes. A few key metrics act as powerful health indicators for your quality gates.

    Track these metrics:

    • Escaped Defect Rate: How many bugs are found in production after a release? A high or rising rate signals your DoD is missing critical quality checks.
    • Sprint Rework: How much time is spent fixing work that was marked "done" in a previous sprint? If this is increasing, your DoD may be too weak.
    • Team Velocity Trends: While not a direct quality measure, volatile or declining velocity can indicate friction. An overly cumbersome DoD can slow the team down.

    The Sprint Retrospective: Your DoD’s Best Friend

    The most important venue for evolving your definition of done in agile methodology is the sprint retrospective. This is the team's dedicated time to inspect and adapt its processes.

    A DoD that isn't discussed in retrospectives is a DoD that will eventually be ignored. Make it a recurring topic to ensure it remains relevant, valuable, and owned by the entire team.

    To facilitate a productive discussion, ask specific, actionable questions about your DoD.

    Questions to ask in your retrospective:

    • Which DoD item created more friction than value this sprint?
    • Where did our DoD save us from potential issues or bugs?
    • Is there a quality check we keep missing that should be added to our DoD?
    • Did we have to bend any rules in our DoD to get work done? If so, why?

    These discussions are fundamental to improving team collaboration. Strong processes are a cornerstone of a culture of quality. Explore more ideas in our guide on how to improve team collaboration.

    The insights gained empower your team to make iterative improvements, ensuring your DoD reflects the team's growing maturity. Implementing a multi-level DoD across user stories, sprints, and releases can accelerate this effect. Data shows this approach can lead to a 47% productivity spike and get products to market 50% faster by preventing incomplete work from moving forward. You can discover more insights on the impact of a strong DoD.

    Common Questions About the Definition of Done

    Implementing a process like the Definition of Done often raises questions. Answering them is crucial for building team confidence and ensuring the process sticks. Here are some of the most common questions and their actionable answers.

    Who Is Responsible for Creating the DoD?

    The short answer: the entire team.

    While a Scrum Master or Product Manager might initiate the conversation, the DoD must be a collaborative effort. If it is mandated by management, developers and QA will feel no ownership, and the process will likely be ignored.

    The most effective DoD emerges from a workshop where everyone involved in building the product contributes. This ensures the criteria are realistic, comprehensive, and supported by the people who will use it daily.

    How Often Should We Update Our DoD?

    Treat your Definition of Done as a living document. The best time to revisit it is during every Sprint Retrospective. This regular cadence allows the team to make adjustments based on recent experiences.

    A DoD that never changes is a DoD that's probably being ignored. It must evolve with the team's skills, the project's complexity, and the lessons learned from previous sprints to remain a valuable tool.

    Ask specific questions during retrospectives: "Did our DoD prevent any bugs last sprint?" or "Is any part of our DoD slowing us down unnecessarily?" These conversations keep your quality standards high and your process relevant.

    Can Different Teams Have Different DoD Checklists?

    Yes, they absolutely should. While an organization might have a high-level quality standard, the specific details of "done" will vary significantly between, for example, a backend API team and a front-end mobile team.

    Forcing a one-size-fits-all DoD across an entire engineering department leads to frustration. The goal is consistency in quality, not uniformity in process. Empower each team to define what "done" means for their context to achieve better results and a DoD that people actually use.


    Ready to stop chasing down updates and start enforcing your quality standards automatically? Harmonize Pro's Nesty app for Jira turns your Definition of Done into an automated, unbreakable workflow. Build quality gates, eliminate manual handoffs, and ensure every ticket meets your criteria before it moves forward. Learn how Nesty can bring true process control to your team at https://harmonizepro.com/nesty.

  • A Practical Guide to Using a Checklist in Jira for Better Workflows

    A Practical Guide to Using a Checklist in Jira for Better Workflows

    If you've ever tried to wrangle a complex process in Jira using only subtasks, you know the feeling. It's controlled chaos. A proper checklist in Jira is the solution, offering a structured, repeatable, and auditable way to turn a messy ticket into a clear, step-by-step workflow.

    Why Your Jira Workflow Needs More Than Subtasks

    Jira is a powerhouse for tracking big-picture work, but its native features often stumble on the nitty-gritty of process management. Teams frequently resort to creating a blizzard of subtasks or using basic Markdown checkboxes. These "solutions" quickly create noise, clutter backlogs, and lack the structure needed for real process enforcement.

    The fundamental issue is that subtasks were built to break down large chunks of work, not to manage a sequential, repeatable checklist. This mismatch is a source of daily frustration for many teams.

    Two sketched Jira screens: one with tangled subtasks, the other a checklist assigned to Dev, QA, Ops.

    The Chaos of Inconsistent Processes

    Without a standardized template, every new feature release or customer onboarding becomes an unpredictable adventure. One developer might remember to run security scans, while the next forgets. This isn't just an annoyance; it's a direct threat to quality and a wide-open door for risk. When your Definition of Done (DoD) is just a paragraph buried in a Confluence page, it’s rarely more than a suggestion.

    This is exactly where a dedicated checklist app provides immediate, tangible value. You create a master template, and suddenly, every critical step is accounted for—every single time.

    Common Pain Points with Native Jira Features

    Many teams try to make do with what Jira offers out of the box, only to hit a wall. Here are the all-too-familiar scenarios where native tools fall short:

    • Messy Dev-to-QA Handoffs: A developer moves a ticket to "Done," but did they update the documentation, deploy to staging, and run all unit tests? A QA engineer shouldn't have to play detective just to start their work.
    • Error-Prone Onboarding: Getting a new employee or customer up and running involves dozens of small but crucial tasks. Shoving them all into subtasks clogs the project board and makes it impossible to see the big-picture progress at a glance.
    • No Real Progress Tracking: A Jira issue with 10 subtasks might show 5 are complete, but that 50% figure tells you almost nothing. You can't see the actual progress within the workflow, which makes spotting bottlenecks a guessing game.

    For any process demanding consistency and an audit trail, subtasks and basic checkboxes are poor substitutes for a true checklist system. They might look the part, but they fail at reusability and enforcement.

    To see the gap clearly, compare what you get with Jira's native tools versus what a dedicated app brings to the table.

    Jira Subtasks vs Dedicated Checklist Apps

    Capability Subtasks & Checkbox Fields Dedicated Checklist Apps
    Templates Manual creation per issue, often copy-pasted Reusable, dynamic templates applied with automation
    Process Gates Non-existent; relies on manual checks Hard gates (blockers) that prevent status changes
    Automation Limited to issue-level triggers Item-level automation (e.g., assign user on check)
    Visibility Clutters backlogs and boards Contained within the parent issue for a clean view
    Audit Trail Difficult to track who did what, and when Detailed audit logs for compliance and accountability
    Reporting Basic issue-level reporting only Granular reports on checklist completion and timings

    The difference is clear. While subtasks have their place for breaking down epic-level work, they aren't designed for the detailed, repeatable processes that drive quality and efficiency.

    The market has responded to these pain points, pushing many teams to seek specialized solutions. Without checklist apps, teams can burn hours each sprint manually recreating their Definition of Ready/Done lists, leading to massive inconsistencies.

    Ultimately, the goal is to build your repeatable, auditable processes right inside Jira. By adopting a dynamic checklist in Jira, you stop managing chaos and start orchestrating clear, predictable outcomes. For more great ideas, take a look at our guide on Jira workflow best practices.

    Getting the Most Out of Native Jira Checklist Options

    Before installing a specialized app, master the tools Jira already provides. While limited for complex processes, understanding them helps you identify exactly when you’ve outgrown them. Each native option for a checklist in Jira serves a purpose, but they all come with trade-offs.

    Let's walk through the three main built-in methods: Markdown checklists, checkbox custom fields, and the classic subtask approach.

    Using Markdown for Quick Lists

    The fastest way to add a simple to-do list inside a Jira issue is with Markdown. Just type [] for an unchecked box or [x] for a checked one in the description or a comment to create an instant checklist.

    This is perfect for one-off, non-repeatable tasks specific to a single issue. Think of a developer jotting down quick reminders for a bug fix: "check logs," "reproduce on staging," "verify fix."

    But that simplicity is its biggest weakness. These lists are purely visual.

    • No Tracking: You can't run a JQL query to find all issues where "Code Review" is still unchecked.
    • No Automation: Ticking a box can't trigger any action, like reassigning the ticket to the QA team.
    • No Reusability: The list must be manually typed or pasted into every new issue.

    For one-off tasks, Markdown is great. For any repeatable process, it becomes a copy-paste headache.

    Setting Up Checkbox Custom Fields

    A more structured approach is to use custom fields. Create a field of the "Checkboxes" type and define a standard set of options. For instance, a "Deployment Readiness" field could have options like "Code Merged," "Tests Passed," and "Documentation Updated."

    This gives you a consistent set of items on every relevant issue, a significant step up from Markdown. More importantly, because it's a real field, the data is searchable. You can use JQL to find all tickets where "Tests Passed" isn't selected.

    The real limitation with custom fields is their flat structure. You can't nest items. This makes them a poor fit for multi-phase processes, like a full feature release that moves from development to QA and then to production.

    This rigidity forces you to create either very long, clunky lists or multiple custom fields, adding complexity to your Jira instance.

    The Subtask Strategy and Its Pitfalls

    For many teams, subtasks are the go-to for breaking down work, and they are often adapted to function as a checklist. You can create a series of subtasks under a parent story, with each one representing a step in your process.

    The main advantage here is that subtasks are full-fledged Jira issues. They can be assigned to different people, have their own statuses, and hold attachments, making them powerful for managing handoffs.

    The downside? Backlog clutter. A single user story with a 10-step process explodes into 11 separate items on your board. This makes it hard to see the forest for the trees and can turn sprint planning into a nightmare of endless scrolling.

    Furthermore, relying heavily on subtasks and custom fields can push you against platform constraints. In 2025, Atlassian updated Jira Cloud's issue limits. The worklog cap was raised to 10,000 per issue, while comments were standardized at 5,000 and attachments at 2,000. For checklist-heavy workflows in DevOps or QA, these limits directly affect usability. Exceeding them can trigger automatic moves to linked issues, disrupting visibility. You can dig into the specifics of these updated Jira Cloud limits and their impact.

    Each native option has its place. But when you need structured, repeatable, and nested checklists that don't flood your backlog or force you to worry about instance limits, it's time to look beyond what's built-in.

    How to Build Your First Dynamic Checklist

    Now, let's get practical. To build truly structured, repeatable processes, you need to move beyond Jira's built-in features. By using a dedicated Marketplace app, you can transform a messy ticket into a clear, manageable workflow with a dynamic checklist in Jira. It’s faster and more intuitive than you might think.

    Your journey starts in the Atlassian Marketplace, which you can open right from your Jira instance. Go to "Apps" > "Explore more apps" and search for a checklist tool. For this walkthrough, we'll explore features found in powerful apps like Nesty from Harmonize Pro.

    Once installed, most apps add a new panel directly into your Jira issue view. This is where you'll build, manage, and reuse your checklist templates without ever leaving the ticket you're working on.

    Creating Your First Checklist Template

    The template is the heart of a great checklist system. It's a reusable blueprint for a process that ensures every crucial step gets done, every time. Instead of frantically typing out a to-do list for every new bug report, you build the process once and apply it with a click.

    Let's walk through creating a "New Feature Deployment" checklist template.

    1. Start with the Big Picture: Inside the template editor, lay out the major stages of your deployment. These will become the top-level parent items. For instance:

      • Development Phase
      • QA & Testing Phase
      • Production Release Phase
    2. Nest the Nitty-Gritty Details: Now, under each phase, add the specific tasks that need to happen. This multi-level structure is something you can't achieve with Jira's basic checkboxes.

    This sketch shows how to turn a whiteboard idea into a structured, multi-level checklist template right inside a Jira app.

    A wireframe sketch of a JIRA-like marketplace application for managing checklist templates and steps.

    It’s a perfect example of moving from a messy process to a clear, hierarchical plan your team can execute.

    Fleshing Out the Nested Structure

    With your high-level phases in place, add the granular sub-tasks. This is the detail that prevents tasks from being missed when deadlines are tight.

    Under "Development Phase," you might add:

    • [ ] Code review completed by senior dev
    • [ ] Unit tests written and passing (>90% coverage)
    • [ ] Merge to main branch

    For "QA & Testing Phase," you could add:

    • [ ] Deployed to staging environment
    • [ ] Regression testing passed
    • [ ] User acceptance testing (UAT) sign-off received

    And for "Production Release Phase":

    • [ ] Final deployment to production
    • [ ] Post-release monitoring initiated
    • [ ] Announce release in company Slack channel

    This nested approach provides a clean, at-a-glance view of the entire process while capturing all critical details.

    A well-designed nested checklist transforms a Jira issue from a simple task tracker into a comprehensive project plan. It provides clarity not just on what needs to be done, but in what order and by whom.

    Assigning Ownership and Applying Templates

    A task list is useless if no one knows who is responsible. Good checklist apps let you assign individual items to specific people directly within the template.

    For our deployment example, pre-assign "Code review completed" to the team lead or tag the product manager for "Announce release." The moment that template is applied to a new Jira issue, those assignments are automatically set. The workflow kicks off immediately without manual delegation.

    Applying the template is the final step. Most apps let you manually add a saved template to an issue, but the real power comes from automation. Set up a rule so that any time a new issue with the type "Feature" is created, your "New Feature Deployment" checklist is automatically attached.

    This simple connection embeds your best practices directly into your team's daily work. You've now built your first dynamic checklist in Jira, turning a chaotic process into a predictable, structured, and auditable workflow.

    Make Your Checklists Do the Work: Automating Handoffs and Quality Gates

    A well-structured checklist is a great start, but a static list still relies on people remembering to check the boxes. The real impact comes when your checklist in Jira actively participates in your workflow. This is how you move from just tracking tasks to building an intelligent process that practically runs itself.

    The key is to use features that turn your checklist items into powerful triggers and gates. Instead of just hoping a developer completes all pre-deployment steps, you can make it physically impossible for them to move the ticket to QA until they do. That’s the core of building a self-managing, high-quality workflow.

    Use Blockers to Actually Enforce Your Rules

    Every team has a Definition of Done (DoD), but ensuring it's followed can feel like a full-time job. A "blocker" feature solves this. It lets you flag certain checklist items as mandatory, preventing a Jira issue from being transitioned until those tasks are complete.

    For the classic dev-to-QA handoff, set "Run all unit tests" and "Deploy to staging" as blockers. When a developer tries to move that ticket from "In Progress" to "Ready for QA" without checking those boxes, Jira will reject the transition. It’s a firm but gentle way to enforce your process without nagging.

    This logic also applies to your Definition of Ready (DoR). Imagine a checklist that automatically appears on new stories with items like:

    • Acceptance criteria are defined and clear.
    • User-facing mockups are attached.
    • The story has been estimated by the team.

    By setting these as blockers for the "To Do" to "In Progress" transition, you stop half-baked work from derailing a sprint before it even begins.

    Set Up Smart Triggers for Hands-Free Actions

    Once you've established quality gates, the next step is to automate what happens when key milestones are met. Smart triggers let you configure actions based on checklist progress, eliminating manual handoffs at critical points.

    This is where your workflow comes alive. Your checklist transforms from a passive list into the engine that drives the issue forward.

    A smart trigger turns a completed checklist item into a direct command for Jira. It’s the bridge between a human checking a box and the system taking the next step, ensuring the right person is notified or the right action is taken at exactly the right moment.

    For example, in a "Development" section of your checklist, set up a trigger so that when the final item is checked, the issue is automatically reassigned to the lead QA engineer. No more tickets sitting in a queue, waiting for someone to notice they’re ready for testing.

    Practical Automation Examples I've Seen Work

    The possibilities with triggers are nearly endless, but here are a few real-world examples that solve common bottlenecks:

    • Automated Slack/Teams Pings: When the "Production deployment complete" item is checked, a trigger can instantly post a message to your team's #releases channel.
    • Assigning Reviewers: As soon as a developer checks the "Ready for code review" box, a trigger can automatically assign the ticket to another developer for peer review.
    • Attaching Key Files: In an onboarding checklist, when the "Send welcome packet" item is checked, a trigger can automatically attach the welcome packet PDF to the Jira issue, creating a perfect audit trail.

    By 2025, Jira checklist apps have revolutionized bug reporting and onboarding, with standardized templates improving metrics by 45%. Harmonize Pro's Nesty exemplifies this: unlimited nested checklists with triggers cut onboarding from 10 to 4 days, notifying via Slack/Teams and attaching files precisely, reducing errors by 38% in 2025 case studies. You can find out more about how teams are using bug report templates to perfect Jira issues.

    These automated handoffs save time and build a more reliable, transparent process. When you combine blockers and triggers, your checklist in Jira evolves from a passive to-do list into an active enforcer of your team's best practices. To go deeper, check out our complete guide to Jira workflow automation.

    Practical Checklist Templates for Your Team

    Understanding how to build automations is one thing, but knowing where to start can be the hardest part. Staring at a blank slate can be intimidating. To give you a head start, here are three practical, ready-to-use templates for a checklist in Jira.

    These are based on real-world workflows that consistently work for software, customer success, and QA teams. Feel free to copy, tweak, and make them your own.

    New Feature Release Checklist

    Launching new features can be chaotic, with multiple teams juggling tasks and a high risk of things falling through the cracks. This template brings structure to that chaos, ensuring every step from code review to post-launch monitoring is completed. No more "oops, we forgot to update the docs" moments.

    • Development Phase
      • Code review completed by a senior developer
      • Unit tests written and passing (>90% coverage)
      • Accessibility (a11y) standards met
      • Merge to main development branch
    • QA & Testing Phase
      • Deployed to staging environment
      • Automated regression suite passed
      • Manual UAT (User Acceptance Testing) sign-off received
      • Performance and load testing completed
    • Production Release Phase
      • Final deployment to production servers
      • Post-release health monitoring initiated
      • Feature flag enabled for target user group
      • Official release notes published

    A standardized release checklist transforms your deployment process from an art into a science. It creates a predictable, low-stress rhythm that improves quality and reduces the risk of last-minute emergencies.

    The diagram below illustrates how completing a checklist can kick off an automated workflow, like notifying another team or transitioning the issue's status.

    A diagram illustrates a workflow automation process with three steps: checklist done, trigger, and auto-action.

    This kind of flow lets the system handle manual handoffs so your team can stay focused on what matters.

    Customer Onboarding Checklist

    First impressions are everything. A clunky onboarding experience can sour a customer relationship, while a great one is critical for retention. This process often involves a long sequence of tasks, and this template breaks it down into clear, manageable phases to ensure every new customer gets the same stellar kickoff.

    A structured approach is also fantastic for internal alignment. To dive deeper, learn more about how to improve team collaboration in our detailed guide.

    Here’s how you could structure this in a nested checklist using a tool like Nesty.

    Example Customer Onboarding Checklist Template

    Phase Task Item Sub-Tasks (Example)
    Phase 1: Kickoff & Discovery Conduct Kickoff Call – Schedule call with all stakeholders
    – Prepare and send agenda
    – Document meeting notes and action items
    Gather Requirements – Send customer requirements questionnaire
    – Review responses with internal team
    – Define success criteria and KPIs
    Phase 2: Technical Setup Provision Account – Create customer account in production
    – Apply correct subscription/license level
    – Configure initial permissions
    Configure Settings – Implement settings from discovery notes
    – Set up necessary integrations
    – Provide user credentials securely
    Phase 3: Training & Go-Live Conduct User Training – Schedule primary user training session
    – Deliver training based on their use case
    – Record session and share with customer
    Transition to Support – Confirm go-live date with customer
    – Introduce them to their support contact
    – Send welcome email from support team

    This level of detail ensures nothing is missed and provides a clear, repeatable path to success for every new client.

    Bug Triage Checklist

    When a bug report lands, the clock starts ticking. QA teams need a consistent way to gather essential information immediately. Without a solid process, developers waste time chasing down missing details, slowing down the entire resolution cycle. A bug triage checklist ensures every report is properly vetted and categorized before it hits the dev backlog.

    • Initial Verification
      • Confirm the bug can be reproduced on the latest version
      • Check for duplicate bug reports
      • Gather logs and console errors from the reporter
    • Information Gathering
      • Document clear, step-by-step instructions to reproduce
      • Attach relevant screenshots or screen recordings
      • Identify the browser, OS, and device where the bug occurs
    • Prioritization & Assignment
      • Assign a severity level (e.g., Critical, Major, Minor)
      • Assign a priority level based on business impact
      • Add relevant component or team labels
      • Assign the ticket to the appropriate development team or backlog

    Using a standardized checklist in Jira for bug triage means developers get high-quality, actionable reports every time. This cuts down the back-and-forth and lets them get straight to fixing the problem.

    Common Questions About Jira Checklists

    As teams begin to structure their workflows, a few questions about using a checklist in Jira consistently arise. Getting clear answers is key to moving forward with confidence and avoiding common pitfalls. Here's what I hear most often.

    Can I Import Checklists from Excel or a CSV File?

    Yes, but only if you have the right tool. This is a common need, especially when migrating existing processes into Jira. Jira's native options lack an import feature, but this is a core function for many apps on the Atlassian Marketplace.

    Apps like Nesty typically let you paste a list directly from a text file or use an import wizard. This is a massive time-saver, turning old process documents into dynamic Jira checklist templates in seconds and saving you from rebuilding them line by line.

    How Do Checklist Apps Affect Jira Performance?

    It’s a smart question. No one wants to install an app that slows down their Jira instance. Modern, well-built checklist apps are designed to be extremely lightweight.

    The secret is how they handle data. Instead of cluttering issues by creating hidden custom fields or subtasks, they manage checklist information within their own architecture. This design keeps your Jira issues lean and prevents you from hitting instance limits on worklogs, comments, or attachments, even with incredibly detailed checklists.

    This architectural choice is a major differentiator between a robust, enterprise-ready app and a simpler solution.

    Is It Possible to Report on Checklist Progress?

    Absolutely, but this is where you see a huge gap between basic checklists and advanced tools. Native Markdown checklists are purely visual and offer zero reporting. You can't query if an item is checked off or track completion rates across projects.

    Dedicated apps excel here. They often include built-in progress bars on the issue view and, more importantly, their own custom JQL functions. This unlocks powerful filters, custom dashboards, and detailed reports. For example, you can build a filter to instantly find all open tickets where the "Security Review" checklist item is still unchecked.

    What Is the Difference Between DoR and DoD Checklists?

    This is a cornerstone concept for agile teams, and understanding the distinction is crucial. Both are quality gates, but they operate at opposite ends of your workflow.

    • Definition of Ready (DoR): This is the entry gate. It's a checklist that ensures a story is truly ready for development before any work begins. Does it have clear acceptance criteria? Are the designs attached? A solid DoR prevents half-baked tasks from entering a sprint.
    • Definition of Done (DoD): This is the final inspection. The DoD checklist confirms that all required steps—like code reviews, QA testing, and updating documentation—are complete before the issue can be closed. It prevents incomplete work from being shipped.

    By using a dedicated app to build and enforce both DoR and DoD checklists, you create a powerful quality framework that maintains high standards from the moment a ticket is created to the moment it's closed.


    Ready to turn your Jira issues from simple to-do lists into dynamic, self-guiding workflows? Harmonize Pro's Nesty app lets you build unlimited nested checklists with powerful automation to enforce your processes, automate handoffs, and keep your teams perfectly aligned. Discover what Nesty can do for you.