Tag: jira automation

  • A Practical Guide to Time in Status Jira for Workflow Mastery

    A Practical Guide to Time in Status Jira for Workflow Mastery

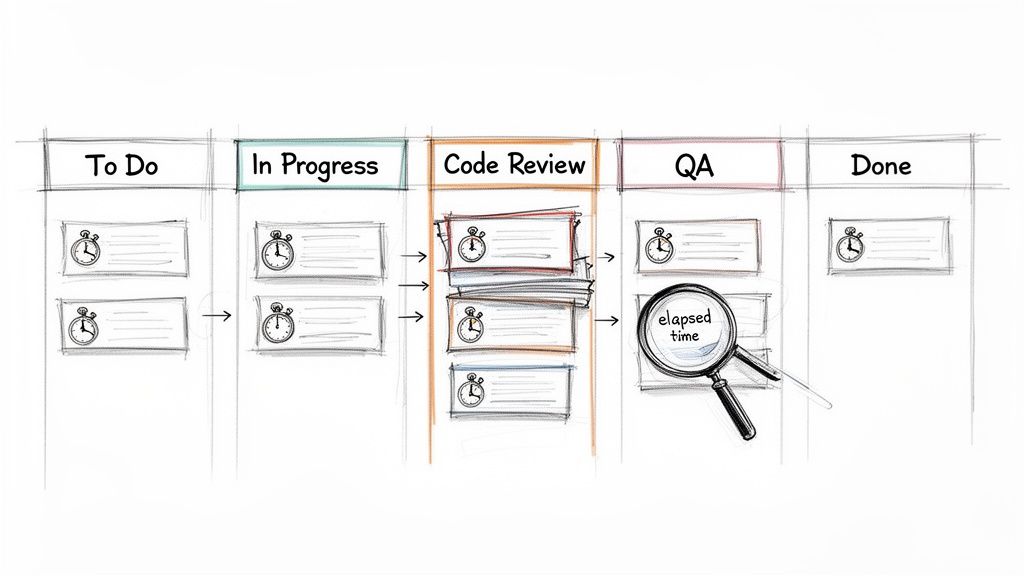
    So, what exactly is Time in Status in Jira?

    Put simply, it's the exact amount of time an issue hangs out in a specific stage of your workflow. Think 'In Progress,' 'Code Review,' or 'Waiting for QA.' It's a stopwatch for each step in your process, telling you precisely how long things actually take. This isn't guesswork; it's concrete data that shows you where work flies and where it gets stuck.

    Why Tracking Time in Status Is a Game-Changer

    A hand-drawn Kanban board illustrating a software development workflow, showing tasks, bottlenecks, and elapsed time.

    We've all been there—sprints feel crunched, and deadlines keep slipping, but it’s hard to put a finger on exactly why. Hidden delays are often the culprit. A task might look like it’s moving along, but the real story is how much time it spends just sitting idle between active work.

    Tracking time in status is the diagnostic tool you need to expose these hidden truths. It transforms that vague feeling of inefficiency into a clear, actionable insight. Is 'Code Review' the black hole where all tickets disappear? Do issues languish for days in 'Waiting for QA'? This one metric holds the answers.

    This kind of visibility is powerful. It equips everyone, from Scrum Masters to Product Managers, to make smarter, system-level decisions. It’s not about watching people—it's about watching the process.

    Uncovering Workflow Bottlenecks

    The number one reason to track this metric is its uncanny ability to shine a spotlight on friction. When you discover that tickets consistently spend 70% of their lifecycle in a single status, you've just found your biggest opportunity for improvement.

    A long time in status can point to a few common culprits:

    • Resource Constraints: Maybe the QA team is overloaded, or only one senior engineer is available to approve pull requests.
    • Clunky Handoffs: It could be that developers aren't providing the right info when they pass a ticket to testing, causing it to stall out.
    • External Dependencies: You might find a task is stuck 'Waiting for Feedback' from a stakeholder who isn't part of the core team.

    In fact, Atlassian’s own research found that teams can lose a staggering 25% of their time just looking for information. Time in status helps you see exactly where those information gaps and process snags are happening, so you can start reclaiming that lost productivity.

    Actionable Insight: Time in status isn't a performance metric for individuals; it's a health check for your process. Use it to find and fix systemic problems, not to point fingers.

    Making Data-Driven Decisions

    With hard numbers on status timing, your conversations change dramatically. Instead of saying, "I feel like code reviews are taking forever," you can state, "The average time in 'Code Review' was 4.2 days last sprint, up from 2.8 days the sprint before." Now you have a real problem to solve.

    This data-backed approach is what drives meaningful change. It’s a core component of any good developer time tracking software because it helps justify process improvements, argue for more resources, or adjust workflow rules with total confidence.

    Here’s a quick breakdown of how this metric directly helps your team.

    Core Benefits of Monitoring Time in Status

    Benefit Impact on Your Team Example Scenario
    Pinpoint Bottlenecks Identifies specific stages where work slows down or stops. Issues consistently spend 5 days in 'Peer Review' before moving to QA.
    Improve Predictability Helps create more accurate sprint forecasts and project timelines. Knowing the average cycle time allows for better estimation of future work.
    Optimize Handoffs Highlights friction between teams or roles, such as Dev to QA. A long 'Ready for Deployment' status may signal a cumbersome release process.
    Validate Process Changes Measures the impact of workflow adjustments over time. After simplifying the review process, 'Time in Review' drops by 40%.

    Ultimately, by understanding where time goes, you can focus your energy on the improvements that will have the biggest impact on your team's flow and output.

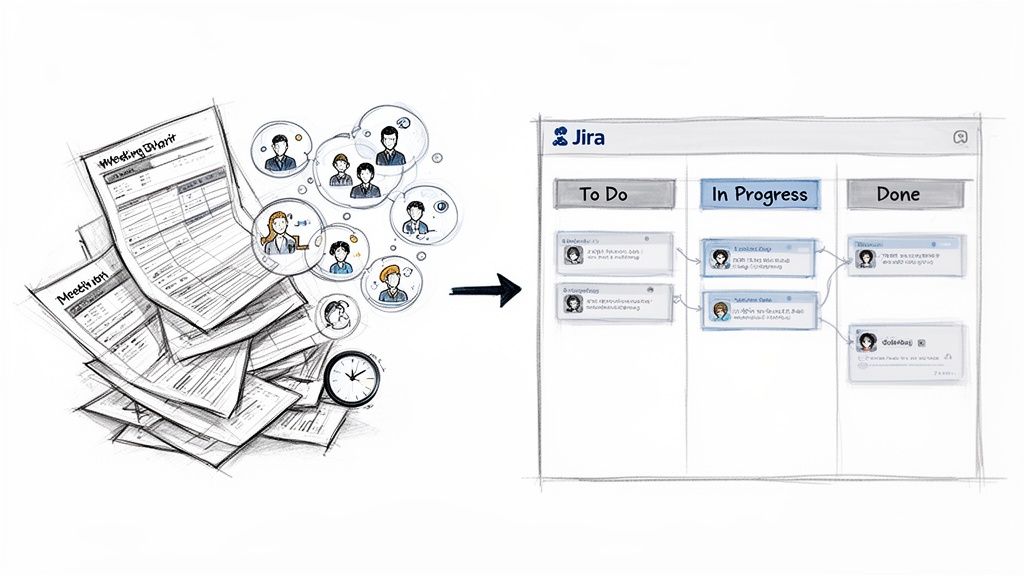
    Using Jira's Built-In Reports for Status Tracking

    You don't need a fancy Marketplace app to start finding answers. Jira already has powerful reporting tools baked right in. If you know where to look and how to read them, you can uncover the bottlenecks that are dragging your team down.

    We're going to focus on two of the most valuable reports for analyzing time in status in Jira: the Control Chart and the Cumulative Flow Diagram. Think of them less as static charts and more as diagnostic tools—an X-ray of your team's workflow health.

    Decoding the Control Chart

    To understand the cycle time for individual tickets, start with the Control Chart. It shows exactly how long issues take to get from a starting point (like 'In Progress') to a finish line (like 'Done'). Its real power lies in spotting outliers and measuring the consistency of your workflow.

    When you pull up a Control Chart, look for these key elements:

    • The Blue Line (Rolling Average): A downward trend is your goal; it means your team is getting faster. If it trends up, it's time to investigate what's slowing you down.
    • The Grey Area (Standard Deviation): This is your "normal" range. Most of your issues should fall within this zone.
    • Outliers: Any dots floating high above that grey area demand attention. These tickets took too long and are perfect for a "what happened here?" investigation in your next retro.

    Here’s what a typical Control Chart looks like, showing the cycle time for a batch of completed work.

    See those few dots way above the shaded area? While most issues are clustered near the average, those outliers represent significant delays that are worth digging into.

    Spotting Bottlenecks with the Cumulative Flow Diagram

    While the Control Chart zooms in on individual issues, the Cumulative Flow Diagram (CFD) gives you the bird's-eye view of your entire workflow. It’s a stacked area chart where each colored band represents a different status.

    The secret to reading a CFD is simple: watch the width of the bands.

    Actionable Insight: If a band for a specific status starts getting wider over time, that’s your bottleneck. It means work is piling up in that stage faster than it’s leaving.

    Imagine the 'In Review' band on your CFD starts to bulge. That’s a clear sign that your review process is overwhelmed. Bring this chart to your next team retrospective to kickstart a conversation on how to fix it.

    Filtering Reports to Get Actionable Insights

    Generic reports are interesting, but they often don't tell you what to do. The real magic happens when you use Jira Query Language (JQL) to filter these reports and zero in on specific parts of your process.

    Instead of looking at every issue, create filters for your board to analyze just one team's performance, a single feature, or a certain type of work.

    Here are a few JQL examples to get you started:

    • By Epic: parentEpic = "PROJ-123"
      • Use this to: See if a major feature is getting bogged down in a specific stage.
    • By Team: labels = "team-alpha"
      • Use this to: Compare different squads' workflows to see what's working well.
    • By Issue Type: issuetype = Bug
      • Use this to: Isolate your bug-fixing process and measure how quickly issues are resolved.

    When you combine sharp JQL filters with the Control Chart and CFD, you go from just looking at data to actually diagnosing problems. These native tools provide a solid starting point for anyone serious about improving their workflow.

    To get a broader look at all of Jira's reporting options, you can get a great overview when you learn how to create a report in Jira. This is especially helpful when you need to understand how to effectively track QA metrics using Jira for more specialized reporting needs.

    Building Custom Trackers with JQL and Automation

    While Jira's built-in reports offer a decent bird's-eye view, they often don't have the granularity you need for real process improvement. When the standard charts can't answer your specific questions about time in status in Jira, it’s time to build a custom solution with Jira Automation and JQL.

    This method shifts you from just observing data to actively collecting it. Instead of being limited to Jira's default cycle time calculations, you can create a permanent, searchable audit trail of every single status transition for every ticket.

    The Power of Automated Timestamps

    The strategy is simple and powerful: set up an automation rule that stamps the date and time every time an issue moves into a specific status. By creating custom date/time fields like "Review Start Time" or "QA Entry Time," you build a precise, queryable record of your workflow.

    Suddenly, you're no longer constrained by the pre-set calculations in Jira's reports. You have raw, accurate data that you can slice and dice however you see fit on your dashboards.

    Actionable Insight: Automating timestamps with custom fields puts you in the driver's seat. You can measure the exact time spent in any phase of your workflow, calculate specific SLAs, and build dashboards that spotlight the bottlenecks that truly matter to your team.

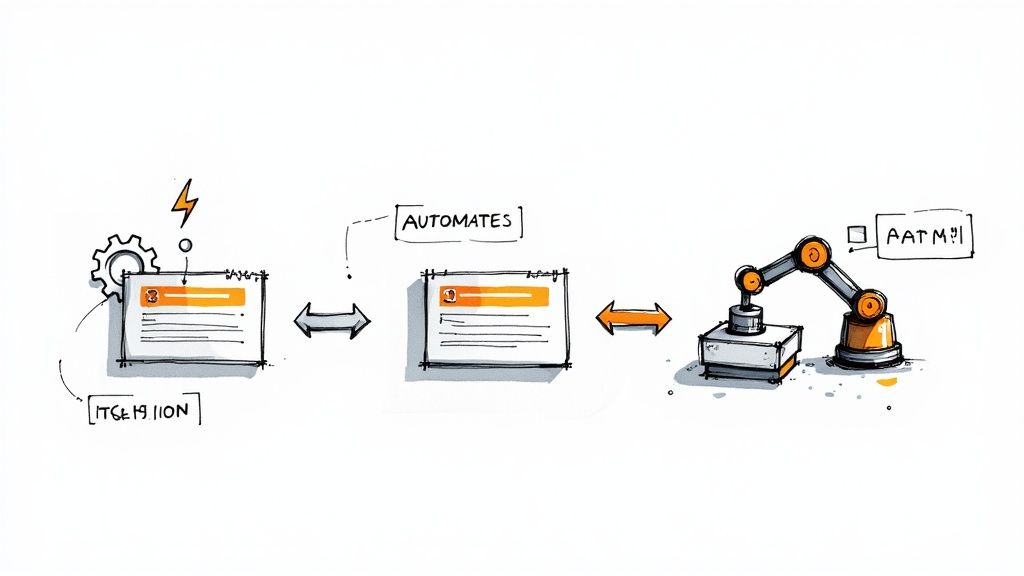
    This approach lets you turn a precise JQL filter into a powerful visualization, giving you a clear picture of your team's flow.

    A three-step process flow on Jira reports: JQL Filter, Control Chart, and Cumulative Flow.

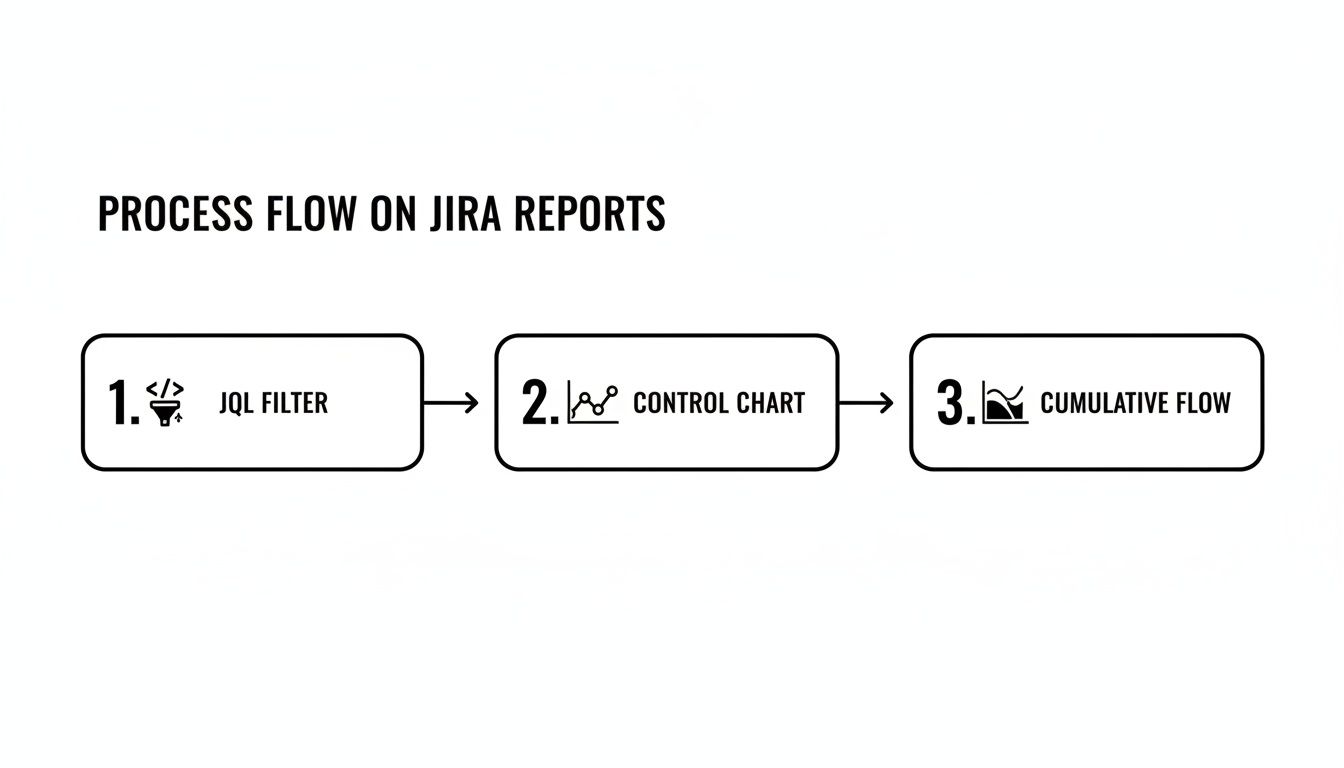
    As the diagram shows, a well-crafted JQL query is the foundation. It feeds directly into tools like the Control Chart or Cumulative Flow Diagram, turning raw data into real-world insights.

    Creating Your Status Timestamp Automation

    Let’s walk through a common real-world scenario. Imagine you want to track exactly how long issues linger in the "In Review" status to make sure pull requests aren't going stale.

    First, create two custom fields in your Jira instance:

    • A Date Time field called Review Entry Date.
    • A Number field called Time in Review (Days).

    Once those fields are ready, build a two-part automation rule.

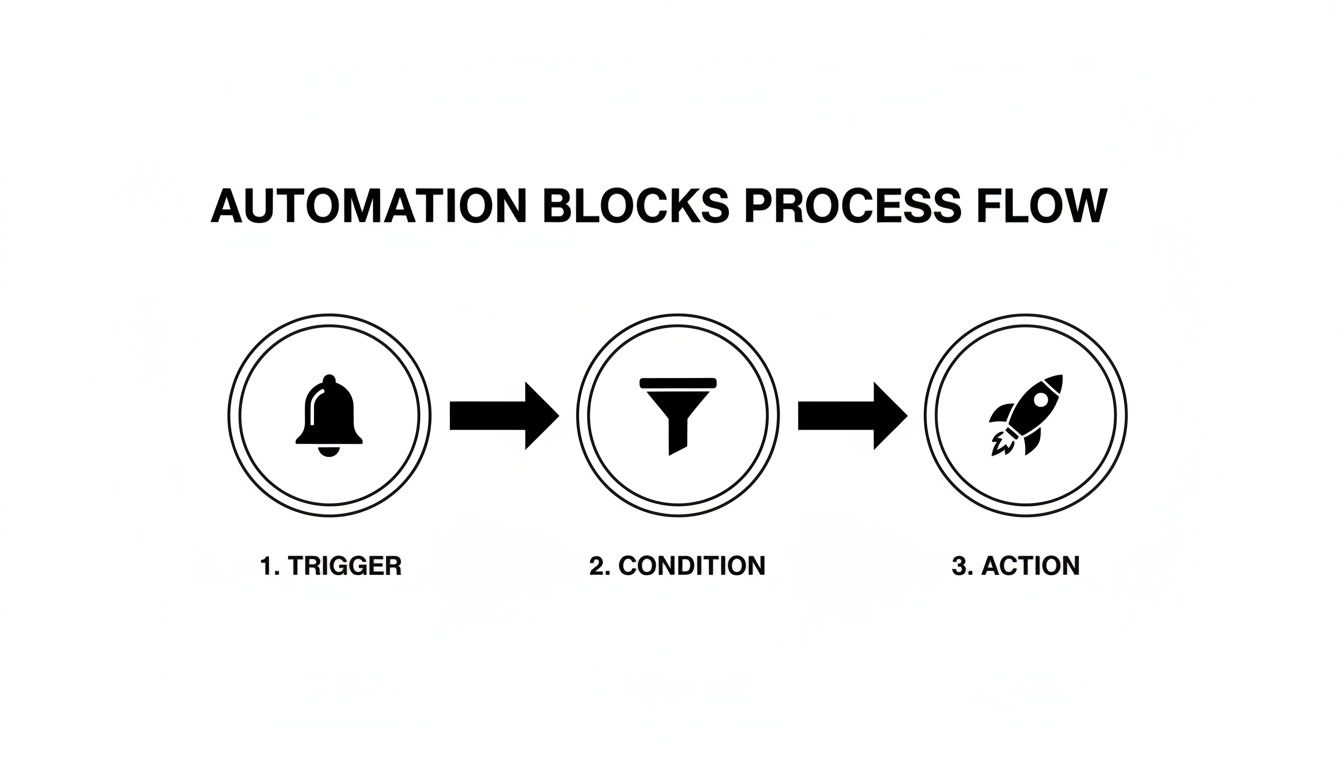
    Part 1: When an issue enters "In Review"

    • Trigger: When an issue is transitioned to "In Review".
    • Action: Edit the issue and set the Review Entry Date field to the current time using the smart value {{now}}.

    Part 2: When an issue leaves "In Review"

    • Trigger: When an issue is transitioned from "In Review".
    • Action: Edit the issue again. This time, set the Time in Review (Days) field using this smart value: {{now.diff(issue.customfield_XXXXX).days}}. You'll need to replace XXXXX with the actual ID of your Review Entry Date custom field.

    This simple setup creates an incredibly valuable feedback loop. The moment a developer resolves a code review, Jira instantly calculates and stores the total time that ticket spent waiting for approval.

    Unleashing Your Data with JQL

    With your automation collecting data, JQL becomes your primary tool for analysis. That custom number field is now a powerful filter you can use to ask very specific questions.

    For example, want to find all tickets that were stuck in review for more than three days last quarter? This JQL query will pull that list instantly:

    project = "Your Project" AND "Time in Review (Days)" > 3 AND resolved >= -90d

    This is the kind of insight that’s impossible to get from standard reports but becomes trivial with a bit of automation. You can save this query as a filter and plug it into a dashboard gadget to create a live "SLA Breach" widget for your team to monitor. To get the most out of this, you’ll want to know how to properly create a filter in Jira to power these custom views.

    This DIY approach also reflects a much bigger trend. With 93% of organizations reporting that automation has boosted their efficiency, using Jira Automation for this kind of tracking is a perfect, practical example. It cuts out the manual grunt work and gives you the exact data you need to fix those critical handoffs between teams.

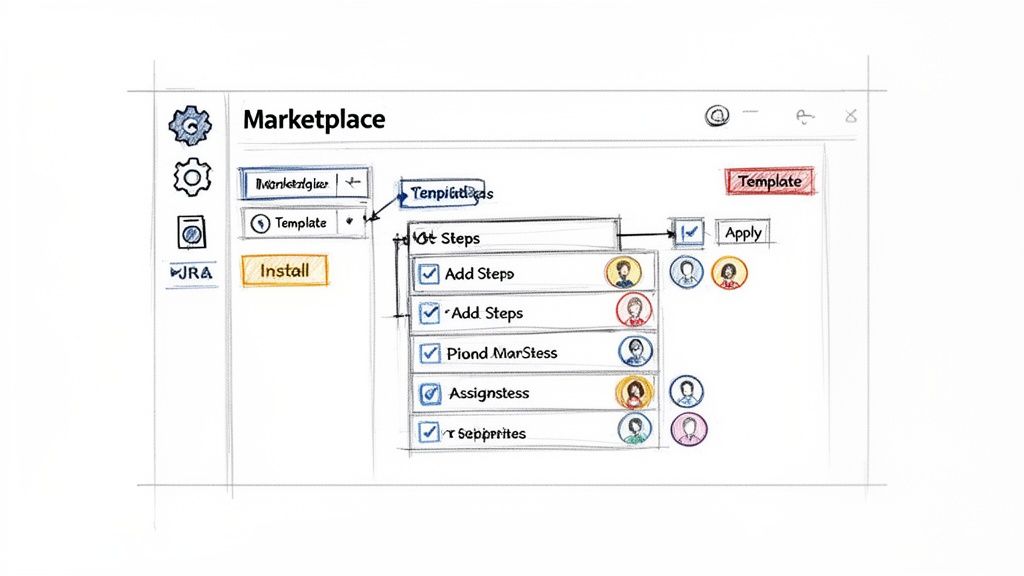
    When It’s Time to Bring in a Marketplace App for Deeper Insights

    Native Jira reports and custom automation are great places to start, but eventually, you might hit a wall. When you need more sophisticated reporting, proactive process controls, and solutions that work right out of the box, the Atlassian Marketplace is the place to go. These apps are purpose-built to solve the complex challenges of tracking time in status in Jira at scale.

    This is about more than just building prettier charts. It's about shifting your entire mindset from passively measuring delays to actively preventing them from happening in the first place. Marketplace apps give you a level of control and automation that's incredibly difficult to build yourself, especially as your team grows.

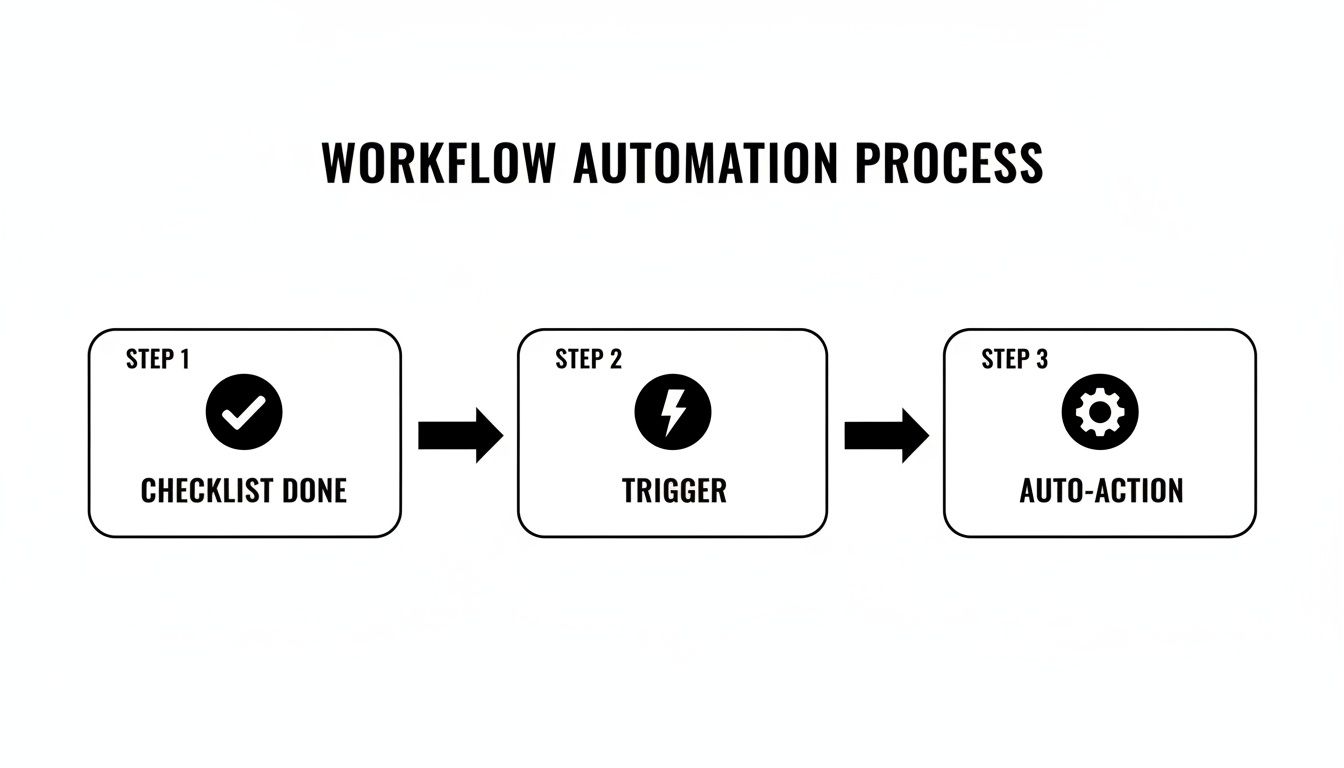
    Moving From Measurement to Proactive Intervention

    Sure, a custom automation rule can tell you a ticket was in 'Blocked' status for 48 hours after the fact. A dedicated Marketplace app, however, can step in and take immediate action while it's happening. That’s the real game-changer: moving from historical analysis to real-time process governance.

    Here are some actions you can implement with an app that are tough to do with native tools alone:

    • Automated SLA Alerts: An app can instantly notify a manager and escalate a ticket if it lingers in the 'Blocked' status for more than a set time, say, 24 hours.
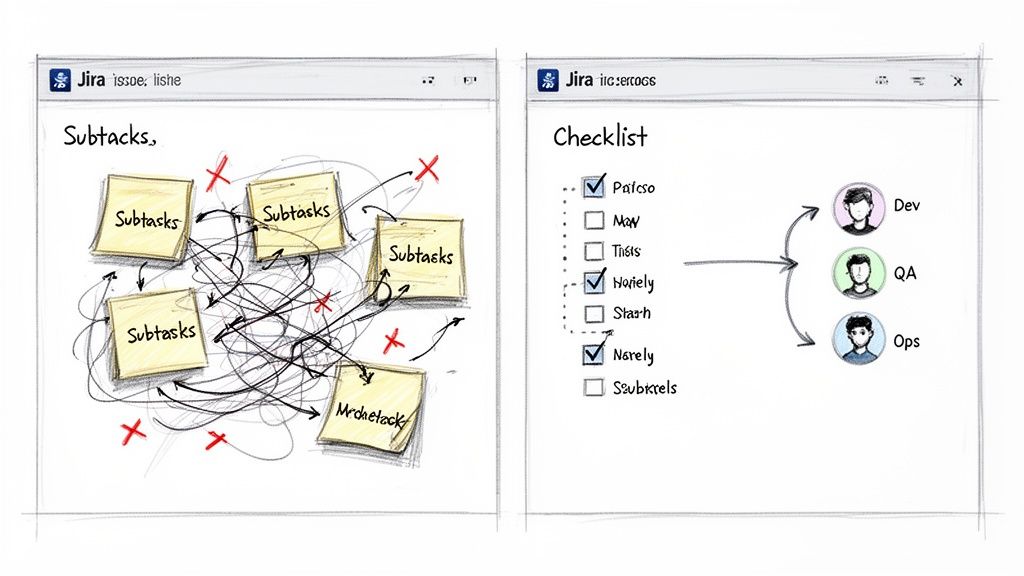
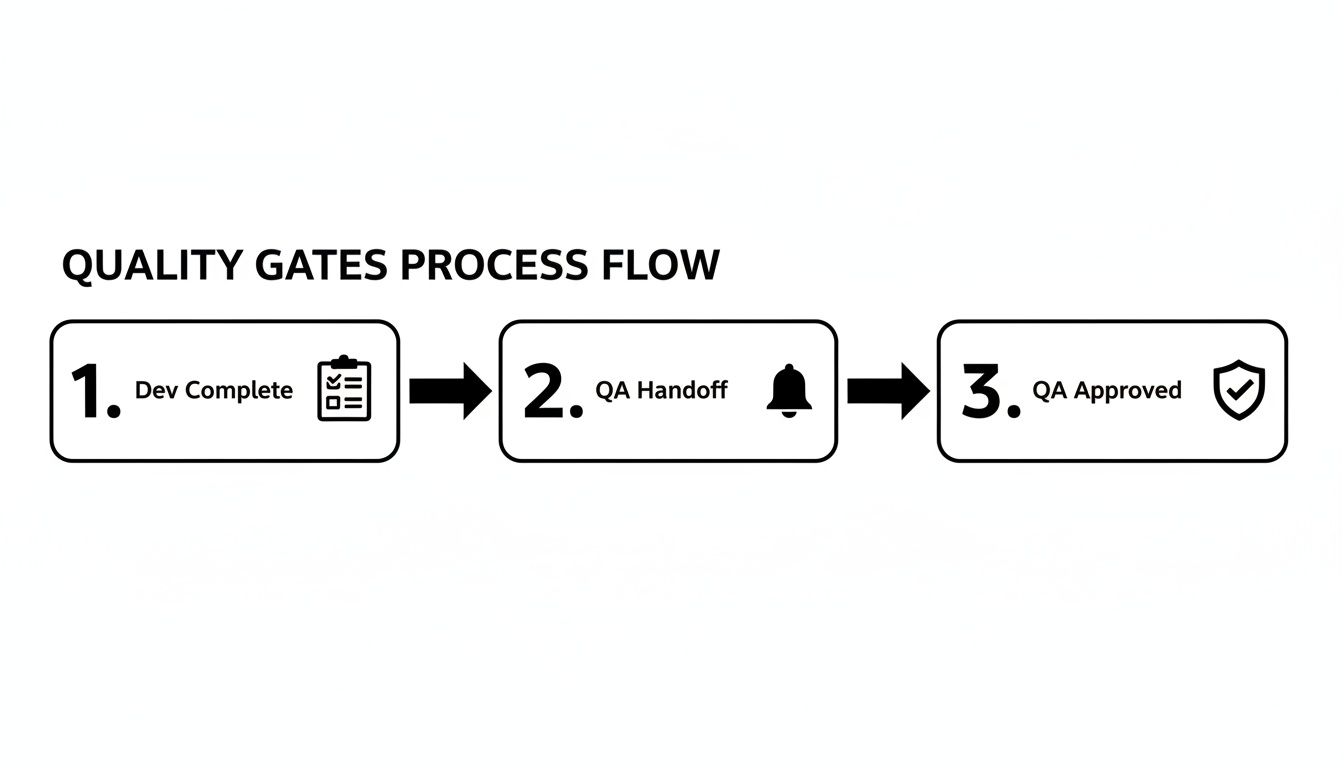
    • Enforcing Quality Gates: Some apps can act as a gatekeeper, preventing an issue from leaving 'In Review' until a specific checklist is completed and all its sub-tasks are closed out.
    • Complex Handoffs: An app like Nesty from Harmonize Pro can orchestrate tricky, multi-step handoffs. When a developer moves a ticket to 'Ready for QA', the app can automatically reassign it to the QA lead, ping a specific Slack channel, and even attach the latest build artifacts.

    This kind of proactive control hardens your process. It dramatically reduces the chance of human error and ensures everyone follows the workflow standards you’ve agreed upon, every single time. Your team is freed from the manual coordination that so often grinds things to a halt.

    When an App Delivers Clear ROI

    Investing in a paid tool needs a solid justification. The decision usually boils down to whether the app saves you more time, money, and headaches than it costs. For larger organizations, this isn't just a nice-to-have; it's a critical part of maintaining efficiency.

    With Jira Cloud now supporting up to 100,000 users per site, scalable and automated process controls are essential for good governance. As Jira's scalability for large enterprises has grown, Marketplace apps that manage time in status have become crucial for maintaining workflow integrity in these massive, complex instances.

    The Atlassian Marketplace is filled with powerful options for reporting and process control.

    This vast ecosystem of apps is designed to extend Jira’s core features, helping you tackle specific needs like advanced time tracking and deep workflow automation.

    Actionable Insight: The real value of a Marketplace app is its ability to turn your ideal process—the one you wrote down on a wiki page—into a self-managing, automated workflow that’s actually enforced inside Jira.

    So, how do you choose? Deciding between native tools, building your own automation, or buying an app involves a trade-off. Here’s a quick look at how they stack up.

    Comparing Methods for Tracking Time in Status

    This table breaks down the pros and cons of each approach, helping you decide which path is right for your team's needs and resources.

    Method Setup Effort Reporting Flexibility Best For
    Native Jira Reports Low Low to Medium Quick health checks and identifying obvious, high-level bottlenecks.
    Custom Automation Medium High Teams that need specific, granular data points not available in default reports.
    Marketplace Apps Low to Medium Very High Teams needing advanced reporting, proactive alerts, and enforced process controls out-of-the-box.

    Ultimately, the choice comes down to your pain points. If you find your team is constantly spending time manually pulling data, policing workflows, or chasing people down for updates, a Marketplace app is almost certainly a worthwhile investment. It lets your team get back to doing their actual work instead of just managing the tool.

    Practical Tips and Common Pitfalls to Avoid

    A checklist on a notepad: effective review practices with green checks and poor practices with red crosses.

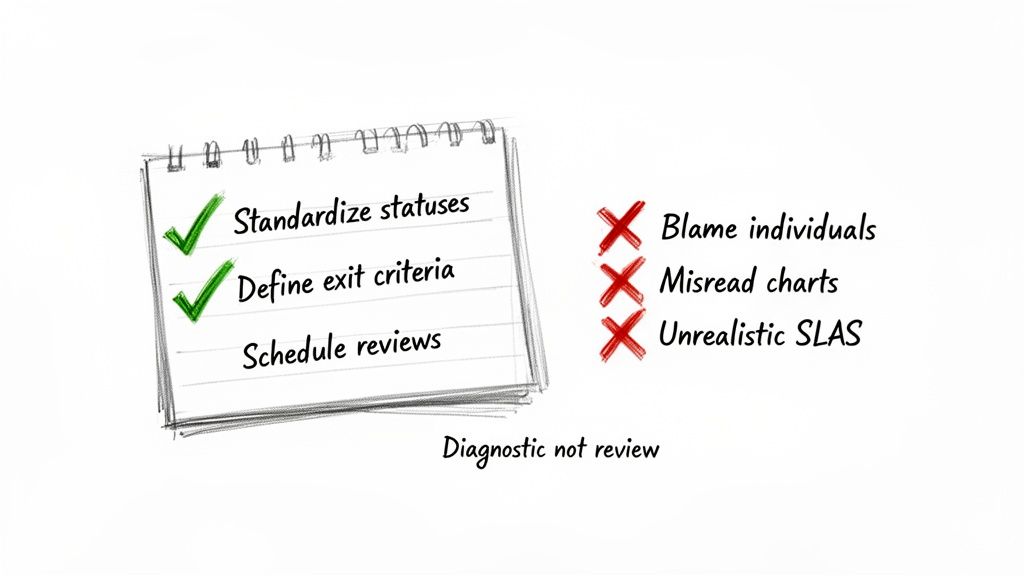
    Getting your hands on time in status Jira data is a great start, but the real magic happens in how you use it. Just looking at the numbers won't change a thing. You need a game plan to turn those metrics into genuine process improvements and build a culture of continuous improvement, not one of blame.

    Think of these metrics as a health check for your workflow, not a report card for your team members. When you see a long delay, the first question should always be, "What in our system caused this?" not, "Who took so long?"

    Standardize and Define Your Workflow

    Inconsistent workflows are the kryptonite of accurate data. If one team uses "Peer Review" while another uses "Code Review," you can't compare their performance. Getting everyone on the same page is the bedrock of reliable measurement.

    Before you track anything, get your team to agree on a single, shared workflow. Once you’ve done that, define crystal-clear exit criteria for every single status.

    What does it really mean for a task to move from 'In Progress' to 'In Review'?

    • All code is committed to the main branch.
    • Unit tests have been written and are passing.
    • The ticket is linked to the pull request.

    Having an explicit checklist like this kills ambiguity. It makes handoffs clean and complete, preventing the dreaded back-and-forth ticket bouncing that inflates your time-in-status metrics.

    Avoid Using Data as a Weapon

    This is the fastest way to make your metrics worthless. The moment you use time in status to call out a team member or factor it into a performance review, you've poisoned the well. People will immediately start finding ways to game the system to make their numbers look better, and your data will become a work of fiction.

    Actionable Insight: Treat a high time in status as a signal that the process is failing the person, not the other way around. Is a developer waiting on an environment? Is QA blocked by vague requirements? Those are system problems, not people problems.

    Instead of pointing fingers, use the data as a conversation starter. A consistently high time in the 'Blocked' status is your cue to get the team together and figure out how to improve dependency management or communication with other departments.

    Common Misinterpretations and How to Correct Them

    It’s tempting to glance at a chart and jump to a conclusion, but the data only shows you the what. It's up to you and your team to dig in and find the why.

    Here are a few common traps to avoid:

    • Misreading Control Charts: Don't freak out over one data point that's way off the average. A single complex task taking longer is normal. Instead, look for clusters of outliers or a steadily rising trend line—those signal a systemic issue.
    • Setting Unrealistic SLAs: Never pull a Service Level Agreement (SLA) out of thin air, like "all reviews must be done in 24 hours." First, you need a baseline. Measure your average time in review for a few sprints, understand your current reality, and then set a realistic improvement goal.
    • Ignoring 'On Hold' Statuses: If your reports don't pause the clock for statuses like 'On Hold' or 'Waiting for Customer,' your metrics will be skewed. Make sure your reporting tool can tell the difference between active work time and legitimate waiting periods.

    Ultimately, this is all about creating a healthy feedback loop. By setting clear rules for your workflow and using data to improve the system, not punish people, you can unlock significant gains. Exploring advanced Jira workflow automation can be a great way to enforce these standards and take the manual effort out of the equation.

    Answering Your Time in Status Questions

    Once you start digging into Time in Status, you’ll inevitably run into some specific, real-world questions. It's one thing to know the theory, but another to apply it to a messy, living workflow. Let's tackle some of the most common hurdles I see teams face.

    This isn't just about definitions; it's about making sure your data is clean, accurate, and actually helps you improve.

    How Should We Handle 'On Hold' or 'Blocked' Statuses?

    This is a big one. If you don't properly account for statuses where work is legitimately paused, your metrics for active statuses like 'In Progress' will get skewed, making it look like work takes much longer than it actually does.

    The best way to handle this is to configure your reporting tool—whether it's Jira's native Control Chart or a Marketplace app—to exclude specific statuses from its cycle time calculation. For example, you can tell the tool to start the clock when an issue moves to 'In Progress' and stop it when it hits 'Done', but completely ignore any time it spent sitting in 'On Hold'. This gives you a much truer picture of active work time.

    What's the Real Difference Between Cycle Time and Time in Status?

    It's easy to mix these two up, but they tell you very different stories about your workflow.

    Think of it this way:

    • Time in Status is a close-up view. It measures how long an issue sat in one single column, like ‘Code Review’ or ‘QA Testing.’ It’s perfect for pinpointing a bottleneck in one specific step.
    • Cycle Time is the wide-angle shot. It measures the total time an issue takes to travel from a starting point (like ‘In Progress’) to a finish line (like ‘Done’). It’s the full journey.

    The Bottom Line: You use Time in Status to figure out why your Cycle Time is what it is. If your overall Cycle Time is creeping up, a quick look at the Time in Status for each column will show you exactly which stage is the culprit.

    Which Report Should I Show to My Team vs. My Boss?

    Not everyone needs to see the same raw data. You'll get much better results by tailoring the report to who you're talking to. Here’s a simple breakdown I use:

    • For Developers and QA: The Control Chart is gold. It gives them direct, granular feedback on the cycle time of individual stories and bugs. It's the perfect tool for retrospectives when the team wants to discuss why a specific ticket took way longer than everything else.
    • For Scrum Masters and Project Managers: The Cumulative Flow Diagram (CFD) is your best friend. It gives you that bird's-eye view of workflow health and instantly shows where work is piling up. If you need to manage flow and spot systemic bottlenecks, this is your go-to report.
    • For Executives and Stakeholders: Keep it simple. A custom Dashboard Gadget showing high-level metrics is far more effective. For example, a pie chart showing the percentage of tickets that met the "Time in Review" SLA is much more useful to a VP than a complex scatter plot they have to decipher.

    Matching the report to the audience makes sure the data leads to action, not confusion.


    Ready to stop just tracking delays and start preventing them? Harmonize Pro's flagship app, Nesty, transforms your Jira tickets into self-managing workflows. Enforce quality gates, automate complex Dev→QA handoffs, and ensure every step is completed on time, every time—all within a single Jira issue. Discover how Nesty can bring order and predictability to your most complex processes by visiting the Harmonize Pro website.

  • A Practical Guide to Managing Test Cases in Jira

    A Practical Guide to Managing Test Cases in Jira

    To effectively manage test cases in Jira, your first actionable step is to move away from native sub-tasks and install a dedicated test management app from the Atlassian Marketplace. This one change provides structured test repositories, clear traceability from requirement to defect, and reporting dashboards that standard Jira can’t offer. It’s how you transform Jira from a task tracker into a QA command center.

    Why Your Native Jira Testing Is Holding You Back

    If you're currently using Jira sub-tasks or custom labels for test cases, you've felt the pain. It starts with a few tests tacked onto a user story. Soon, you're lost in a tangled web of tickets where tracking progress is manual detective work, and proving a feature is fully tested is a shot in the dark.

    This ad-hoc approach simply doesn't scale.

    A visual metaphor showing interconnected software modules, with red lines and bugs emerging from a central system crack.

    This disorganization has real consequences. Critical bugs slip through because you lack a clear view of test coverage. Release delays become the norm as teams scramble to manually verify what’s been tested.

    We've seen teams repurpose user stories for tests and end up with 30-40% more manual rework, slowing down their release cycles by up to two weeks per sprint. This is a direct hit to productivity.

    The Limits of Standard Jira

    At its core, Jira is a phenomenal issue and project tracker. But it wasn't built for dedicated test management. Forcing it into that role creates immediate, practical roadblocks.

    • No Reusability: Test cases created as sub-tasks are trapped. You can't pull them into a regression suite or reuse them in another project without tedious copy-pasting, which introduces errors.
    • Poor Visibility: Without a central test repository, there’s no single source of truth. To get an overview of all test suites or the overall health of product quality, you have to manually compile data.
    • Broken Traceability: Can you quickly prove that every requirement in a release is covered by a test case? With native Jira, this means exporting data to a spreadsheet and manually connecting the dots—a process that fails audits and wastes time.

    This setup forces QA teams into administrative busywork, pulling them away from their primary mission: ensuring a high-quality product. You can start improving your process by reviewing common workflow pitfalls described in https://harmonizepro.com/blog/changing-workflow-in-jira.

    The real cost of native Jira testing isn't just wasted time; it's the erosion of confidence. When you can't trust your process, you can't be certain about your product's quality, which leads to release anxiety and customer-facing defects.

    Native Jira vs. Dedicated Test Management Apps

    To understand the gap, let's compare the capabilities side-by-side. The difference between using sub-tasks and a purpose-built tool is stark.

    Capability Native Jira (Using Sub-tasks/Labels) Dedicated Apps (e.g., Nesty, Xray) Actionable Insight
    Test Case Reusability None. Each test is a one-off sub-task. Central repository allows reuse across cycles and projects. Action: Build a regression suite once and reuse it indefinitely, saving hours each sprint.
    Traceability Manual and fragile. Relies on linking issues. Built-in, end-to-end traceability from requirements to defects. Action: Generate a traceability matrix report in one click to satisfy audit requirements.
    Reporting & Metrics Basic issue reports. No QA-specific dashboards. Advanced dashboards for test coverage, pass/fail rates, and more. Action: Create a live dashboard to show stakeholders real-time quality metrics.
    Execution History Buried in issue comments or requires custom fields. Detailed, versioned history of every test run. Action: Pinpoint when a test started failing by comparing execution histories.

    The difference is clear. Dedicated apps introduce a structured, professional workflow that native Jira was never designed to support.

    A Path Forward with Dedicated Tools

    The solution isn't to ditch Jira—it's to augment it. Dedicated test management apps integrate directly into your Jira instance, adding the necessary structure and features. These tools introduce specialized issue types for test cases, test plans, and test executions, giving everything a proper place.

    This fundamental shift brings order to the chaos. Many teams have found success by leveraging a brilliant combination for a perfect bug reporting workflow in Jira to handle the defect side of the equation.

    When you layer in smart automation, like the kind Nesty provides, you can build truly intelligent workflows that connect all the pieces. This sets the stage for the practical, step-by-step guidance that follows.

    How to Structure Test Cases for Clarity and Reuse

    To move past ad-hoc testing, you need a blueprint. Building a solid foundation for managing tests in Jira means creating a structure that brings clarity, encourages reuse, and scales with your team. Your first step is to create a centralized test repository right inside Jira by using a dedicated "Test Case" issue type from a test management app.

    Hand-drawn sketch illustrating multiple test cases and expected results organized into test suites.

    This simple move immediately separates your testing artifacts from the development backlog, making them searchable, reportable, and, most importantly, reusable. It's a small change with a massive impact on organization.

    Designing the Perfect Test Case Issue Type

    A great test case ticket leaves no room for interpretation. It provides all the necessary information so any team member can execute it correctly. Before you build this in Jira, review how to write test cases effectively to master the fundamentals of clarity and reuse.

    To standardize everything, configure your "Test Case" issue type to include these key fields:

    • Summary: A short, clear title (e.g., "Verify user login with valid credentials").
    • Component: The part of the application under test (e.g., Authentication, Checkout, User Profile).
    • Preconditions: What must be true before the test starts? (e.g., "User account testuser@email.com must exist and be active.")
    • Test Steps: A numbered list of specific actions.
    • Expected Results: For each step, the exact, observable outcome that proves it passed.

    This structure removes guesswork and drives consistency across your entire QA practice.

    Think of a test case as a recipe. A vague recipe gives you inconsistent results. A precise one ensures anyone in the kitchen can create the same dish perfectly, every time. Your Jira test cases need to be that clear.

    The Power of Atomic Test Steps

    Vague test steps are the number one cause of flaky test results. Instead of "Test the login form," break it down into atomic actions. This makes the test easier to follow and simplifies debugging.

    A Poor Example:

    • Step 1: Go to the login page and try to log in.

    A Much Better Example:

    1. Action: Navigate to the application's login URL.
      Expected Result: The login page loads with fields for username and password.
    2. Action: Enter a valid, registered username into the username field.
      Expected Result: The text is accepted by the field.
    3. Action: Enter the corresponding valid password into the password field.
      Expected Result: The text is masked and accepted.
    4. Action: Click the "Login" button.
      Expected Result: The user is redirected to their account dashboard.

    If this test fails on step 4, the developer knows exactly where the process broke, speeding up the fix.

    Organizing Tests into Logical Suites

    Once you have a library of test cases, you need to group them. This is where test suites (or test sets) come in. These are collections of test cases executed together for a specific purpose. Getting this organization right is crucial for managing test cases in Jira effectively.

    Actionable Tip: Use folders or labels within your test management app to create suites like:

    • By Feature: All tests for the new "Shopping Cart" feature.
    • By Type: A "Full Regression Suite" containing all critical-path tests.
    • By Release: A specific set of tests needed to validate the upcoming "v2.1" release.

    This doesn't just keep your repository tidy; it makes planning test cycles efficient. A QA lead can simply assign an entire suite to a tester for a given sprint, instead of picking dozens of tests one by one.

    This integrated approach pays off. A Forrester study on QA tools found that teams using Jira-native apps achieve 28% higher test coverage rates. They link 92% of requirements to executable tests, a huge leap from the 65% managed in standalone systems. For product managers tracking releases across dev, staging, and production, that’s a game-changer. With a well-structured repository, you're building a foundation for quality that helps you ship more reliable software, faster.

    Executing and Tracking Test Cycles with Precision

    You’ve built a solid repository of test cases. Now, it’s time to execute and track your test cycles with precision. This is where your Jira setup evolves from a library into a command center for your entire quality assurance operation.

    The goal is a clear, repeatable process for running tests against a specific sprint, release, or feature. To do this, group the right test cases into a Test Cycle or Test Run, assign them to QA engineers, and watch the progress unfold in real time. A well-managed cycle in Jira is the antidote to the last-minute chaos many teams dread before a release.

    Kicking Off a Test Cycle

    A Test Cycle is a specific, targeted mission. For instance, create a cycle named "v2.5 Sprint 3 Regression" or "New User Onboarding Feature." This naming provides immediate context.

    Once you have your cycle, pull in the relevant test suites and individual test cases from your repository. Then, assign the whole batch or individual tests to your QA team. This simple act of assigning ownership is critical—everyone knows exactly what they’re responsible for.

    Of course, a perfect test case is useless if the environment isn't ready. A test will fail against a broken or outdated build every time. It's crucial to have clear protocols for ensuring the testing environment is stable. For a deeper dive, review these test environment management best practices.

    Think of a test cycle like a mission briefing. It defines the objective (what we're testing), assigns roles (who's testing it), and ensures everyone has the right equipment (the correct environment and test data). Without this briefing, teams are just running disconnected drills.

    Tracking Execution Status in Real Time

    As your testers work, their progress needs to be visible to the entire team—not locked in a spreadsheet. This is where standardized execution statuses are so important. Move beyond vague comments like "it worked" and start marking every test run with a clear, universally understood status.

    This immediate feedback loop is a major benefit of managing test cases in Jira. A project manager can glance at a dashboard and instantly understand test cycle progress, see the pass/fail rate, and pinpoint blocked areas.

    Essential Test Execution Statuses and Their Meanings

    To make real-time tracking work, everyone must use the same statuses. This table breaks down the most common statuses, their meaning, and the next steps for QA and development.

    Status Definition Action for QA Action for Developer
    Pass The actual result matched the expected result perfectly. Move to the next test case. No further action needed. None. The functionality works as intended.
    Fail The actual result did not match the expected result. Create a new bug ticket, linking it to this test run. Investigate the linked bug ticket to identify and fix the issue.
    Blocked The test cannot be executed due to an external factor. Document the blocker (e.g., "Staging environment is down"). If the blocker is a bug, prioritize a fix. If environmental, coordinate with DevOps.
    In Progress The tester has started executing the test but has not finished. Continue executing the remaining steps. Monitor for status changes.

    Using these statuses consistently ensures there's no ambiguity. A "Fail" is a clear signal to a developer, while a "Blocked" status tells the team that an external issue needs attention.

    Creating an Unbreakable Traceability Chain

    The most powerful outcome of this process is an unbreakable chain of evidence. Every action is linked, giving you complete traceability from the initial requirement down to the final test result.

    When a test fails, you don't just mark it red. Action: Create a new bug issue directly from the test execution screen. Most dedicated Jira test management apps automate this, pre-populating the bug report with crucial context like the test steps, expected results, and actual results. The tester just needs to add proof—screenshots, videos, or logs.

    This new bug is automatically linked to the failed test run, which is linked to the test case, which is linked back to the original user story. This closed-loop system creates a complete audit trail and makes it easy to answer critical questions:

    • Which requirements are affected by this bug?
    • What tests were run against this user story?
    • Has the fix for this bug been verified by QA?

    This integrated tracking elevates your team from simply managing tasks to running a sophisticated quality engineering workflow.

    Automating QA Handoffs and Quality Gates

    You've got your test cycles running. But the real bottleneck is often the manual handoff. A developer moves a ticket to "Ready for Test," but the QA engineer misses the notification. The ticket sits idle for hours or even days.

    This is where you move from managing tasks to orchestrating a workflow. By automating handoffs and building quality gates, you can cut out the manual back-and-forth. The goal is a system where the right person is notified at the exact right moment with everything they need.

    This flow chart breaks down a typical test execution cycle. Automation is what glues these stages together, making the transition seamless.

    Process flow diagram outlining the three steps for test execution: Cycle, Assign, and Run.

    Building an Automated Handoff from Dev to QA

    Here's an actionable automation recipe using a Jira app like Nesty. When a developer drags a user story into the "Ready for Test" column, a chain of actions kicks off automatically.

    This is more than just changing the assignee; it's delivering a complete package to the tester.

    • The Trigger: An issue transitions to the "Ready for Test" status.
    • Assign Instantly: The ticket is immediately reassigned to the QA Lead or a designated tester. No more ambiguity.
    • Notify the Team: A message instantly pings a specific Slack channel (e.g., #qa-team), tagging the new assignee with a direct link: "@jane.doe – US-123 'User Login Flow' is ready for testing."
    • Attach the Goods: The workflow can automatically attach the latest build artifacts, ensuring the tester has the right version.

    This one automation eradicates missed handoffs and the "is this ready yet?" chatter. It's a fundamental step for how to improve team collaboration in a fast-moving environment.

    Enforcing Quality with Automated Gates

    A quality gate is a checkpoint—an automated rule that prevents a ticket from moving forward until certain conditions are met. It’s your workflow’s enforcer. One of the most powerful gates prevents a user story from being marked "Done" until every single linked test has passed.

    A quality gate acts as your workflow's conscience. It doesn't rely on memory or good intentions; it programmatically enforces the Definition of Done, ensuring quality standards are met every single time, without exception.

    Using an app like Nesty, you can build this logic directly into Jira. Here's how:

    • Set the Blocker: Put a blocker on the workflow transition to "Done."
    • Define the Condition: The blocker stays active as long as any linked test case has a status other than "Pass."
    • See the Result: A developer literally cannot close the story. When they try, the system stops them and shows a message like, "Cannot be closed. 3 of 5 linked test cases have not passed."

    This creates a powerful, self-regulating loop. The burden of checking test results shifts from a person to an automated rule, guaranteeing that buggy code doesn't slip through.

    Building Actionable QA Reports and Dashboards

    Great testing is invisible without great reporting. If your hard work is buried in individual tickets, it's not helping anyone. The next step is to turn that raw testing data into live dashboards in Jira that tell a clear story about product quality.

    The key ingredient here is Jira Query Language, or JQL. Think of it as a super-powered search bar for Jira. You write simple queries to pull exactly the information you need, and these queries become the engine for your dashboard gadgets.

    Mastering JQL for QA Metrics

    You don't need to be a developer to master JQL. With a few practical, copy-and-paste examples, you can start filtering for the metrics that matter. These queries are the building blocks for creating visual, useful reports.

    Here are a few essential JQL queries for QA teams:

    • Overall Test Status for a Release: Finds all test executions for a specific version.
      issuetype = "Test Execution" AND fixVersion = "v3.1 Release"
    • Defects Found in the Current Sprint: Keeps an eye on bug discovery rates.
      issuetype = Bug AND sprint in openSprints()
    • Untested Requirements: A lifesaver for finding coverage gaps. It looks for user stories that don't have linked test cases.
      issuetype = Story AND issue not in hasLinkType("Tests")

    Getting comfortable with these simple filters is the first step toward turning data into a clear picture.

    From JQL Filters to Powerful Dashboard Gadgets

    Once you save a JQL query as a filter, plug it into dashboard gadgets to bring the data to life. This allows stakeholders to see the state of quality at a glance.

    Actionable Tip: Set up a dedicated QA dashboard with a mix of these three gadgets for a complete view.

    1. Pie Chart Gadget: Use this for showing test execution status. Plug in your "Overall Test Status" filter to get a simple, color-coded chart showing the percentage of tests that are Pass, Fail, Blocked, and To Do.
    2. Filter Results Gadget: Use this to display a live list of critical defects. Create a filter like issuetype = Bug AND priority = Highest and display it in a table showing the bug summary, assignee, and status. It keeps everyone accountable.
    3. Two-Dimensional Filter Statistics Table: This is fantastic for pinpointing problem areas. Set it up to show Components on one axis and Status on the other, instantly revealing which parts of the application are generating the most bugs.

    A dashboard isn't just a report; it's a conversation starter. When a product manager sees a pie chart with a giant red slice for "Failed Tests," it forces an immediate and necessary discussion about release readiness.

    This visibility is a major benefit of managing test cases inside Jira with a purpose-built tool. Real-world stats show that integrated systems can slash testing overhead by 35%. That efficiency helps scrum teams ship 22% faster while maintaining 95% traceability—critical for regulated industries. You can find more details in these findings on integrated QA solutions.

    By creating these dashboards, you give the entire team the context to make smarter, data-driven decisions, understand risks, and ultimately, ship with more confidence.

    Frequently Asked Questions About Jira Test Management

    Even with a perfect system, practical questions always come up. Teams often ask how to handle tricky situations like running the same tests across multiple environments or managing a large regression suite.

    Here are answers to the most common questions with battle-tested advice.

    How Should We Handle Tests for Different Environments?

    You have one test case but need to run it against dev, staging, and UAT. Do not duplicate the test case. This creates a maintenance nightmare.

    The best practice is to reuse the same test case but execute it within different Test Cycles. Create a distinct cycle for each environment and pull in the same set of test cases.

    • Cycle 1: "v4.2 Staging Smoke Test"
    • Cycle 2: "v4.2 UAT Full Regression"

    This keeps your test library clean and follows the DRY (Don't Repeat Yourself) principle. The execution history for staging is tracked in its own cycle, separate from UAT, but the test case itself lives in one central spot.

    What Is the Best Way to Manage a Large Regression Suite?

    As your product grows, your regression suite will too. Running hundreds of tests every sprint is unrealistic.

    The key is to prioritize and categorize your suite. Stop thinking of it as one monolithic block. Actionable Tip: Break down regression tests into smaller, targeted sub-suites using labels or components in Jira.

    • P1 – Smoke Tests: A small set of mission-critical tests. Run these on every build to catch catastrophic failures immediately.
    • P2 – Core Functionality: A larger suite covering the most important features. Run this once per sprint to ensure main workflows are solid.
    • P3 – Full Regression: The entire suite. Save this for right before a major release.

    This tiered approach maximizes risk coverage without killing your team's velocity.

    How Do We Integrate Automated Tests with Jira?

    Getting automated test results into Jira is the final piece of the puzzle. Most modern test automation frameworks can communicate with Jira test management apps via plugins or APIs.

    The goal is to have your automated test runs appear in Jira just like manual ones. A typical workflow involves a CI/CD pipeline job that finishes and automatically creates a new Test Cycle in Jira. It then populates that cycle with the test results, marking each as Pass or Fail and attaching logs or screenshots.

    The real magic of managing tests in Jira happens when you bring everything together. When your manual test results, automated run data, and all the linked defects live in one place, you get a complete, 360-degree view of product quality. No spreadsheet or standalone tool can come close to that.

    The industry has caught on. Data from the Atlassian Marketplace shows test management apps account for 15% of all Jira plugin installs in enterprise companies. This is especially true in the US and Europe, where agile teams now make up 65% of all software projects. You can discover more insights about these Jira trends and see how other teams are centralizing their QA work.


    Turn your complex Jira processes into self-managing workflows with Harmonize Pro. Our app, Nesty, helps you automate handoffs, enforce quality gates, and build dynamic checklists that keep your teams aligned and your projects on track. Transform your Jira workflows with Nesty today.

  • A Practical Guide to Using a Checklist in Jira for Better Workflows

    A Practical Guide to Using a Checklist in Jira for Better Workflows

    If you've ever tried to wrangle a complex process in Jira using only subtasks, you know the feeling. It's controlled chaos. A proper checklist in Jira is the solution, offering a structured, repeatable, and auditable way to turn a messy ticket into a clear, step-by-step workflow.

    Why Your Jira Workflow Needs More Than Subtasks

    Jira is a powerhouse for tracking big-picture work, but its native features often stumble on the nitty-gritty of process management. Teams frequently resort to creating a blizzard of subtasks or using basic Markdown checkboxes. These "solutions" quickly create noise, clutter backlogs, and lack the structure needed for real process enforcement.

    The fundamental issue is that subtasks were built to break down large chunks of work, not to manage a sequential, repeatable checklist. This mismatch is a source of daily frustration for many teams.

    Two sketched Jira screens: one with tangled subtasks, the other a checklist assigned to Dev, QA, Ops.

    The Chaos of Inconsistent Processes

    Without a standardized template, every new feature release or customer onboarding becomes an unpredictable adventure. One developer might remember to run security scans, while the next forgets. This isn't just an annoyance; it's a direct threat to quality and a wide-open door for risk. When your Definition of Done (DoD) is just a paragraph buried in a Confluence page, it’s rarely more than a suggestion.

    This is exactly where a dedicated checklist app provides immediate, tangible value. You create a master template, and suddenly, every critical step is accounted for—every single time.

    Common Pain Points with Native Jira Features

    Many teams try to make do with what Jira offers out of the box, only to hit a wall. Here are the all-too-familiar scenarios where native tools fall short:

    • Messy Dev-to-QA Handoffs: A developer moves a ticket to "Done," but did they update the documentation, deploy to staging, and run all unit tests? A QA engineer shouldn't have to play detective just to start their work.
    • Error-Prone Onboarding: Getting a new employee or customer up and running involves dozens of small but crucial tasks. Shoving them all into subtasks clogs the project board and makes it impossible to see the big-picture progress at a glance.
    • No Real Progress Tracking: A Jira issue with 10 subtasks might show 5 are complete, but that 50% figure tells you almost nothing. You can't see the actual progress within the workflow, which makes spotting bottlenecks a guessing game.

    For any process demanding consistency and an audit trail, subtasks and basic checkboxes are poor substitutes for a true checklist system. They might look the part, but they fail at reusability and enforcement.

    To see the gap clearly, compare what you get with Jira's native tools versus what a dedicated app brings to the table.

    Jira Subtasks vs Dedicated Checklist Apps

    Capability Subtasks & Checkbox Fields Dedicated Checklist Apps
    Templates Manual creation per issue, often copy-pasted Reusable, dynamic templates applied with automation
    Process Gates Non-existent; relies on manual checks Hard gates (blockers) that prevent status changes
    Automation Limited to issue-level triggers Item-level automation (e.g., assign user on check)
    Visibility Clutters backlogs and boards Contained within the parent issue for a clean view
    Audit Trail Difficult to track who did what, and when Detailed audit logs for compliance and accountability
    Reporting Basic issue-level reporting only Granular reports on checklist completion and timings

    The difference is clear. While subtasks have their place for breaking down epic-level work, they aren't designed for the detailed, repeatable processes that drive quality and efficiency.

    The market has responded to these pain points, pushing many teams to seek specialized solutions. Without checklist apps, teams can burn hours each sprint manually recreating their Definition of Ready/Done lists, leading to massive inconsistencies.

    Ultimately, the goal is to build your repeatable, auditable processes right inside Jira. By adopting a dynamic checklist in Jira, you stop managing chaos and start orchestrating clear, predictable outcomes. For more great ideas, take a look at our guide on Jira workflow best practices.

    Getting the Most Out of Native Jira Checklist Options

    Before installing a specialized app, master the tools Jira already provides. While limited for complex processes, understanding them helps you identify exactly when you’ve outgrown them. Each native option for a checklist in Jira serves a purpose, but they all come with trade-offs.

    Let's walk through the three main built-in methods: Markdown checklists, checkbox custom fields, and the classic subtask approach.

    Using Markdown for Quick Lists

    The fastest way to add a simple to-do list inside a Jira issue is with Markdown. Just type [] for an unchecked box or [x] for a checked one in the description or a comment to create an instant checklist.

    This is perfect for one-off, non-repeatable tasks specific to a single issue. Think of a developer jotting down quick reminders for a bug fix: "check logs," "reproduce on staging," "verify fix."

    But that simplicity is its biggest weakness. These lists are purely visual.

    • No Tracking: You can't run a JQL query to find all issues where "Code Review" is still unchecked.
    • No Automation: Ticking a box can't trigger any action, like reassigning the ticket to the QA team.
    • No Reusability: The list must be manually typed or pasted into every new issue.

    For one-off tasks, Markdown is great. For any repeatable process, it becomes a copy-paste headache.

    Setting Up Checkbox Custom Fields

    A more structured approach is to use custom fields. Create a field of the "Checkboxes" type and define a standard set of options. For instance, a "Deployment Readiness" field could have options like "Code Merged," "Tests Passed," and "Documentation Updated."

    This gives you a consistent set of items on every relevant issue, a significant step up from Markdown. More importantly, because it's a real field, the data is searchable. You can use JQL to find all tickets where "Tests Passed" isn't selected.

    The real limitation with custom fields is their flat structure. You can't nest items. This makes them a poor fit for multi-phase processes, like a full feature release that moves from development to QA and then to production.

    This rigidity forces you to create either very long, clunky lists or multiple custom fields, adding complexity to your Jira instance.

    The Subtask Strategy and Its Pitfalls

    For many teams, subtasks are the go-to for breaking down work, and they are often adapted to function as a checklist. You can create a series of subtasks under a parent story, with each one representing a step in your process.

    The main advantage here is that subtasks are full-fledged Jira issues. They can be assigned to different people, have their own statuses, and hold attachments, making them powerful for managing handoffs.

    The downside? Backlog clutter. A single user story with a 10-step process explodes into 11 separate items on your board. This makes it hard to see the forest for the trees and can turn sprint planning into a nightmare of endless scrolling.

    Furthermore, relying heavily on subtasks and custom fields can push you against platform constraints. In 2025, Atlassian updated Jira Cloud's issue limits. The worklog cap was raised to 10,000 per issue, while comments were standardized at 5,000 and attachments at 2,000. For checklist-heavy workflows in DevOps or QA, these limits directly affect usability. Exceeding them can trigger automatic moves to linked issues, disrupting visibility. You can dig into the specifics of these updated Jira Cloud limits and their impact.

    Each native option has its place. But when you need structured, repeatable, and nested checklists that don't flood your backlog or force you to worry about instance limits, it's time to look beyond what's built-in.

    How to Build Your First Dynamic Checklist

    Now, let's get practical. To build truly structured, repeatable processes, you need to move beyond Jira's built-in features. By using a dedicated Marketplace app, you can transform a messy ticket into a clear, manageable workflow with a dynamic checklist in Jira. It’s faster and more intuitive than you might think.

    Your journey starts in the Atlassian Marketplace, which you can open right from your Jira instance. Go to "Apps" > "Explore more apps" and search for a checklist tool. For this walkthrough, we'll explore features found in powerful apps like Nesty from Harmonize Pro.

    Once installed, most apps add a new panel directly into your Jira issue view. This is where you'll build, manage, and reuse your checklist templates without ever leaving the ticket you're working on.

    Creating Your First Checklist Template

    The template is the heart of a great checklist system. It's a reusable blueprint for a process that ensures every crucial step gets done, every time. Instead of frantically typing out a to-do list for every new bug report, you build the process once and apply it with a click.

    Let's walk through creating a "New Feature Deployment" checklist template.

    1. Start with the Big Picture: Inside the template editor, lay out the major stages of your deployment. These will become the top-level parent items. For instance:

      • Development Phase
      • QA & Testing Phase
      • Production Release Phase
    2. Nest the Nitty-Gritty Details: Now, under each phase, add the specific tasks that need to happen. This multi-level structure is something you can't achieve with Jira's basic checkboxes.

    This sketch shows how to turn a whiteboard idea into a structured, multi-level checklist template right inside a Jira app.

    A wireframe sketch of a JIRA-like marketplace application for managing checklist templates and steps.

    It’s a perfect example of moving from a messy process to a clear, hierarchical plan your team can execute.

    Fleshing Out the Nested Structure

    With your high-level phases in place, add the granular sub-tasks. This is the detail that prevents tasks from being missed when deadlines are tight.

    Under "Development Phase," you might add:

    • [ ] Code review completed by senior dev
    • [ ] Unit tests written and passing (>90% coverage)
    • [ ] Merge to main branch

    For "QA & Testing Phase," you could add:

    • [ ] Deployed to staging environment
    • [ ] Regression testing passed
    • [ ] User acceptance testing (UAT) sign-off received

    And for "Production Release Phase":

    • [ ] Final deployment to production
    • [ ] Post-release monitoring initiated
    • [ ] Announce release in company Slack channel

    This nested approach provides a clean, at-a-glance view of the entire process while capturing all critical details.

    A well-designed nested checklist transforms a Jira issue from a simple task tracker into a comprehensive project plan. It provides clarity not just on what needs to be done, but in what order and by whom.

    Assigning Ownership and Applying Templates

    A task list is useless if no one knows who is responsible. Good checklist apps let you assign individual items to specific people directly within the template.

    For our deployment example, pre-assign "Code review completed" to the team lead or tag the product manager for "Announce release." The moment that template is applied to a new Jira issue, those assignments are automatically set. The workflow kicks off immediately without manual delegation.

    Applying the template is the final step. Most apps let you manually add a saved template to an issue, but the real power comes from automation. Set up a rule so that any time a new issue with the type "Feature" is created, your "New Feature Deployment" checklist is automatically attached.

    This simple connection embeds your best practices directly into your team's daily work. You've now built your first dynamic checklist in Jira, turning a chaotic process into a predictable, structured, and auditable workflow.

    Make Your Checklists Do the Work: Automating Handoffs and Quality Gates

    A well-structured checklist is a great start, but a static list still relies on people remembering to check the boxes. The real impact comes when your checklist in Jira actively participates in your workflow. This is how you move from just tracking tasks to building an intelligent process that practically runs itself.

    The key is to use features that turn your checklist items into powerful triggers and gates. Instead of just hoping a developer completes all pre-deployment steps, you can make it physically impossible for them to move the ticket to QA until they do. That’s the core of building a self-managing, high-quality workflow.

    Use Blockers to Actually Enforce Your Rules

    Every team has a Definition of Done (DoD), but ensuring it's followed can feel like a full-time job. A "blocker" feature solves this. It lets you flag certain checklist items as mandatory, preventing a Jira issue from being transitioned until those tasks are complete.

    For the classic dev-to-QA handoff, set "Run all unit tests" and "Deploy to staging" as blockers. When a developer tries to move that ticket from "In Progress" to "Ready for QA" without checking those boxes, Jira will reject the transition. It’s a firm but gentle way to enforce your process without nagging.

    This logic also applies to your Definition of Ready (DoR). Imagine a checklist that automatically appears on new stories with items like:

    • Acceptance criteria are defined and clear.
    • User-facing mockups are attached.
    • The story has been estimated by the team.

    By setting these as blockers for the "To Do" to "In Progress" transition, you stop half-baked work from derailing a sprint before it even begins.

    Set Up Smart Triggers for Hands-Free Actions

    Once you've established quality gates, the next step is to automate what happens when key milestones are met. Smart triggers let you configure actions based on checklist progress, eliminating manual handoffs at critical points.

    This is where your workflow comes alive. Your checklist transforms from a passive list into the engine that drives the issue forward.

    A smart trigger turns a completed checklist item into a direct command for Jira. It’s the bridge between a human checking a box and the system taking the next step, ensuring the right person is notified or the right action is taken at exactly the right moment.

    For example, in a "Development" section of your checklist, set up a trigger so that when the final item is checked, the issue is automatically reassigned to the lead QA engineer. No more tickets sitting in a queue, waiting for someone to notice they’re ready for testing.

    Practical Automation Examples I've Seen Work

    The possibilities with triggers are nearly endless, but here are a few real-world examples that solve common bottlenecks:

    • Automated Slack/Teams Pings: When the "Production deployment complete" item is checked, a trigger can instantly post a message to your team's #releases channel.
    • Assigning Reviewers: As soon as a developer checks the "Ready for code review" box, a trigger can automatically assign the ticket to another developer for peer review.
    • Attaching Key Files: In an onboarding checklist, when the "Send welcome packet" item is checked, a trigger can automatically attach the welcome packet PDF to the Jira issue, creating a perfect audit trail.

    By 2025, Jira checklist apps have revolutionized bug reporting and onboarding, with standardized templates improving metrics by 45%. Harmonize Pro's Nesty exemplifies this: unlimited nested checklists with triggers cut onboarding from 10 to 4 days, notifying via Slack/Teams and attaching files precisely, reducing errors by 38% in 2025 case studies. You can find out more about how teams are using bug report templates to perfect Jira issues.

    These automated handoffs save time and build a more reliable, transparent process. When you combine blockers and triggers, your checklist in Jira evolves from a passive to-do list into an active enforcer of your team's best practices. To go deeper, check out our complete guide to Jira workflow automation.

    Practical Checklist Templates for Your Team

    Understanding how to build automations is one thing, but knowing where to start can be the hardest part. Staring at a blank slate can be intimidating. To give you a head start, here are three practical, ready-to-use templates for a checklist in Jira.

    These are based on real-world workflows that consistently work for software, customer success, and QA teams. Feel free to copy, tweak, and make them your own.

    New Feature Release Checklist

    Launching new features can be chaotic, with multiple teams juggling tasks and a high risk of things falling through the cracks. This template brings structure to that chaos, ensuring every step from code review to post-launch monitoring is completed. No more "oops, we forgot to update the docs" moments.

    • Development Phase
      • Code review completed by a senior developer
      • Unit tests written and passing (>90% coverage)
      • Accessibility (a11y) standards met
      • Merge to main development branch
    • QA & Testing Phase
      • Deployed to staging environment
      • Automated regression suite passed
      • Manual UAT (User Acceptance Testing) sign-off received
      • Performance and load testing completed
    • Production Release Phase
      • Final deployment to production servers
      • Post-release health monitoring initiated
      • Feature flag enabled for target user group
      • Official release notes published

    A standardized release checklist transforms your deployment process from an art into a science. It creates a predictable, low-stress rhythm that improves quality and reduces the risk of last-minute emergencies.

    The diagram below illustrates how completing a checklist can kick off an automated workflow, like notifying another team or transitioning the issue's status.

    A diagram illustrates a workflow automation process with three steps: checklist done, trigger, and auto-action.

    This kind of flow lets the system handle manual handoffs so your team can stay focused on what matters.

    Customer Onboarding Checklist

    First impressions are everything. A clunky onboarding experience can sour a customer relationship, while a great one is critical for retention. This process often involves a long sequence of tasks, and this template breaks it down into clear, manageable phases to ensure every new customer gets the same stellar kickoff.

    A structured approach is also fantastic for internal alignment. To dive deeper, learn more about how to improve team collaboration in our detailed guide.

    Here’s how you could structure this in a nested checklist using a tool like Nesty.

    Example Customer Onboarding Checklist Template

    Phase Task Item Sub-Tasks (Example)
    Phase 1: Kickoff & Discovery Conduct Kickoff Call – Schedule call with all stakeholders
    – Prepare and send agenda
    – Document meeting notes and action items
    Gather Requirements – Send customer requirements questionnaire
    – Review responses with internal team
    – Define success criteria and KPIs
    Phase 2: Technical Setup Provision Account – Create customer account in production
    – Apply correct subscription/license level
    – Configure initial permissions
    Configure Settings – Implement settings from discovery notes
    – Set up necessary integrations
    – Provide user credentials securely
    Phase 3: Training & Go-Live Conduct User Training – Schedule primary user training session
    – Deliver training based on their use case
    – Record session and share with customer
    Transition to Support – Confirm go-live date with customer
    – Introduce them to their support contact
    – Send welcome email from support team

    This level of detail ensures nothing is missed and provides a clear, repeatable path to success for every new client.

    Bug Triage Checklist

    When a bug report lands, the clock starts ticking. QA teams need a consistent way to gather essential information immediately. Without a solid process, developers waste time chasing down missing details, slowing down the entire resolution cycle. A bug triage checklist ensures every report is properly vetted and categorized before it hits the dev backlog.

    • Initial Verification
      • Confirm the bug can be reproduced on the latest version
      • Check for duplicate bug reports
      • Gather logs and console errors from the reporter
    • Information Gathering
      • Document clear, step-by-step instructions to reproduce
      • Attach relevant screenshots or screen recordings
      • Identify the browser, OS, and device where the bug occurs
    • Prioritization & Assignment
      • Assign a severity level (e.g., Critical, Major, Minor)
      • Assign a priority level based on business impact
      • Add relevant component or team labels
      • Assign the ticket to the appropriate development team or backlog

    Using a standardized checklist in Jira for bug triage means developers get high-quality, actionable reports every time. This cuts down the back-and-forth and lets them get straight to fixing the problem.

    Common Questions About Jira Checklists

    As teams begin to structure their workflows, a few questions about using a checklist in Jira consistently arise. Getting clear answers is key to moving forward with confidence and avoiding common pitfalls. Here's what I hear most often.

    Can I Import Checklists from Excel or a CSV File?

    Yes, but only if you have the right tool. This is a common need, especially when migrating existing processes into Jira. Jira's native options lack an import feature, but this is a core function for many apps on the Atlassian Marketplace.

    Apps like Nesty typically let you paste a list directly from a text file or use an import wizard. This is a massive time-saver, turning old process documents into dynamic Jira checklist templates in seconds and saving you from rebuilding them line by line.

    How Do Checklist Apps Affect Jira Performance?

    It’s a smart question. No one wants to install an app that slows down their Jira instance. Modern, well-built checklist apps are designed to be extremely lightweight.

    The secret is how they handle data. Instead of cluttering issues by creating hidden custom fields or subtasks, they manage checklist information within their own architecture. This design keeps your Jira issues lean and prevents you from hitting instance limits on worklogs, comments, or attachments, even with incredibly detailed checklists.

    This architectural choice is a major differentiator between a robust, enterprise-ready app and a simpler solution.

    Is It Possible to Report on Checklist Progress?

    Absolutely, but this is where you see a huge gap between basic checklists and advanced tools. Native Markdown checklists are purely visual and offer zero reporting. You can't query if an item is checked off or track completion rates across projects.

    Dedicated apps excel here. They often include built-in progress bars on the issue view and, more importantly, their own custom JQL functions. This unlocks powerful filters, custom dashboards, and detailed reports. For example, you can build a filter to instantly find all open tickets where the "Security Review" checklist item is still unchecked.

    What Is the Difference Between DoR and DoD Checklists?

    This is a cornerstone concept for agile teams, and understanding the distinction is crucial. Both are quality gates, but they operate at opposite ends of your workflow.

    • Definition of Ready (DoR): This is the entry gate. It's a checklist that ensures a story is truly ready for development before any work begins. Does it have clear acceptance criteria? Are the designs attached? A solid DoR prevents half-baked tasks from entering a sprint.
    • Definition of Done (DoD): This is the final inspection. The DoD checklist confirms that all required steps—like code reviews, QA testing, and updating documentation—are complete before the issue can be closed. It prevents incomplete work from being shipped.

    By using a dedicated app to build and enforce both DoR and DoD checklists, you create a powerful quality framework that maintains high standards from the moment a ticket is created to the moment it's closed.


    Ready to turn your Jira issues from simple to-do lists into dynamic, self-guiding workflows? Harmonize Pro's Nesty app lets you build unlimited nested checklists with powerful automation to enforce your processes, automate handoffs, and keep your teams perfectly aligned. Discover what Nesty can do for you.

  • Master Jira Software Release Management to Accelerate Releases

    Master Jira Software Release Management to Accelerate Releases

    If you're still relying on spreadsheets and endless status meetings for your Jira software release management, you're creating unnecessary friction. This manual approach is a surefire way to introduce communication silos and human error, turning what should be a smooth process into a chaotic firefight. Let's fix that.

    Moving Beyond Spreadsheets And Status Meetings

    For any modern software team, traditional release management is fundamentally broken. The problem isn't just that it's slow; it's the daily productivity loss that occurs when your release process lives outside of Jira, your team's central hub for development.

    Visualizing the shift from traditional paper-based project management to efficient digital Jira scrum boards.

    When teams track progress across a patchwork of different tools, the result is predictable chaos. Ditch these common pain points by centralizing your process in Jira:

    • Eliminate Status Meetings: Replace meetings where people report progress with real-time Jira dashboards. Progress should be visible to everyone, at all times, without a meeting.
    • Kill the "Master" Spreadsheet: A release tracker spreadsheet is a single point of failure. It’s instantly out of date and creates version control nightmares. Use Jira Versions as your single source of truth.
    • Reduce Communication Noise: Without a central hub, your team is stuck in a loop of Slack messages and emails just to clarify status. A well-configured Jira project makes the status clear to everyone.

    The Real Cost Of Manual Tracking

    Manual coordination is incredibly risky. One missed update in a spreadsheet can lead to deploying the wrong code, skipping a crucial testing step, or giving stakeholders an inaccurate timeline. The result? Delayed launches and a frustrated team spending more time on admin than building software.

    Take Swiss Re, a global reinsurance company that had to manage releases across 12 interconnected applications. They were buried in spreadsheets, leading to constant emails and calls for basic updates. By bringing their release management directly into Jira, they cut communication overhead by 50%. This freed up their teams to focus on shipping, not chasing information. You can read more about Swiss Re's successful transition and replicate their success.

    The core problem with manual release management is the lack of a single source of truth. When development is in Jira but release coordination is elsewhere, you guarantee misalignment.

    A structured, automated approach built inside Jira isn't just a "nice-to-have." It’s essential for shipping software reliably and efficiently.

    Laying the Foundation for Your Jira Release Workflow

    Before building complex automations, get the fundamentals right. A successful Jira software release management process is built on a solid foundation using Jira’s native features. This creates a single source of truth for every release, eliminating scattered spreadsheets for good.

    The cornerstone of this setup is the Jira Version. Treat a Version as a container that holds every piece of work (features, bug fixes, tech debt) destined for a specific deployment. Proper configuration is non-negotiable for a predictable release cadence.

    Taming Your Releases With Jira Versions

    First, create a Version for your upcoming release. Navigate to your Jira project settings, find the 'Releases' section, and create a new version.

    Give it a descriptive name like "Q3-Mobile-App-V2.1" instead of a generic one like "Next Release." Most importantly, set a Start date and a Release date. These dates are what Jira uses to measure progress against your timeline.

    With the Version created, start assigning issues to it using the Fix Version/s field during backlog grooming or sprint planning. Every issue you tag gets added to that release container, making the scope visible and trackable for everyone.

    Getting Your Workflow to Mirror Reality

    Your Jira workflow must be an accurate model of your actual release process. For Jira's reporting to be useful, your final workflow column—typically 'Done'—must represent work that is truly finished and ready to ship.

    Here's a critical step: map your final status to the correct category. Jira’s release reports only count an issue as "done" if its status is mapped to the green 'Done' status category. If your final step is called "Shipped" but isn't mapped to that green category, Jira won't see it as completed. Your burndown charts will be inaccurate. For a step-by-step walkthrough, our guide on https://harmonizepro.com/blog/changing-workflow-in-jira provides the specifics.

    A common mistake is a "Testing Complete" status that isn't mapped to the 'Done' category. All those validated issues will still show up as unresolved in your release view, causing unnecessary panic.

    Every release in Jira combines scope (issues), a timeline (dates), and its journey through your workflow. With agile adoption now exceeding 70% in enterprises, this kind of tracking is crucial for cutting project delays.

    The Essential Jira Release Management Components

    To tie this all together, master these native Jira components. This is your foundational toolkit.

    Key Jira Components For Release Management

    Jira Component Primary Function Actionable Tip
    Versions (Releases) Acts as a container to bundle all issues (features, bugs, tasks) for a specific deployment. Use a consistent naming convention (e.g., "Platform-V4.2-Q3") and always set a start and release date.
    Fix Version/s Field The Jira field that links an individual issue to one or more release Versions. Make updating this field a required part of your backlog grooming or sprint planning process.
    Workflow Statuses Visual representation of the steps your work goes through from "To Do" to "Done." Customize your workflow to match how your team actually works, not just a generic template.
    Status Categories The backend mapping that tells Jira whether a status means "To Do," "In Progress," or "Done." Double-check that all of your final statuses (e.g., "Deployed," "Live") are mapped to the green 'Done' category.
    Release Burndown Chart A real-time report that visualizes remaining work against the time left before the release date. Check this chart daily. It's your early warning system for scope creep and potential delays.

    Mastering these components gives you the control and visibility to run a smooth release process directly within Jira.

    Putting the Release Burndown Chart to Work

    Once your Versions and workflow are configured correctly, leverage Jira's most powerful native tool: the Release Burndown chart. This isn't just another report; it’s your command center for tracking release health.

    Use this chart to get immediate answers without pinging developers:

    • Is scope creeping? A sharp upward jump in the "Total issues" line means new work has been added.
    • What's our velocity? The downward slope of the "Remaining issues" line shows your team's completion rate. A flat line is a red flag.
    • Are we on track? If the projected burndown trend extends past your release date, you have an early warning that you're at risk.

    This is actionable intelligence. Use this real-time visibility to make proactive decisions—adjust scope, reallocate resources, or manage stakeholder expectations—long before the deadline.

    Building Reliable Quality Gates And Handoffs

    With a solid workflow in place, it's time to build the automated checkpoints that elevate your Jira software release management. Go beyond simple status tracking by creating automated quality gates and handoffs. These are the tools that prevent bad code from slipping through and eliminate the endless "is this ready yet?" conversations.

    A workflow status is just a label. A quality gate is a barrier that lowers only when specific criteria are met. Without this, you’re relying on trust and memory, which are unreliable under pressure.

    We've all seen a developer drag a ticket to "Ready for QA" when the feature branch isn't merged and no test notes exist. The QA engineer wastes time playing detective and bounces the ticket back. This is the inefficiency that enforceable quality gates are designed to prevent.

    Enforcing Your Definition Of Done With Blockers

    Your Definition of Done (DoD) needs to be more than a wiki page; it must be an active part of your Jira workflow. The most effective way to achieve this is by embedding detailed checklists directly inside your Jira issues and using them to block transitions.

    For example, a developer's DoD before a QA handoff should include:

    • Code Review Completed: All PR feedback is addressed and approved.
    • Unit Tests Passed: The new code is covered, and the test suite is green.
    • Feature Branch Merged: The code is in the main development branch.
    • Deployed to Staging: The build is live on the staging environment.

    Using an app like Nesty, you can build this checklist into your Jira issue templates. Then, configure the workflow so the "Move to QA" transition is physically blocked until every item is checked. It's not a suggestion; it's a hard requirement. The developer simply cannot pass the ticket on until the work is verifiably done.

    This mechanism shifts accountability from the QA engineer back to the developer. When a ticket lands in the QA queue, the team knows it’s genuinely ready. This action alone can slash QA cycle times and reduce back-and-forth communication.

    Your DoD becomes an active contract within each ticket, creating a clear, auditable trail.

    Automating The Perfect Handoff

    Once the "is it ready?" problem is solved, tackle the handoff itself. Manual handoffs are notoriously error-prone. Automate the process to ensure nothing gets missed.

    Here is an actionable "Dev → QA" handoff automation, triggered the instant a developer completes their DoD checklist:

    The Trigger: The final item on the "Developer DoD" checklist is marked complete.

    The Automated Actions:

    1. Status Transition: The issue instantly moves from "In Progress" to "Ready for QA." No manual board updates are needed.
    2. Assignee Change: The ticket is unassigned from the developer and reassigned to the QA team's lead or a shared "QA Triage" user.
    3. Team Notification: An automated message is sent to a specific Slack or MS Teams channel with key info: "Hey @qa-team, JIRA-123 'Implement New User Login Flow' is now ready for testing. Deployed to Staging by @developer-dave."
    4. Artifact Verification: Set a rule that blocks the handoff if a required file, like "test-plan.pdf," isn't attached, prompting the developer to upload it.

    This automated sequence ensures a perfect, information-rich handoff every time. The QA team gets a clear signal, the right person is assigned, and all context arrives instantly. This is how top teams use Jira to orchestrate their entire release process.

    Managing Deployments Across Multiple Environments

    After locking down your quality gates, the next step is managing deployments across environments like dev, staging, and production. A single, linear Jira workflow for this is inefficient and confusing.

    Instead, treat each environment as a distinct stage inside the Jira issue itself. This gives you a clear, auditable trail and lets you build specific checks for each environment. A Jira issue transforms from a task tracker into a deployment command center for that specific feature.

    Structuring Your Issue for Multi-Environment Promotions

    Use nested checklists to map out the deployment process for each environment. For a new user profile feature, create separate sections for each stage in the pipeline.

    With a tool like Nesty, you can set up parent checklist items for each environment—like "Deploy to Development," "Promote to Staging," and "Release to Production"—and nest the required tasks underneath each one.

    This flow creates a quality-gated handoff, where one stage is fully verified before the next one begins.

    Quality gates process flow diagram with steps: Dev Complete, QA Handoff, and QA Approved.

    This process ensures development work is complete before QA is notified. QA's approval then acts as the final gate, creating a reliable and easy-to-follow handoff.

    Here’s a practical structure to implement inside a Jira ticket:

    • Deploy to Development
      • Merge feature branch to develop
      • CI build successful
      • Smoke tests passed on dev server
    • Promote to Staging
      • Create release branch from develop
      • Deploy to staging environment
      • Run integration test suite
      • QA sign-off received
    • Release to Production
      • Merge release branch to main
      • Tag final release version (e.g., v2.5.1)
      • Production deployment complete
      • Monitor logs and performance metrics for 30 mins

    This structured format makes the status instantly clear. Anyone can see which environment the code is in and what needs to happen next.

    Pro Tip: By structuring your deployment process this way, you create a perfect audit trail. When a stakeholder asks about the release process for JIRA-456, you can show them the completed checklist with every step documented and timestamped.

    Using Smart Triggers to Automate the Promotion Process

    Structure is the start; automation is the accelerator. Use smart triggers to automate the handoffs between environments, eliminating the manual errors that cause delays.

    Tie checklist completions to automated Jira actions. Here is a typical Staging-to-Production promotion automation:

    The Trigger: The last item on the "Promote to Staging" checklist—"QA sign-off received"—is checked off.

    The Automated Cascade:

    1. Task Creation: An automation rule instantly creates a new sub-task titled "Deploy JIRA-456 to Production" and assigns it to the release engineering team.
    2. Stakeholder Notification: A webhook sends a message to the #releases Slack channel and an email to key product stakeholders: "Feature 'JIRA-456' has passed QA on Staging and is now ready for production release."
    3. Issue Status Update: The parent Jira issue's status automatically flips from "In QA" to "Ready for Release," keeping your board accurate.

    This automated sequence acts as an invisible project manager, ensuring the right people are notified and the right tasks are created at the right moment. By combining structured checklists with smart automation, you build a resilient, repeatable, and transparent deployment workflow.

    Hooking Up Your CI/CD Tools and Automating Release Notes

    To achieve full efficiency, connect Jira to your entire development toolchain. Manually updating tickets after a build or deployment is a time-waster and an error source. Integrating Jira with your CI/CD pipeline creates an automated feedback loop that keeps your project board perfectly in sync with your code.

    This closes the gap between your codebase and your project plan. When a developer merges a pull request, your CI/CD tool—whether it's Jenkins, GitLab CI, or Bitbucket Pipelines—should update Jira automatically.

    Bridging the Gap Between Code and Jira

    Use webhooks to connect your CI/CD server to Jira. A webhook is a notification that one system sends another when an event occurs. For example, when a Jenkins build succeeds, it can fire a webhook to a Jira automation rule.

    This simple connection unlocks powerful automations. Configure Jira to listen for these signals and react instantly:

    • Successful Build: A webhook triggers an automation to move the corresponding Jira issue from "In Progress" to "Ready for QA."
    • Failed Build: A failed build posts an automated comment on the ticket, tagging the developer with a direct link to the build log.
    • Deployment to Staging: A successful deployment changes the issue's status to "In Staging" and assigns it to the lead QA engineer.

    This automation ensures your Jira board is always an accurate snapshot of reality. To learn more about building these rules, our guide on Jira workflow automation provides practical examples.

    Taking the Pain Out of Release Notes

    The next big win is automating release notes. Compiling them is tedious and error-prone. You can automate this process since Jira already knows every issue—feature, bug fix, and improvement—associated with a specific Version.

    Make release notes a natural byproduct of your development process, not a painful task at the end. When Jira generates the first draft, you only need to edit and refine, saving hours of work.

    How to Set Up Release Note Generation

    Many marketplace apps can do this, but you can also use Jira's native automation. Create a rule that triggers the moment you mark a Version as "Released."

    Here’s how to build the automation:

    1. The Trigger: The rule fires as soon as a Jira Version's status is changed to "Released."
    2. The JQL: The automation runs a JQL (Jira Query Language) query to pull all issues with that specific "Fix Version."
    3. Formatting and Sending: It loops through those issues, grabs key details like the summary and issue type, and formats them into a clean list. This text can then be posted to a Confluence page, emailed to stakeholders, or pushed to a Slack channel.

    You can also use different templates, such as grouping bug fixes under a "Bug Fixes" heading and new features under "What's New?". This simple setup ensures nothing gets missed and frees your team from one of the most monotonous parts of the release cycle.

    Future-Proofing Your Release Process

    A great Jira software release management system requires ongoing maintenance to remain effective. Treat it as a living part of your team's toolkit, not a "set it and forget it" project. You need to build a process that is not just efficient today but resilient for the future.

    Why Long Term Support Matters

    One of the most strategic actions you can take is to stick with Atlassian's Long Term Support (LTS) releases. An LTS version guarantees crucial security, stability, and performance fixes for an extended period, providing a stable foundation.

    By opting for an LTS release, you avoid the churn of frequent feature updates. This allows you to refine complex workflows and automations without the platform changing underneath you. This predictability is critical for teams that cannot afford downtime.

    For instance, Atlassian designated Jira Software 11.3 as an LTS release, guaranteeing critical bug fixes until December 3, 2027. Over 80% of Fortune 500 companies use Jira, and relying on LTS versions is a core part of maintaining enterprise-grade reliability. As their release notes highlight, this stability minimizes disruptions.

    Choosing an LTS release isn’t about missing new features. It’s a deliberate choice for stability, giving your team a predictable environment to perfect their release process.

    Future-proofing your Jira setup means building on solid ground. An LTS version combined with well-designed internal processes creates a release machine that is efficient now and dependable for years. To ensure your workflows are built to last, review our guide on Jira workflow best practices.

    Even with the best plans, you'll encounter challenges. Here are practical solutions to common questions.

    How Do We Handle Dependencies Between Teams?

    This is a common headache. When one team is waiting on another, your release timeline is at risk.

    The simplest native solution in Jira is the "Blocks" issue link. If ticket PROJ-123 can't proceed until CORE-456 is done, link them. This provides basic visibility.

    For a more powerful approach, use an app from the Atlassian Marketplace that offers cross-project release boards. These tools provide a bird's-eye view, automatically flagging schedule conflicts and dependencies that are holding up a release.

    What’s the Best Way to Manage Urgent Hotfixes?

    When a critical bug hits production, you need to deploy a fix immediately. Your standard workflow is too slow.

    The solution is to create a separate, fast-track workflow.

    • First, create a unique issue type like "Hotfix" to signal its urgency.
    • Next, design an expedited workflow for it. This process should have fewer statuses and quality gates, stripping it down to the essentials needed for a safe production deployment.

    Use Jira's automation to automatically escalate hotfix issues, notify the on-call engineer in Slack, and feature them prominently on dashboards so they cannot be missed.

    Can We Sync Our Release Versions with the Service Desk?

    Yes, and you should. When a customer reports a bug through Jira Service Management, the support team needs to know when the fix is released.

    "Versions" can be shared across multiple projects in the same Jira instance. Link a customer's support ticket directly to the software version that will contain the fix. Once that version is marked as "Released" in Jira Software, trigger an automation rule to update the service desk ticket and notify the customer. This closes the loop between your development and support teams.


    Transform your Jira issues into dynamic, automated workflows with Harmonize Pro. Enforce quality gates, automate handoffs, and manage complex processes with Nesty's powerful nested checklists. Get started at https://harmonizepro.com/nesty.

  • 10 Actionable Best Practices in Jira for High-Performing Teams in 2025

    10 Actionable Best Practices in Jira for High-Performing Teams in 2025

    Jira is the central nervous system for countless development teams, yet many organizations barely scratch the surface of its potential. Without a clear strategy, what should be a source of truth quickly devolves into a chaotic collection of inconsistent tickets, ambiguous workflows, and cluttered projects. This disorganization leads directly to confusion, missed deadlines, and frustrated teams who spend more time deciphering Jira than building products. The difference between a high-performing team and a struggling one often lies in how they manage this critical tool.

    This guide cuts through the noise. It isn't a theoretical overview; it's a practical, actionable playbook for implementing essential best practices in Jira. We will explore 10 field-tested principles that transform Jira from a simple ticketing system into a powerful engine for collaboration, predictability, and efficient delivery. This comprehensive roundup is designed for immediate impact, helping you bring order to your projects and empower your teams.

    For each best practice, you will learn:

    • The Why: The strategic value behind the practice and the problems it solves.
    • The How: Concrete, step-by-step instructions for implementation within Jira.
    • Common Pitfalls: Mistakes to avoid that can undermine your efforts.
    • Automation & Enforcement: How modern tools like Harmonize Pro / Nesty can enforce these standards automatically.

    By moving from reactive Jira usage to a proactive, structured approach, you can eliminate ambiguity and ensure your teams stay aligned, efficient, and focused on delivering value. Let's dive into the practices that create clarity and drive results.

    1. Standardize Project and Issue Key Naming Conventions

    Consistent naming conventions for Jira projects and issue keys are foundational for maintaining clarity and efficiency at scale. When every team member can instantly identify a project's purpose or an issue's context from its key, you eliminate ambiguity and speed up cross-team collaboration. This practice is a cornerstone of effective information architecture within your Jira instance.

    Why It's a Best Practice

    Standardized naming prevents the chaos that ensues when project keys are cryptic or inconsistent. A clear convention like MKT for Marketing or DS for Data Science immediately tells a user where a ticket originates. This predictability is crucial for filtering, searching, and creating effective JQL queries. For example, a developer can quickly find all dependencies related to a specific product by searching for its prefix, a vital step in complex release planning. Without this, teams waste time deciphering ticket origins, leading to delays and miscommunication.

    Actionable Implementation Steps

    To implement this best practice in Jira, start by defining and documenting your standards.

    • Establish a Project Key Formula: Create a simple, memorable formula. A common approach is a 2-4 letter abbreviation of the team, product, or initiative (e.g., IOS for the iOS App team, WEB for the Web Platform team).
    • Define Issue Summary Prefixes: For issue summaries, use standardized prefixes to signal the work type. For instance, a bug report could start with BUG:, a new feature with FEAT:, and a technical task with TASK:.
    • Document Everything: Create a central Confluence page or shared document that clearly outlines these conventions for all teams, including onboarding materials for new hires.

    Key Insight: The goal is not just consistency but predictability. A team member from any department should be able to reasonably guess a project key or understand an issue's context without needing a decoder ring.

    Automating Naming Conventions

    Manually enforcing these rules is prone to human error. Tools can automate this process, ensuring every project and issue conforms to your standards from the moment of creation. For instance, you can create standardized project templates that lock in naming conventions.

    For teams looking for robust enforcement, platforms like Harmonize Pro’s Nesty can automatically apply these naming conventions based on predefined rules, ensuring 100% compliance. You can learn more about how to set up these automated templates on Nesty's getting started page. This automation solidifies one of the most impactful best practices in Jira, turning a manual chore into a reliable, background process.

    2. Implement Comprehensive Issue Type Structure

    A well-defined issue type structure is the backbone of an organized Jira instance. By creating a clear taxonomy for different types of work, you ensure that every task, bug, and story is categorized consistently. This foundation is essential for enabling accurate reporting, precise filtering, and streamlined workflow management across all teams.

    Why It's a Best Practice

    Without a standardized issue type scheme, teams often default to generic types like "Task," leading to a chaotic backlog where a critical bug holds the same classification as a minor documentation update. This ambiguity makes it nearly impossible to prioritize work effectively, generate meaningful reports, or build specialized workflows. For example, a "Bug" issue type can be routed through a specific QA and verification workflow, while a "Story" follows a product discovery and development path. This level of process clarity, a key component of best practices in Jira, is only possible with a thoughtful issue type hierarchy.

    Actionable Implementation Steps

    To implement this best practice, focus on creating a clear, intentional, and well-documented set of issue types.

    • Limit Core Issue Types: Start with a core set of 5-7 issue types per project, such as Story, Task, Sub-task, Bug, and Epic. This prevents user confusion and ensures each type has a distinct purpose.
    • Map to Your Development Process: Align issue types with your actual workflow. If your team handles infrastructure requests differently from feature development, create a custom issue type like "Infra Task" with its own workflow.
    • Train and Document: Create a Confluence page detailing when to use each issue type, with clear examples. Include this training in your onboarding process to ensure new team members adopt the standards from day one.
    • Audit Regularly: Periodically review your projects to identify and remove misused or obsolete issue types. This keeps your Jira instance clean and efficient.

    Key Insight: Your issue types should reflect your team's unique processes, not force your processes into a generic template. The goal is to make categorization intuitive and meaningful for everyone.

    Automating Issue Type Structure

    Maintaining this structure manually can be challenging as teams evolve. Automation can ensure your established taxonomy is consistently applied. For instance, you can use project templates to pre-configure a standard set of issue types for all new projects.

    For more advanced governance, tools like Harmonize Pro’s Nesty allow you to define and enforce organizational standards for issue type schemes. You can lock in a specific set of issue types for certain project categories, preventing unauthorized additions and ensuring every project aligns with your established best practices. This automation helps maintain long-term structural integrity in your Jira instance.

    3. Maintain Clean and Descriptive Issue Summaries

    A well-written issue summary is the first point of contact anyone has with a ticket. It acts as the headline, determining whether stakeholders can quickly grasp the task's purpose. Clean, descriptive summaries are crucial for effective communication, searchability, and overall backlog hygiene, making this one of the most fundamental best practices in Jira.

    Why It's a Best Practice

    Vague summaries like "Fix bug" or "Update page" create informational black holes. Team members are forced to click into every ticket to understand the work, wasting valuable time and causing confusion during backlog grooming, sprint planning, and reporting. A descriptive summary, such as "BUG: Login button unresponsive on mobile Safari," provides immediate context, enabling team members to filter, prioritize, and assign work efficiently. This clarity accelerates everything from daily stand-ups to high-level roadmap discussions, as the nature of the work is instantly recognizable.

    Actionable Implementation Steps

    Implementing clear summary standards requires a simple but disciplined approach.

    • Create a Summary Template: Establish a standardized format that includes key information. A popular and effective template is [Type]: [Component] - [Action]. For example, FEAT: User Profile - Add two-factor authentication option.
    • Define Clear Verbs: Encourage the use of specific action verbs. Instead of "Work on," use verbs like "Implement," "Investigate," "Remove," or "Refactor."
    • Document the Standard: Add these guidelines to your team's Confluence page or central documentation. Ensure it's part of the onboarding process for new hires to build good habits from day one.

    Key Insight: A great issue summary should pass the "glance test." Anyone, from a developer to a product manager, should understand the core task in under three seconds without needing to open the issue.

    Automating Summary Standards

    Consistently enforcing summary formats can be challenging, especially in large or fast-moving teams. Manual reviews are time-consuming and often fall through the cracks. Automation can ensure every new issue adheres to your defined structure from the moment it's created.

    Tools like Harmonize Pro’s Nesty can automatically validate and enforce summary patterns using predefined rules. For instance, you can configure it to ensure every bug report starts with BUG: and includes a component name. This removes the manual burden of policing standards and guarantees a clean, searchable backlog. You can find out more about setting up these rules on the Nesty product page.

    4. Define and Enforce Clear Workflow States

    A well-defined workflow is the backbone of process management in Jira, guiding an issue from creation to completion. Establishing explicit, clear workflow states ensures that every team member understands the status of a task at a glance. This clarity is essential for accurate reporting, identifying bottlenecks, and preventing work from getting lost in ambiguous or undefined stages.

    A hand-drawn workflow diagram showing project stages: To Do, Ready, In Progress, In Review, and Done.

    Why It's a Best Practice

    Clear workflows bring predictability and structure to complex processes. When states like Backlog, Ready for Dev, In Progress, In Review, and Done are universally understood, it eliminates confusion and standardizes how work progresses. This visibility allows teams to accurately forecast timelines and helps stakeholders understand the status of deliverables without needing constant updates. Without clear states, teams often misinterpret an issue's progress, leading to duplicated effort and missed deadlines.

    Actionable Implementation Steps

    To implement this best practice in Jira, focus on simplicity and enforcement.

    • Keep It Simple: Design workflows with a minimal number of states, ideally between 5 and 7. A common, effective flow is To DoIn ProgressIn ReviewDone.
    • Define Each State: Document what each status means and the criteria required to move an issue into it. For example, an issue can only move to In Review if it has an assigned reviewer.
    • Use Workflow Conditions: Leverage Jira’s built-in workflow conditions and validators to enforce business rules. For instance, prevent an issue from moving to Done unless the "Resolution" field is set.

    Key Insight: A workflow shouldn't just map your process; it should enforce it. Use conditions and validators to build guardrails that guide users toward the correct actions, making the right way the only way.

    Automating Workflow Management

    Manually managing transitions and ensuring compliance is time-consuming. Jira automation can be configured to transition issues based on specific triggers, such as moving a ticket to In Review when a pull request is created. This reduces manual overhead and ensures the workflow moves forward consistently.

    For organizations needing to standardize workflows across multiple projects, Harmonize Pro’s Nesty allows you to create and deploy locked-down, reusable workflow templates. This ensures every project follows the same proven process from the start. Learn more about how to set up cross-functional workflows on Nesty's documentation page. Automating your workflows is a critical step in scaling your best practices in Jira.

    5. Leverage Custom Fields Strategically and Sparingly

    Custom fields are powerful for capturing unique metadata, but their overuse is a common Jira pitfall that leads to cluttered screens, slow performance, and user confusion. Strategic use of custom fields ensures you collect essential information without overwhelming teams. This practice is key to maintaining a clean, efficient, and user-friendly Jira environment.

    Why It's a Best Practice

    An excessive number of custom fields complicates issue creation, making it a chore for users to fill out tickets. This can lead to incomplete data or, worse, users avoiding ticket creation altogether. A lean approach ensures that every field serves a distinct, valuable purpose, making data entry faster and more accurate. For instance, an engineering team benefits from a "Reproducibility" field on bug reports, but a marketing team does not. Tailoring fields to project needs is a critical component of successful best practices in Jira.

    Actionable Implementation Steps

    To implement this best practice, focus on necessity and regular maintenance. A disciplined approach prevents field-creep and keeps your instance optimized.

    • Audit Existing Fields: Regularly review your custom fields. If a field is unused or provides redundant information, archive it. Start by auditing fields that are not associated with any screen.
    • Prioritize Built-in Fields: Before creating a new custom field, determine if a default Jira field like "Component," "Affects Version," or "Labels" can serve the purpose.
    • Limit Fields Per Project: Aim to keep the number of required custom fields to a minimum, ideally 3-5 per project, to streamline the issue creation process. Document the purpose of each field in a shared Confluence page.

    Key Insight: Treat every custom field as a form of "technical debt." Each one adds complexity and requires maintenance. Only add a field if the value of the data it collects clearly outweighs the cost of its existence.

    Automating Custom Field Management

    Manually auditing and managing custom fields across a large instance is time-consuming. You can improve this process by using Jira’s built-in tools to identify unused fields and associate specific fields with relevant issue-type screen schemes. This ensures that a bug report for a mobile app has different fields than a content request for the marketing blog.

    For more advanced governance, tools can provide insights into custom field usage and help enforce standards. Harmonize Pro’s Nesty allows administrators to create and manage project templates with pre-defined custom field configurations, ensuring new projects start clean and adhere to organizational standards from day one. This proactive approach prevents clutter before it begins, solidifying your custom field strategy.

    6. Use Automation to Reduce Manual Work and Errors

    Jira's automation features are a powerful tool for reducing the burden of repetitive manual tasks, minimizing human error, and accelerating workflow execution. By creating rules that trigger specific actions, teams can ensure processes are followed consistently and efficiently without constant manual intervention. This is a crucial step in scaling operations and freeing up team members to focus on more strategic work.

    A hand-drawn diagram illustrating a workflow from task initiation to automated action by a robotic arm.

    Why It's a Best Practice

    Manual processes are slow, prone to mistakes, and inconsistent. Forgetting to update a ticket's status, notify a stakeholder, or assign a sub-task can cause significant delays and communication breakdowns. Automation solves this by creating reliable, event-driven workflows. For instance, an automation rule can instantly assign a newly created bug to the QA lead for the specified component, ensuring it never gets lost in the backlog. This practice transforms Jira from a simple task tracker into a dynamic system that actively manages your workflow.

    Actionable Implementation Steps

    To effectively integrate automation, start small and build complexity over time. Focus on high-impact, low-effort rules first.

    • Identify Repetitive Tasks: Pinpoint common, rule-based actions your team performs daily, such as transitioning issues, adding comments, or assigning work.
    • Start with Simple Rules: Begin with straightforward automations. A great starting point is a rule that automatically closes a parent story when all its sub-tasks are moved to "Done."
    • Document and Test: Create a central record of all automation rules, explaining their triggers and actions. Always test rules in a sandbox or with a limited scope before deploying them globally to avoid unintended consequences.

    Key Insight: The most effective automation doesn't just save time; it enforces process. It ensures that critical steps are never missed, creating a more reliable and predictable workflow for everyone.

    Automating Notifications and Workflows

    Leveraging automation for notifications and workflow transitions is one of the most impactful best practices in Jira. Instead of manually pinging team members, rules can handle it for you. You can set up triggers to send automated notifications when critical issues are created or when a ticket is unassigned for too long.

    Tools like Harmonize Pro’s Nesty extend these capabilities, allowing you to build complex, multi-step automations that can manage entire processes. For example, Nesty can automatically create a standardized set of sub-tasks for a new feature request, assign them to the correct individuals, and set due dates based on the parent issue's timeline. You can explore how to set up advanced automated triggers with Nesty's documentation on notification triggers. This level of automation ensures consistency and accelerates project timelines from day one.

    7. Establish Clear Estimation and Planning Practices

    Consistent estimation practices are the engine of predictability in agile development. Whether using story points or time-based estimates, a shared understanding of effort allows teams to forecast sprints accurately, plan capacity effectively, and communicate realistic timelines to stakeholders. This discipline transforms planning from a guessing game into a data-driven process, forming a key pillar of effective Jira best practices.

    Why It's a Best Practice

    Inconsistent estimation leads to unreliable sprint commitments, missed deadlines, and a breakdown of trust between development teams and business stakeholders. When every team member applies a consistent scale, such as the Fibonacci sequence (1, 2, 3, 5, 8), the team develops a stable velocity. This velocity is a crucial metric, enabling accurate long-term forecasting and providing an empirical basis for sprint planning. Without this foundation, sprint planning is chaotic, and roadmaps become unreliable fantasies.

    Actionable Implementation Steps

    To implement this best practice in Jira, focus on creating a shared framework and process.

    • Choose and Define an Estimation Scale: Decide whether to use story points (e.g., Fibonacci) or time-based estimates (e.g., hours, days). Document what each value represents in a shared Confluence page. For example, a "3" might represent a straightforward task with minimal unknowns.
    • Conduct Team-Based Estimation Sessions: Use techniques like Planning Poker during sprint planning. This collaborative approach ensures the entire team contributes to the estimate, uncovering hidden complexities and fostering a shared understanding of the work.
    • Track and Analyze Velocity: Use Jira's built-in Velocity Chart to track the team's output over the last 3-4 sprints. This establishes a baseline that makes future sprint commitments more reliable and predictable.

    Key Insight: The goal of estimation is not perfect accuracy on a single ticket but consistent predictability over a body of work. It’s about creating a reliable forecast, not a contractual obligation for each issue.

    Automating Estimation and Planning

    While the estimation process itself is collaborative, Jira can be configured to support it seamlessly. Ensure your boards are configured to display your chosen estimation statistic (Story Points or Original Time Estimate). This makes the data visible and central to all planning activities.

    For more advanced needs, platforms like Nesty can help standardize the fields and workflows associated with planning. By ensuring that estimation fields are mandatory at the right workflow stage, you can enforce that no work is committed to a sprint without a proper estimate. You can explore how Nesty helps structure these workflows on Nesty's getting started page. This automation reinforces the discipline required for one of the most critical best practices in Jira.

    8. Maintain Organized Backlogs with Proper Prioritization

    A well-organized backlog is the engine of an agile team, translating strategic goals into actionable work. Without clear prioritization, teams waste cycles on low-impact tasks, lose momentum, and fail to deliver value efficiently. This practice ensures that every sprint is focused on what matters most, aligning development efforts directly with business objectives and making it one of the most crucial best practices in Jira.

    A stack of four notes numbered 1 to 4, with 'Must', 'Should', 'Could' written on them.

    Why It's a Best Practice

    An unmanaged backlog quickly becomes a "junk drawer" of outdated ideas, vague requests, and technical debt. Proper prioritization provides clarity and focus, enabling teams to make informed decisions during sprint planning. When the backlog is refined and ordered, developers can pull the next most important item without hesitation, stakeholders have visibility into the product roadmap, and product managers can accurately forecast timelines. This structured approach prevents scope creep and ensures resources are allocated to tasks with the highest return on investment.

    Actionable Implementation Steps

    To implement this best practice, establish a routine and a clear framework for backlog management.

    • Choose a Prioritization Framework: Adopt a consistent method like the MoSCoW method (Must, Should, Could, Won't) or a Value vs. Effort matrix to objectively rank issues. This removes subjectivity and aligns the team around a shared understanding of priority.
    • Schedule Regular Refinement Sessions: Hold weekly or bi-weekly backlog grooming meetings. Use these sessions to discuss, estimate, and prioritize upcoming user stories, ensuring the top of the backlog is always ready for development.
    • Define Clear Acceptance Criteria: Every user story should have well-defined acceptance criteria before it's considered "sprint-ready." This minimizes ambiguity and reduces back-and-forth during the development cycle.

    Key Insight: A great backlog is not just a list; it's a living, breathing artifact that reflects the product's strategic direction. The top items should be small, well-defined, and ready for work, while items further down can remain larger and less detailed.

    Automating Backlog Organization

    Manually managing priorities and ensuring stories are properly formatted can be tedious. Automation can help maintain the integrity of your backlog by standardizing issue creation and organization. Templates and predefined fields are a good starting point for ensuring every new issue contains the necessary information for prioritization.

    For more advanced control, platforms like Harmonize Pro’s Nesty can enforce the inclusion of specific fields like "Business Value" or "Effort Score" upon issue creation. By setting up templates in Nesty’s getting started guide, you can guarantee that every new backlog item is created with the data needed for effective prioritization, keeping your backlog clean and actionable.

    9. Create and Maintain Comprehensive Issue Documentation

    Comprehensive issue documentation is the lifeblood of an effective development cycle. When issues are created with rich context, clear acceptance criteria, and detailed descriptions, they become a single source of truth that prevents ambiguity, reduces rework, and enables asynchronous collaboration. This practice transforms a simple ticket into a comprehensive work package that accelerates resolution and improves final quality.

    Why It's a Best Practice

    Poorly documented issues are a primary source of friction and wasted effort. When a developer has to chase down a product manager for clarification or a QA engineer cannot reproduce a bug, valuable time is lost. Well-documented issues eliminate these bottlenecks by providing all necessary information upfront. For example, a bug report with clear reproduction steps, logs, and screenshots allows a developer to diagnose the problem immediately, rather than spending hours trying to replicate it. This level of detail ensures that everyone, from engineering to QA, operates from the same shared understanding.

    Actionable Implementation Steps

    To implement this best practice in Jira, focus on creating structured templates that guide users to provide complete information.

    • Develop Issue Templates: Create different templates for Bugs, Stories, and Tasks. For a bug, require fields like "Steps to Reproduce," "Expected Behavior," and "Actual Behavior." For a story, include "User Persona," "Use Cases," and "Acceptance Criteria."
    • Mandate Essential Information: Make key fields mandatory. Include attachments like screenshots or logs, specify affected versions and environments, and use @mentions to pull in relevant stakeholders for initial review.
    • Document and Train: Store these templates and guidelines in a central Confluence page. Train teams on why this level of detail is crucial and how to use the templates effectively.

    Key Insight: Treat every Jira issue as a formal handover document. The goal is for anyone to pick up the ticket and understand the "what," "why," and "how" without needing a live conversation.

    Automating Documentation Standards

    Relying on manual compliance for detailed documentation can be inconsistent. Automation can enforce these standards, ensuring every issue created meets your quality bar. You can use Jira’s built-in issue template features or configure automation rules that prompt users to fill in missing information.

    For more advanced control, tools like Harmonize Pro’s Nesty allow you to create dynamic, pre-populated templates that can be automatically applied based on project or issue type. This ensures that every bug report, feature request, or task is created with the necessary structure and detail from the start. Learn how to configure these powerful templates by visiting the Nesty documentation. This transforms one of the most critical best practices in Jira from a guideline into a guaranteed process.

    10. Implement Effective Labeling and Component Organization

    Effective labeling and component organization are critical for creating a multi-dimensional and searchable Jira instance. While issue types define what an item is, components and labels define where it belongs and what it affects. This practice turns your Jira instance from a simple task list into a powerful, cross-functional database that supports targeted reporting, filtering, and JQL queries.

    Hand-drawn diagram illustrating a horizontal flow of software development components: Backend, Frontend, Security, Performance.

    Why It's a Best Practice

    Without a structured approach, labels proliferate uncontrollably, creating a "tag swamp" where security, Security, and sec all mean the same thing but return different search results. Components, when ill-defined, become too granular or too broad to be useful. A strategic system for both prevents this chaos. Components like authentication or payment-gateway clearly group work by functional area, while labels like performance or technical-debt track cross-cutting concerns that touch multiple components, making them essential best practices in Jira.

    Actionable Implementation Steps

    Start by defining a clear, documented strategy for how your teams should use labels and components.

    • Define Component Structure: Use components to represent major, stable parts of your product or system. Good examples include Backend, Frontend, iOS-App, or API. Avoid creating components for temporary features.
    • Create a Standard Label Set: Establish a curated list of 15-20 global labels for cross-cutting concerns (e.g., security, accessibility, documentation). This prevents duplicates and ensures consistency.
    • Document and Govern: Maintain a Confluence page detailing the purpose of each component and the definition of each standard label. Periodically audit and consolidate labels to remove redundant or unused tags.

    Key Insight: Treat Components as the "nouns" of your project (the parts) and Labels as the "adjectives" (the characteristics). This mental model helps teams decide which to use and prevents overlap.

    Automating Labeling and Components

    Manually adding the correct labels and components to every issue is tedious and prone to error. Automation ensures that issues are correctly categorized from the start, improving the accuracy of your reports and filters. For example, an automation rule could add the security label to any bug created with a "critical" priority.

    For organizations requiring strict governance, Harmonize Pro’s Nesty allows administrators to create predefined, approved lists of labels and components. This prevents users from creating ad-hoc tags and enforces taxonomic consistency across all projects, ensuring your Jira data remains clean and reliable. You can explore how to enforce these structures on Nesty's documentation page.

    Top 10 Jira Best Practices Comparison

    Practice 🔄 Implementation complexity ⚡ Resource requirements 📊 Expected outcomes 💡 Ideal use cases ⭐ Key advantages
    Standardize Project and Issue Key Naming Conventions Low–Moderate 🔄: policy definition + initial setup Low ⚡: admin time, docs Improved discoverability and consistent identification 📊 Multi-project orgs, cross-team integrations 💡 Consistent search/filtering; easier integrations ⭐
    Implement Comprehensive Issue Type Structure Moderate 🔄: taxonomy design and governance Moderate ⚡: config, training Better classification, reporting accuracy 📊 Large orgs or varied workstreams (dev, infra, ops) 💡 Targeted workflows and clearer reports ⭐
    Maintain Clean and Descriptive Issue Summaries Low 🔄: templates and training Low ⚡: lightweight review effort Faster triage and improved searchability 📊 Teams needing quick triage and async communication 💡 Quicker identification; fewer clarification meetings ⭐
    Define and Enforce Clear Workflow States Moderate–High 🔄: workflow mapping + automation Moderate ⚡: admins, automation rules, reviews Greater visibility and accurate metrics (burndown/velocity) 📊 Cross-functional teams or regulated processes 💡 Prevents invalid transitions; reliable status reporting ⭐
    Leverage Custom Fields Strategically and Sparingly Moderate 🔄: field design, governance, audits Moderate ⚡: admin overhead; potential perf impact Targeted reporting when limited and relevant fields used 📊 Teams needing business-specific metadata (finance, sales) 💡 Captures essential metadata; supports specialized reports ⭐
    Use Automation to Reduce Manual Work and Errors Moderate–High 🔄: rule creation, testing, maintenance Moderate ⚡: technical setup, monitoring Reduced manual tasks, fewer errors, faster resolution 📊 High-volume repetitive tasks; SLA-driven environments 💡 Consistency, time savings, improved SLA compliance ⭐
    Establish Clear Estimation and Planning Practices Moderate 🔄: calibration, process adoption Moderate ⚡: planning meetings, tracking tools Improved sprint predictability and velocity forecasting 📊 Sprint-based teams needing reliable forecasts 💡 Better planning accuracy; identifies capacity bottlenecks ⭐
    Maintain Organized Backlogs with Proper Prioritization Moderate 🔄: ongoing refinement and governance Moderate ⚡: PO/PM time, refinement sessions Focused delivery; reduced context switching 📊 Teams with many competing priorities or stakeholders 💡 Clear priorities; improved stakeholder alignment ⭐
    Create and Maintain Comprehensive Issue Documentation Moderate 🔄: templates, review discipline Moderate–High ⚡: time to author and update Fewer clarifications; higher-quality resolutions 📊 Complex bugs, onboarding, distributed teams 💡 Faster resolution; knowledge retention and reuse ⭐
    Implement Effective Labeling and Component Organization Low–Moderate 🔄: taxonomy definition and audits Low–Moderate ⚡: governance, periodic cleanup Multi-dimensional filtering and improved routing/reporting 📊 Cross-cutting concerns; multi-team reporting needs 💡 Enhanced filtering, routing, and flexible reporting ⭐

    Turn Best Practices into Automated Habits

    Navigating the complexities of software development, QA, release management, and customer onboarding requires a central nervous system that is both powerful and precise. As we've explored, Jira can be that system, but only when it’s configured with intention and discipline. Moving beyond the default settings to implement structured best practices in Jira is not merely an administrative exercise; it's a strategic imperative that directly impacts your team's velocity, predictability, and overall product quality.

    We've covered a wide spectrum of actionable strategies, from establishing standardized naming conventions for projects and issues to maintaining meticulously organized backlogs. We've seen how clear workflow states eliminate ambiguity, while strategic use of custom fields adds valuable context without creating clutter. Each of these practices, whether it’s writing clean issue summaries or leveraging automation, contributes to a single, overarching goal: creating a seamless, transparent, and efficient delivery pipeline.

    From Theory to Daily Reality

    The challenge with any set of best practices is transforming them from a documented ideal into a lived reality. It's one thing to agree that every bug report should include detailed steps to reproduce; it's another thing entirely to ensure it happens every single time, without fail, across a growing team. This is where the true value of process maturity emerges. The most successful teams don't rely solely on human memory or manual enforcement. Instead, they embed these best practices directly into their tools and workflows, making the "right way" the "easy way."

    This is the critical shift from simply knowing the best practices in Jira to operationalizing them. When you automate the mundane-yet-critical tasks, you create an environment where excellence becomes the default. Consider the impact:

    • Reduced Cognitive Load: Your team members no longer have to remember a long checklist of requirements for each issue type. The system guides them, ensuring nothing is missed.
    • Increased Consistency: Every issue, from a simple task to a critical production bug, adheres to the same high standard of documentation and structure, making handoffs between teams (like development to QA) frictionless.
    • Proactive Quality Gates: Instead of discovering missing information late in the cycle, you can build automated checks directly into your workflow transitions, preventing incomplete issues from ever moving forward.

    Your Actionable Path Forward

    Adopting all ten practices at once can be overwhelming. The most effective approach is incremental. Start by identifying your team's most significant pain point. Is it inconsistent bug reports slowing down your QA team? Begin by implementing a comprehensive issue structure and documentation standards for bugs. Are sprint planning meetings chaotic due to a disorganized backlog? Focus on establishing clear estimation practices and rigorous backlog grooming.

    Choose one or two key areas to focus on this quarter. Work with your team to define what "good" looks like, configure Jira accordingly, and most importantly, explore how automation can lock in those gains. For example, you can configure Jira automation to automatically add a "Definition of Done" checklist to every new user story or to assign a ticket to the QA lead once it moves into the "Ready for Testing" status. This small step turns a manual process into a reliable, automated habit.

    By systematically implementing and automating these best practices in Jira, you are not just cleaning up your project management tool. You are building a scalable foundation for high-performance engineering, predictable releases, and ultimately, a more innovative and less reactive culture. The goal is to make your process serve the work, not the other way around, freeing your team to focus on what they do best: building exceptional products.


    Ready to move beyond manual enforcement and turn Jira best practices into automated, self-managing workflows? Harmonize Pro’s Nesty app transforms your static Definition of Done and Acceptance Criteria into dynamic, intelligent checklists inside Jira, ensuring quality and consistency at every step. See how you can build a more predictable delivery pipeline by visiting Harmonize Pro today.

    Article created using Outrank

  • What Is Workflow Automation Explained Simply

    What Is Workflow Automation Explained Simply

    Let's get right to it. Workflow automation is using technology to run a sequence of tasks automatically based on rules you set. Think of it as creating a digital assembly line for your business processes. Instead of your team manually passing tasks, sending update emails, and entering data, the software handles it for you.

    This simple shift frees your team from repetitive work, allowing them to apply their skills to strategic thinking, customer engagement, and creative problem-solving—activities that directly drive business growth.

    What Is Workflow Automation and Why It Matters

    At its core, workflow automation is the system that ensures data and tasks move smoothly between your people and your software. It’s the practical solution to stop chasing updates through endless email chains and messy spreadsheets. By setting up simple "if this, then that" rules, you build a reliable process that executes perfectly every time.

    For instance, you can create a workflow where a new customer signing a contract automatically triggers the creation of their account, sends a notification to the onboarding team, and schedules their kickoff call. This all happens instantly, without anyone needing to manually coordinate the steps.

    Hand-drawn image illustrating the contrast between manual workflows with people and automated processes with a system.

    From Manual Effort to Automated Efficiency

    The transition from a manual process to an automated one is a game-changer for productivity. Manual workflows are inherently slow, inconsistent, and prone to human error. Critical steps get missed, causing delays, rework, and team-wide frustration. Automation introduces structure and predictability, ensuring your standard operating procedures are actually followed.

    To see just how significant this shift is, let's compare the two approaches.

    Manual vs Automated Workflows A Quick Comparison

    This table breaks down the core differences and their direct impact on your business operations.

    Aspect Manual Workflow Automated Workflow
    Execution Speed Slow, dependent on human availability. Fast, runs instantly 24/7.
    Consistency Varies by person and day; prone to error. Highly consistent; follows rules precisely.
    Scalability Difficult; requires hiring more people. Easy; handles increased volume without issue.
    Visibility Opaque; hard to track status without asking. Transparent; provides real-time tracking.
    Team Focus On repetitive, low-value administrative tasks. On strategic, high-value creative work.
    Cost High operational costs due to labor. Lower long-term costs; improves resource use.

    The differences are stark, and the business world is taking notice.

    The financial case for this shift is compelling. In 2023, the global workflow automation market was valued at around $20 billion and is projected to surge to nearly $37.5 billion by 2030. This growth is driven by the practical need for companies to reduce manual work, accelerate project timelines, and scale operations efficiently. You can find more detail on these workflow automation market trends in recent industry reports.

    By automating routine processes, teams can consistently execute their work with higher speed and accuracy. This doesn't just improve productivity; it builds a foundation for scalable operations and allows employees to focus on high-value activities that drive business growth.

    Ultimately, understanding what workflow automation is means recognizing its power to transform how your teams collaborate. It's about turning chaotic, manual processes into streamlined systems that run themselves, ensuring no detail is ever missed.

    The Three Building Blocks of Automation

    To effectively use workflow automation, you need to understand its core components. Every automated process, no matter how complex, is built from three simple parts. This logic is the engine of all automation. Once you grasp these three building blocks—Triggers, Conditions, and Actions—you can design workflows to handle nearly any repetitive task with precision.

    Let's break down how to use each one.

    Triggers: The Starting Gun

    A Trigger is the specific event that initiates an automated workflow. It’s the starting signal that tells the system, "Begin the process." A trigger can be a customer submitting a support ticket, a developer merging code, or a specific date arriving.

    Actionable examples of triggers include:

    • A new email arrives in a shared inbox like support@company.com.
    • A prospect submits a "Request a Demo" form on your website.
    • A new file is added to a specific Google Drive or Dropbox folder.
    • A Jira issue is moved from "In Progress" to "Ready for QA."

    Conditions: The Rulebook

    Once a workflow is triggered, it consults the Conditions—a set of rules that must be met for the process to proceed. Conditions act as a filter, ensuring the automation only runs when appropriate. They add logic, asking, "Should I execute this action now?"

    For example, your trigger might be "a new invoice is received." A practical condition would be, "Only if the invoice amount is over $1,000." This rule prevents your finance lead from being bothered with minor approvals, saving their time for more critical tasks.

    Conditions are the brain of your workflow. They turn a simple, reactive process into an intelligent one that can handle different situations, making sure the right things happen at the right time.

    Actions: The Work Itself

    Finally, if the trigger event occurs and all conditions are met, the workflow performs one or more Actions. An action is the specific task the system executes for you. This is where the work gets done automatically.

    Practical examples of actions include:

    • Sending a Slack notification to the #dev-team channel.
    • Creating a new task in your project management tool and assigning it to the project manager.
    • Updating a customer's status from "Lead" to "Active" in your CRM.
    • Adding a new row with customer data to a Google Sheet.

    By combining these three elements, you can build powerful automations. For instance, a Jira ticket transition (Trigger) for a high-priority bug (Condition) could automatically create a dedicated Slack channel and ping the on-call engineer (Actions). To get more ideas on how different triggers can fire off notifications, you can explore various notification trigger types in Nesty’s documentation.

    Seeing Workflow Automation in Action

    Theory is helpful, but seeing automation solve real-world problems makes its value clear. Let's examine three common business scenarios where a well-designed workflow can eliminate bottlenecks and improve efficiency. These examples show how triggers, conditions, and actions work together to streamline everyday processes.

    This flow—event happens, rule is checked, action is taken—is the engine behind every automation.

    A diagram illustrating the automation process flow: Trigger (bell), Condition (filter), and Action (rocket).

    Think of it as a digital domino effect you control. A specific event tips the first domino, a rule decides if the next one falls, and a task is completed at the end of the line.

    Example 1: The Developer to QA Handoff

    In software development, the handoff from a developer to the quality assurance (QA) team is a frequent bottleneck. A developer merges their code but forgets to update the Jira ticket or notify the QA engineer. The feature sits idle, delaying the release cycle.

    An automated workflow eliminates this delay.

    • Trigger: A developer merges a pull request into the main branch in GitHub or Bitbucket.
    • Condition: The linked Jira ticket's current status is "In Progress."
    • Actions: The system automatically transitions the Jira ticket's status to "Ready for QA," assigns it to the QA team lead, and sends a notification to the team's Slack channel with a direct link to the ticket.

    With this automation, the QA process begins the moment code is ready, ensuring no time is lost and nothing is forgotten.

    Example 2: Streamlining New Hire Onboarding

    Onboarding a new employee involves numerous tasks across HR, IT, and management: creating accounts, setting up hardware, and scheduling orientation meetings. A manual process is often disorganized, leading to a frustrating first day for the new hire.

    Workflow automation transforms this chaos into a seamless, professional experience.

    Automating the onboarding process ensures every new hire gets the same great experience. It also frees up your HR and IT teams to focus on the more human side of welcoming someone to the company. A smooth, well-organized first day sets the tone for their entire time with you.

    Here’s how to structure the workflow:

    • Trigger: An HR manager updates a candidate's status to "Offer Signed" in the company’s HR platform.
    • Condition: The new hire’s start date is less than two weeks away.
    • Actions: The workflow initiates a series of tasks: it generates an IT ticket to provision a laptop, creates user accounts in necessary systems, and automatically schedules introductory meetings with key team members on their calendar.

    This ensures every new employee has everything they need on day one, without anyone relying on a manual checklist. For a more detailed look, you can learn about setting up automated onboarding workflows and see the steps involved.

    Example 3: Managing Marketing Content Approvals

    Getting a blog post approved via email is often chaotic. The draft is sent, feedback arrives from multiple people, and no one is sure which version is the latest. This back-and-forth slows down content production significantly.

    An automated approval workflow brings order to this process.

    • Trigger: A writer moves a draft card to the "Ready for Review" column in a tool like Trello or Asana.
    • Condition: The content card is tagged as "High Priority."
    • Actions: The system automatically @-mentions all required reviewers, setting a clear due date for feedback. As each person marks an "Approved" checklist item, the system tracks progress. Once all approvals are received, the card automatically moves to the "Scheduled for Publishing" column.

    The True Business Impact of Automation

    Understanding the components is one thing, but what tangible results can you expect? The impact of automation extends beyond speed. It delivers measurable improvements to your bottom line, team morale, and capacity for growth. By removing manual, repetitive work, you change how your team operates, allowing them to achieve more without increasing headcount.

    Drive Greater Operational Efficiency

    The most immediate benefit is a significant boost in operational efficiency. Automated workflows run 24/7 without breaks. Tasks that previously took hours of manual coordination—like the handoff between development and QA—are now completed in seconds.

    This increased speed leads to shorter project cycles and faster delivery of value to your customers. Your entire operation gains a predictable rhythm, allowing your team to manage a larger workload without feeling overwhelmed. This is how you build a process that scales with your business.

    Improve Accuracy and Reduce Costly Errors

    Human error is inevitable in manual processes. Mistakes in data entry, forgotten steps in a checklist, or miscommunication can lead to costly rework, compliance issues, and dissatisfied customers.

    Automation enforces consistency. It executes rules precisely, every single time. By eliminating the potential for human error in repetitive tasks, you dramatically improve data quality and process reliability. This precision not only saves the money and time spent fixing mistakes but also builds trust in your operations.

    The real power of workflow automation lies in its ability to create a clear, digital audit trail for every process. It enhances accountability and makes compliance straightforward, as every action, approval, and handoff is automatically logged and time-stamped.

    Boost Team Morale and Strategic Focus

    No one enjoys a day filled with mind-numbing administrative work. When you automate tedious tasks, you give your team their time and brainpower back. They can finally focus on the high-value, strategic work they were hired for. This isn't about replacing people; it's about elevating their roles.

    The impact on job satisfaction is significant. Burnout decreases and employee retention improves. Instead of ticking boxes, your team can dedicate their energy to innovation, customer interaction, and creative problem-solving—the activities that drive your business forward.

    It’s no surprise, then, that organizations are prioritizing this shift. Reports show that between 51% and 66% of companies have already automated at least one business process, with many seeing a first-year ROI between 30% and 200%. You can dig into more of these workflow automation statistics to see just how widespread its adoption and impact have become.

    Your First Steps to Implementing Automation

    Ready to get started? Launching your first automation project doesn't have to be a massive undertaking. The most effective approach is to start small, secure a quick win, and build momentum from there.

    By following a clear, step-by-step plan, you can confidently reclaim your team's time and build more reliable processes. Use this as your roadmap for getting your first successful automation implemented.

    A whiteboard flowchart outlining the six first steps to implement automation.

    This visual lays out the game plan, from finding the right tasks to making continuous improvements. Let’s walk through each of these steps so you can put them into practice yourself.

    Find the Right Tasks to Automate

    Start by targeting "low-hanging fruit." Identify tasks that are repetitive, rule-based, and consume a significant amount of your team's time. These low-complexity, high-volume processes are ideal candidates for your first automation.

    To find them, ask your team these questions:

    • What daily or weekly tasks are the most tedious and time-consuming?
    • Where do handoffs between people or teams consistently cause delays?
    • Which processes are most prone to simple human errors?

    Map Your Current Workflow

    Before you automate a process, you must understand it completely. Map out every step as it currently exists. Identify who is responsible for each task, what information they need, and where the bottlenecks occur.

    This critical step often uncovers hidden inefficiencies and ensures your automation solves the right problem. Do not skip this.

    Choose the Right Automation Tools

    The best tool depends on your specific needs and existing software stack. Many platforms you already use, like Jira, have powerful native automation features. For more complex, cross-platform workflows, you might need a dedicated automation tool.

    The right tool makes everything feel more intuitive. For teams already deep in Jira, this could mean starting with its native features or grabbing a specialized app from the Atlassian Marketplace to handle more intricate, multi-step processes without ever leaving the platform.

    For example, our Nesty app is built specifically for Jira to manage complex, nested checklists and multi-stage handoffs—perfect for structured processes like deployments or new hire onboarding. You can see how it works by getting started with Nesty's documentation.

    Build and Test Your First Workflow

    Now it's time to build. Begin with a simple, low-risk workflow. Using the process map you created, define your triggers, conditions, and actions in the tool you have selected.

    The most important part is to test thoroughly. Run the workflow in a controlled environment before deploying it to your team. This allows you to identify and fix any issues without disrupting active work. Your first automation doesn't need to be perfect, but it must be reliable.

    Monitor and Refine Your Process

    Effective automation is not a "set it and forget it" activity. Once your workflow is live, monitor its performance. Is it running as expected? Is it delivering the time savings you anticipated? Gather feedback from your team and look for opportunities for improvement.

    This cycle of refinement is what separates successful projects from the ones that fizzle out. And the stakes are high. While some studies project automation could create a net positive of nearly 80 million jobs by 2030, other industry analyses show that a staggering 60-70% of automation projects fail to meet their goals. Success isn't about the technology alone; it depends on smart implementation and continuous improvement.

    Common Questions About Workflow Automation

    As you explore workflow automation, some common questions are likely to arise. Getting clear answers is key to moving forward with confidence. Let's address the most frequent ones.

    A common point of confusion is the difference between workflow automation and Robotic Process Automation (RPA). While related, they solve different problems. RPA is best thought of as a bot that mimics human actions—like clicking and typing—within a single application's user interface. It's ideal for repetitive, on-screen tasks.

    Workflow automation, however, orchestrates entire business processes across multiple systems, teams, and tools. It ensures a complex project moves smoothly from start to finish. It’s not just about automating one task; it's about connecting the entire sequence.

    Does Automation Replace Jobs?

    This is the most common concern. The goal of automation is not to replace people but to free them from the most tedious and repetitive parts of their jobs so they can focus on higher-value work.

    Instead of spending hours manually transferring data from a form to a spreadsheet, an employee could be using that time to solve a complex customer problem or develop a new marketing campaign. Automation handles the grunt work, allowing your team to focus on critical thinking, creativity, and human interaction.

    Automation shifts the focus from mind-numbing task execution to high-value problem-solving. It doesn't take jobs; it makes them better by giving people back their time and brainpower.

    What Technical Skills Are Needed to Start?

    The belief that you need to be a developer to create automations is outdated. The emergence of no-code and low-code platforms has democratized workflow automation.

    These tools feature visual, drag-and-drop interfaces that allow you to build workflows without writing a single line of code. If you can map out a process on a whiteboard, you have the necessary skills to build an automation with modern tools.

    This empowers the people who know the processes best—your team—to become "citizen automators," building the solutions they need without creating a bottleneck for the IT department.


    Ready to turn your team's complex Jira processes into self-managing workflows? Harmonize Pro's Nesty app empowers you to build powerful, automated checklists and handoffs directly within Jira, ensuring nothing ever falls through the cracks. Learn more and start your free trial.

    Article created using Outrank