Your Jira workflow is the digital backbone of how your team completes work. Changing it is a strategic move that can either unlock new efficiency or create chaos. Before touching any admin settings, you must be crystal clear on why a change is necessary. Are you trying to eliminate a bottleneck, adapt to a new methodology, or provide clearer reporting to stakeholders? A vague reason leads to a failed implementation.
Knowing When to Change Your Jira Workflow
Before editing, confirm the workflow is the true problem, not a symptom of a deeper issue like insufficient resources or unclear requirements. A well-timed update can boost team velocity. A poorly planned one creates confusion and kills momentum.
Common Triggers for a Workflow Update
Often, the need for a change is obvious. A growing software team, for example, quickly outgrows a simple "To Do -> In Progress -> Done" workflow. To accurately reflect their development cycle, they need more granular stages like "Backlog," "In Development," "Code Review," "QA Testing," and "Ready for Release." Conversely, an overly complex workflow with redundant statuses can slow teams down. If your team spends more time debating an issue's status than working on it, it's time to simplify.
Here are actionable signs that your Jira workflow needs an overhaul:
Frequent Bottlenecks: Identify columns where tickets consistently pile up. This signals a process blockage or a resource constraint that a workflow change can help visualize and manage.
Poor Visibility: If stakeholders constantly ask for manual status updates, your workflow statuses are too vague or don't reflect the actual work stages. The workflow should provide clarity at a glance.
Direct Team Feedback: Listen to your users. If they find the workflow clunky or misaligned with their actual process, treat their feedback as a requirement for change.
Shift in Methodology: When moving from Scrum to Kanban or adopting a new agile framework, your Jira workflow must be updated to support the new principles, ceremonies, and required metrics.
A great workflow should be an invisible guide, not an obstacle. When your team starts developing workarounds to avoid the workflow, it has failed and must be fixed.
To ensure your changes are effective, benchmark your current process against proven strategies. Brushing up on Jira workflow best practices provides a solid foundation for designing a workflow that sets your team up for success.
Your Pre-Change Preparation Checklist
Attempting a live Jira workflow change without a plan is a high-risk gamble that almost always causes disruption. The smoothest updates are built on careful preparation. Follow this checklist before you modify any settings.
Your first action is to secure buy-in from your team, product owners, and other key stakeholders. Schedule a meeting to walk them through the proposed changes and explain why each modification is necessary. Connect each change directly to a specific problem they are currently facing to get them on board.
Visualize the Change and Get Everyone on the Same Page
To make the discussion concrete, map out the current and proposed workflows side-by-side on a whiteboard or a digital tool like Miro. Draw every status and transition clearly. This visual comparison makes it easy for stakeholders to understand the changes, ask specific questions, and spot potential issues you might have overlooked.
Remember, Jira is a critical tool for a vast number of teams. An estimated 57.5% of professional developers use it to manage their work. Any change has a significant ripple effect, making stakeholder alignment an essential prerequisite for success. You can see the complete data in the full Stack Overflow survey analysis.
Once you have alignment, the next step is to create a safe testing environment.
Set Up a Sandbox Environment
This cannot be stressed enough: Never test workflow changes in your live production environment. A sandbox is non-negotiable. If you use Jira Cloud Premium or Enterprise, Atlassian provides a sandbox where you can clone your production setup.
Use this isolated environment to perform these critical validation steps:
Test every transition path: Click through each new transition to verify that all conditions, validators, and post-functions execute as expected.
Check for integration conflicts: Confirm that the new workflow does not break any connected apps, custom scripts, or automation rules.
Conduct user acceptance testing (UAT): Grant access to team leads or power users so they can run through common scenarios and provide feedback in a zero-risk environment.
Treat your sandbox as a full dress rehearsal. It is where you find and fix all issues before the live rollout, ensuring a smooth and predictable deployment.
Finally, prepare a rollback plan. Document the exact steps required to revert to the old workflow, including how to switch the workflow scheme and manage any issues that were in transition. Having this plan ready gives you the confidence to proceed, knowing you can quickly undo the change if a critical problem arises.
A Practical Guide to Editing Workflows
With preparation complete and your sandbox ready, it's time to implement the changes. Modifying a Jira workflow involves configuring the logic that dictates how issues move through your process.
Navigate to the Jira administration panel to begin. Your first step should always be to make an inactive copy of the current workflow. This allows you to make all your changes without impacting the live project. You will activate this new version only when it is fully configured and tested.
Building Your Workflow's Foundation: Statuses and Transitions
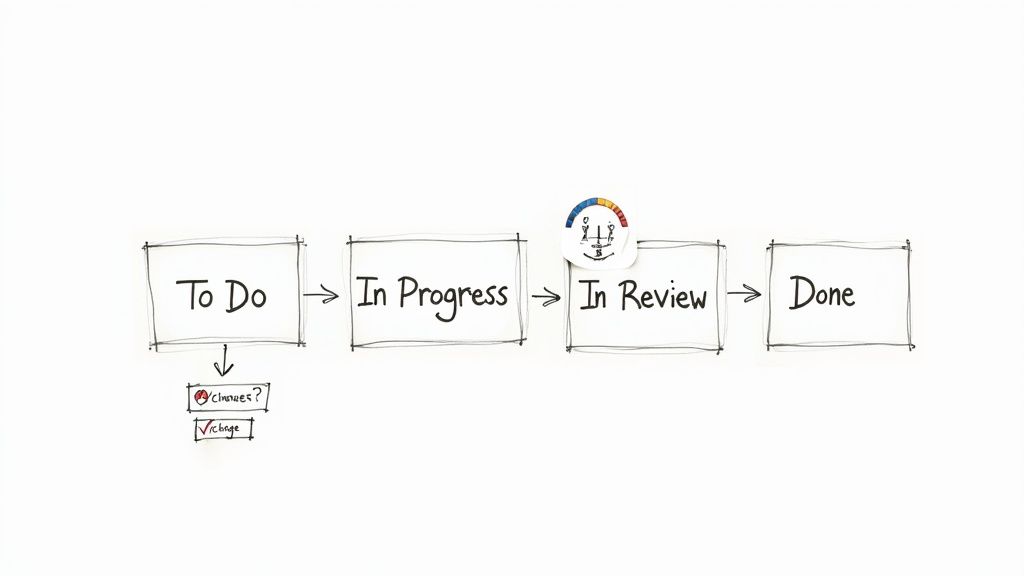
Statuses are the core stages of your process, such as ‘To Do’, ‘In Review’, or ‘Done’. Adding or removing a status is straightforward. The real power lies in configuring transitions, which are the pathways connecting one status to another. Each transition you create becomes a clickable button in the Jira issue view. Give it a clear, action-oriented name like "Submit for Review" to make the process intuitive for your users.
Think of statuses as rooms and transitions as doorways. Your job as an admin is to control not just where the doors lead, but who has the key and what criteria they must meet to pass through.
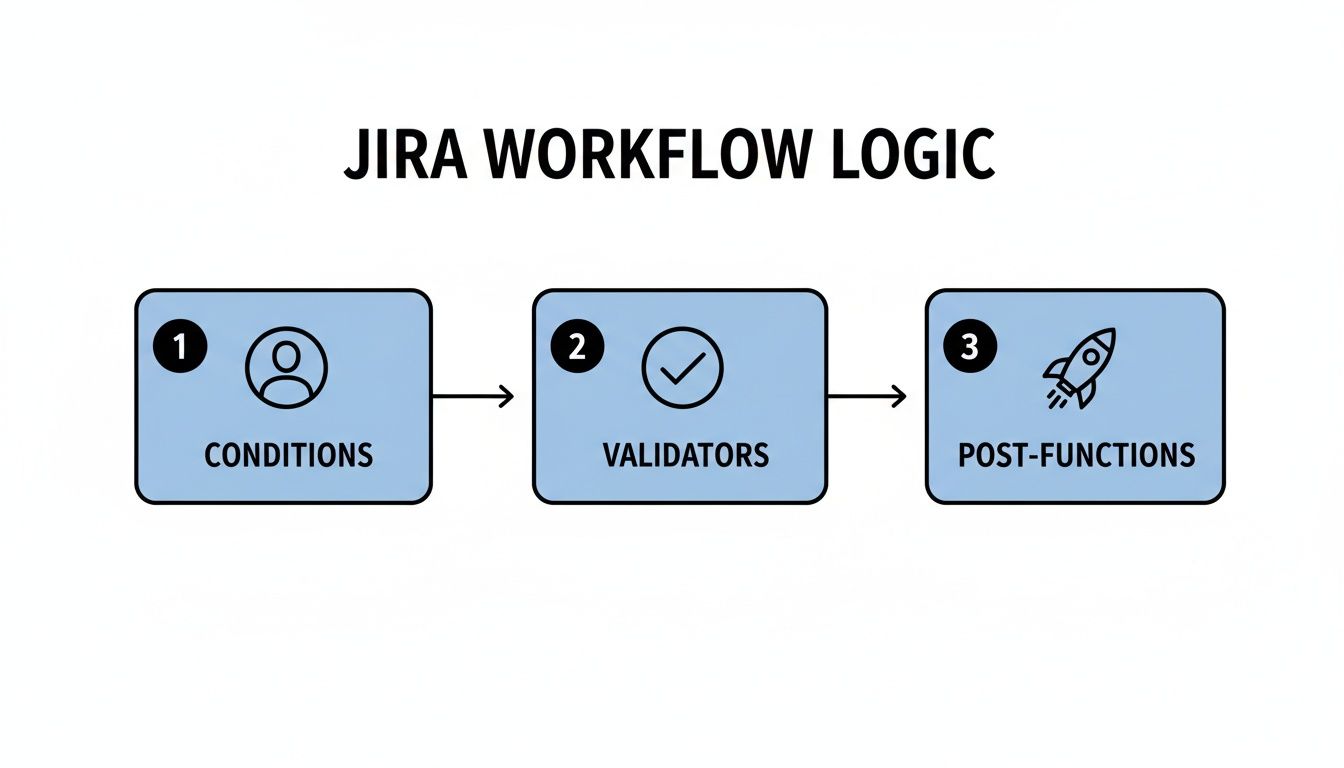
To build an intelligent workflow, you must master the three components that control each transition: conditions, validators, and post-functions.
Adding Intelligence with Conditions, Validators, and Post-Functions
These three tools transform a simple process map into a smart, automated system that enforces rules and eliminates repetitive tasks.
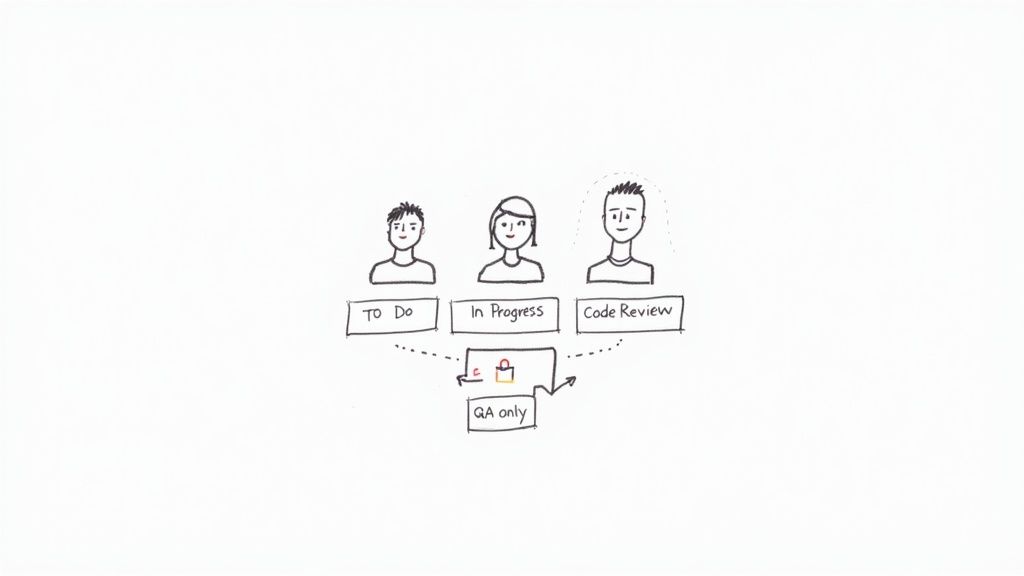
Conditions control who can see a transition. For example, set a condition so only users in the 'QA-Team' project role can see the "Mark as Tested" transition, preventing others from skipping this crucial step.
Validators act as quality gates, checking that specific criteria are met before allowing a transition. A common use is adding a validator to the "Start Progress" transition that requires an assignee to be set, preventing unassigned work.
Post-Functions trigger actions after a transition is completed successfully. This is your primary tool for automation. A classic post-function is to automatically assign an issue to the QA lead as soon as it moves to the ‘Ready for Testing’ status.
Here is a practical example for a software team that wants to enforce peer review for every bug fix:
To configure the transition from ‘In Progress’ to ‘In Review’:
Condition: Add a condition so only the issue's current assignee can move it to review, preventing premature handoffs.
Validator: Add a validator that checks if a 'Code Reviewer' custom field has been filled out. The transition will fail if the field is empty.
Post-Function: Once the validator passes, a post-function automatically assigns the issue to the user selected in the 'Code Reviewer' field and sends them a notification.
By layering these three elements, you build a system that actively guides your team toward your established best practices.
Key Workflow Components and Their Functions
Use this table as a quick reference for the function of each workflow component.
Component
Function
Practical Example
Conditions
Controls who can perform a transition.
Only a ‘Project Manager’ can move an issue to the ‘Approved’ status.
Validators
Ensures required data is present before a transition.
A bug report can’t move to ‘In Progress’ until the ‘Steps to Reproduce’ field is filled.
Post-Functions
Automates actions after a transition is complete.
When an issue moves to ‘Done’, automatically update its resolution to ‘Fixed’.
Mastering these tools will enable you to make precise, effective workflow changes that reduce process friction and genuinely help your team.
How to Safely Migrate Issues to a New Workflow
After designing and testing your new workflow in the sandbox, the final step is migrating all existing issues. With a clear plan, this is a low-risk process. The goal is to move every active issue to the new workflow without data loss or team disruption.
The migration process is initiated by associating your new workflow with the project's workflow scheme. Jira will then prompt you to map the statuses from the old workflow to the new one. This mapping step is critical for data integrity.
Mapping Old Statuses to New Ones
For each status in your old workflow, you must select a corresponding status in the new one. For example, an old status like ‘In QA’ can be mapped directly to a new status called ‘QA Testing’.
However, you will likely encounter edge cases, such as obsolete statuses like ‘On Hold’ that don't exist in the new workflow. Here are two practical strategies for handling them:
Map to a logical default: Route issues from the obsolete status to a default state in the new workflow, such as the ‘Backlog’. This allows product managers to re-triage them.
Use a temporary holding status: Create a temporary status in the new workflow, like ‘Needs Triage’. Map the old status there. After migration, you can use a bulk change operation to move these issues to their correct new statuses.
The golden rule of migration: no issue left behind. You must map every old status, even those you believe are unused. Overlooking a single status can leave issues in a broken state, creating a post-migration cleanup task you want to avoid.
The status mapping process preserves the logic built into your transitions.
This sequence of Conditions, Validators, and Post-Functions is what makes your workflow intelligent. Correct status mapping ensures this logic remains intact after the switch.
Communicating and Scheduling the Migration
The technical migration may be quick, but the impact on your team is immediate. Proactive communication is essential. Announce a specific migration window well in advance, choosing off-peak hours (like a Friday afternoon) to minimize disruption. Inform your team about any potential downtime and clearly explain what changes they will see when they log back in. This simple step prevents a flood of support requests and ensures a smooth transition for everyone.
For organizations managing complex dependencies across multiple teams, refer to this guide on cross-functional workflow transitions to keep everyone aligned.
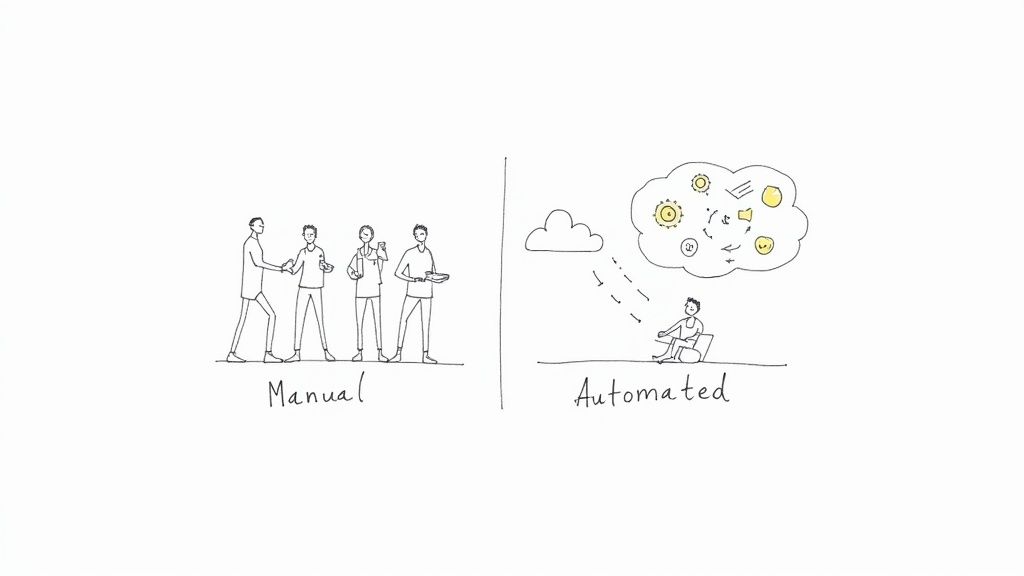
Automating Handoffs to Shave Off Manual Work
An optimized Jira workflow should actively move work forward. Once your statuses and transitions are defined, the next major improvement is automating the handoffs between teams. These are the points where work often stalls while waiting for someone to manually update a ticket, reassign it, and notify the next person.
Instead of relying on manual updates, use automation to handle these repetitive tasks for you. Jira Automation, based on a simple "if-this-then-that" logic, is the primary tool for this. You define a trigger (like a status change) and then specify the actions Jira should perform automatically.
Starting with Jira's Native Automation
Consider the common handoff from development to QA. Manually, a developer must move the issue, select the correct QA engineer, reassign the ticket, and potentially send a Slack message. This multi-step process is prone to error.
With Jira Automation, you can execute this entire sequence with a single transition:
Trigger: Issue transitions to "Ready for QA."
Action 1: Automatically assign the ticket to a specific QA lead or use a load-balancing rule to assign it to the next available tester.
Action 2: Add a comment to the issue, tagging the QA team's user group for visibility.
Action 3: Send a notification to a designated Slack channel like #qa-alerts.
This transforms your workflow from a passive tracker into an active participant. The data from Atlassian shows that over 10 billion automated actions have been executed, proving the value teams get from offloading manual work.
Enforcing Standards and Complex Handoffs
Jira's native automation is excellent for straightforward tasks, but what about enforcing complex standards like a Definition of Done (DoD)? For example, you may need to prevent a story from being moved to "Done" until all its sub-tasks are closed and a "QA Approved" checkbox is ticked.
Automation enforces process discipline without requiring manual oversight. By building your standards directly into the workflow, best practices become non-negotiable steps in the process.
For these advanced requirements, you may need a Marketplace app like Nesty for Jira (Harmonize Pro). It allows you to create detailed, multi-step checklists within an issue and use their completion as a trigger for workflow transitions. For example, you can build a rule that only allows an issue to be reassigned to the DevOps team after the QA checklist is 100% complete, eliminating coordination overhead and ensuring nothing moves forward prematurely.
Launching your new workflow is the start, not the end, of the process. Treat your workflow as a living system that requires ongoing validation, refinement, and scaling.
Your immediate priority is to gather feedback from your users. Schedule a brief retrospective meeting one or two weeks after launch to capture their initial impressions. Ask targeted questions to uncover specific friction points:
Which transitions are confusing or feel unnecessary?
Are any statuses unclear or redundant?
Is the new workflow saving time, or has it added extra clicks?
Acting on this feedback demonstrates that you value your team's experience and helps you resolve minor issues before they become major problems.
Planning for Organizational Growth
A workflow that is perfect for a small team can become a bottleneck as your organization grows. You must plan strategically for how to scale your Jira workflows. A common challenge is deciding between a single, shared workflow scheme for multiple projects and project-specific workflows.
A shared workflow promotes consistency across similar teams, simplifies cross-project reporting, and makes it easier for people to move between projects. However, it risks becoming a "one-size-fits-none" solution if teams have genuinely different processes.
A workflow should be a supportive framework, not a rigid cage. The moment a standardized process actively hinders a team's ability to deliver value, it’s time to consider a more tailored, project-specific approach.
A project-specific workflow, on the other hand, gives a team complete autonomy to tailor its process. The trade-off is increased administrative overhead and the potential for inconsistent data that complicates high-level reporting.
Atlassian is addressing this challenge by increasing Jira Cloud's capacity to 100,000 users on a single instance, enabling large organizations to centralize work and reduce workflow fragmentation. You can read more about these Jira scalability enhancements on their blog.
The key is to evolve your workflows with intention. Continuously monitor performance, maintain open communication with your teams, and be prepared to adapt as your organization's needs change.
Jira is the backbone of modern software development, but are you using it to its full potential? A well-designed workflow is the difference between a simple to-do list and an automated, intelligent system that accelerates delivery and enforces quality. Many teams struggle with chaotic boards, missed handoffs, and unclear processes, turning Jira into a source of friction rather than a tool for collaboration. This common pitfall leads to manual overhead, inconsistent data, and a lack of visibility into the true status of work. When workflows are poorly configured, they become a bottleneck instead of a guide.
This guide cuts through the noise. We will explore 10 specific, actionable Jira workflow best practices that go beyond generic advice. You'll learn how to implement clear states, enforce quality gates like Definition of Done (DoD) or Definition of Ready (DoR), automate tedious manual steps, and leverage metrics to create a self-managing process. These strategies are tailored for the unique needs of software, QA, DevOps, and product teams, providing concrete steps to build a more efficient and predictable delivery pipeline.
By implementing these best practices, you can transform your Jira instance from a passive task tracker into an active, intelligent system. The goal is to build workflows that enforce standards, reduce rework, and let your teams focus on what they do best: building great products. Forget the vague tips; this listicle provides practical implementation details and real-world examples to help you create a workflow that truly works for your organization.
1. Define Clear Workflow States and Transitions
The foundation of any effective Jira project is a workflow that accurately maps to your team's real-world processes. One of the most critical Jira workflow best practices is to establish a well-defined set of states (statuses) and the explicit transition rules that govern movement between them. This creates a predictable, transparent process map that eliminates ambiguity and ensures everyone understands how work progresses from conception to completion.
A clear workflow prevents issues from getting lost, clarifies ownership at each stage, and provides accurate data for reporting on cycle time and throughput. Without it, your Jira board becomes a chaotic free-for-all where issue statuses are inconsistent and team members are unsure of the next step.
How to Implement This Practice
Start by mapping your current process on a whiteboard. Don't build your ideal workflow yet; document what actually happens. This exercise often reveals hidden steps or bottlenecks. From there, you can design a streamlined workflow in Jira.
For Scrum Teams: Implement a workflow like Backlog → Selected for Development → In Progress → Code Review → In QA → Done. This structure clearly separates development, review, and testing activities.
For Kanban/Ops Teams: Use a simpler flow focused on continuous delivery: New → Assigned → In Progress → Waiting for Customer → Resolved → Closed. This accommodates the reactive nature of operations and support tasks.
Key Insight: The goal isn't to create the most complex workflow, but the most intuitive one. Start with 4-6 core states. You can always add more complexity later, but it's much harder to simplify an overly engineered process that the team has already adopted.
Actionable Tips for Success
Visualize and Document: Use Jira’s workflow designer to build and visualize your process. Create a Confluence page that details the purpose of each state and the "Definition of Done" required to move to the next.
Restrict Transitions: Configure your workflow to enforce the process. For example, prevent an issue from moving from In Progress directly to Done, forcing it to go through Code Review and In QA first.
Use Conditions and Validators: Add workflow conditions (e.g., only the 'Assignee' can move an issue to In Progress) and validators (e.g., require a 'Test Plan' to be attached before moving to In QA) to enforce quality gates.
Review and Refine: Treat your workflow as a living document. Hold a review every quarter to gather team feedback and identify bottlenecks. Are issues piling up in one particular state? That’s a signal that your process needs adjustment.
2. Implement Role-Based Permissions and Workflow Restrictions
Once you have a clear workflow, the next step is to ensure it’s followed correctly by controlling who can do what, and when. A crucial Jira workflow best practice is to implement role-based permissions and configure workflow restrictions. This practice prevents unauthorized or premature state changes, creating clear lines of accountability and safeguarding the integrity of your process.
Without defined permissions, anyone can move an issue anywhere, bypassing critical quality gates like code reviews or QA testing. This leads to inconsistent data, missed steps, and a breakdown in process discipline. By restricting transitions, you ensure that specific actions are performed only by the individuals qualified and responsible for them.
How to Implement This Practice
Begin by identifying the key handoff points and quality gates in your workflow where control is most needed. Map these points to specific project roles (e.g., Developer, QA Engineer, Release Manager) within Jira. Then, configure your workflow to use conditions that restrict transitions based on these roles or user groups.
For Development Teams: Restrict the transition from In Progress to Code Review to only the issue's assignee. Then, allow only users in the 'Senior Developers' project role to move an issue from Code Review to In QA.
For Release Management: Configure the workflow so that only a user in the 'Release Manager' group can execute the final transition from Staging Approved to Deployed to Production. This prevents accidental or unauthorized deployments.
Key Insight: The goal of restrictions isn't to create bureaucracy, but to build guardrails that guide the team toward the correct process. These permissions should empower roles by clarifying their specific responsibilities within the workflow, not hinder them.
Actionable Tips for Success
Map Roles to Jira Groups: Create Jira groups that correspond to team roles (e.g., qa-team, dev-leads, product-owners) and use these in your workflow conditions for easier management.
Use Conditional Transitions: In the workflow editor, add a "Condition" to a transition. A common one is the "User Is In Project Role" or "User Is In Group" condition to lock down specific paths.
Document the "Why": On your Confluence workflow documentation page, clearly state who can perform each transition and the reasoning behind the restriction. This fosters understanding and buy-in from the team.
Audit Permissions Regularly: Use Jira's Permission Helper and Scheme Reports to periodically review who has access to what. This helps identify and clean up misconfigurations before they cause problems. For more advanced automated controls, you can explore tools that help enforce critical workflow gates.
3. Use Custom Fields to Enhance Workflow Context
While workflow states and transitions define the path of an issue, custom fields provide the crucial context needed at each step. One of the most impactful Jira workflow best practices is to use custom fields strategically to capture essential information at specific stages. This enriches your issues with data that informs decision-making, streamlines handoffs, and improves the overall intelligence of your workflow.
Without relevant context, team members are forced to hunt for information in comments, attachments, or external documents. By embedding data collection directly into your workflow, you ensure that the right information is available at the right time, reducing friction and preventing delays caused by missing details.
How to Implement This Practice
The key is to present fields only when they are needed. Don't overwhelm users with dozens of fields on the "Create Issue" screen. Instead, use Jira screens and workflow transitions to conditionally require or display fields as an issue progresses. This approach makes your workflow dynamic and user-friendly.
For Bug Triage: In a bug-fixing workflow, the initial screen might only require a summary and description. Upon transitioning to In Progress, you could then prompt the developer to fill in required fields like Root Cause Analysis and Affected Component(s).
For Feature Development: A new feature request might only need a Business Justification to move from the Backlog to Selected for Development. Later, when it moves to Ready for Release, a Deployment Notes field could be required.
For DevOps/Release: A deployment ticket could require a Target Environment field when moving to Ready for Deployment, and a Rollback Plan field before transitioning to Deploying.
Key Insight: Think of your workflow as a conversation with your team. Custom fields are the questions you ask at each stage to ensure clarity and completeness. Ask only what's necessary for the next step, not everything at once.
Actionable Tips for Success
Use Transition Screens: Configure your workflow transitions to pop up a screen that prompts users for specific information. For example, when moving an issue to a Blocked status, present a screen that requires a Reason for Blocker text field.
Leverage Field Configurations: Create different Field Configuration Schemes for different issue types. This allows you to show or hide fields based on the workflow state, keeping issue screens clean and relevant.
Group Related Fields: On your Jira screens, use tabs to group related custom fields together (e.g., a "QA" tab with fields for Test Plan and Test Results). This improves readability and organization.
Regularly Audit Fields: Custom field clutter is a common Jira problem. Every six months, run an audit to identify and deprecate unused or redundant fields. This keeps your instance performant and your processes lean.
4. Establish Workflow Automation Rules
Manually updating issues, assigning them to the right person, and sending status notifications is not only tedious but also a major source of process errors and delays. Establishing workflow automation rules is one of the most impactful Jira workflow best practices because it offloads repetitive administrative tasks to the system itself. This ensures consistency, reduces human error, and frees up your team to focus on value-adding work instead of Jira housekeeping.
A well-automated workflow enforces your process 24/7 without fail. It accelerates handoffs between teams, keeps stakeholders informed in real-time, and ensures that critical process steps are never missed. This practice transforms your Jira instance from a passive task tracker into an active, intelligent process engine.
How to Implement This Practice
Jira Automation uses a simple "When… If… Then…" logic to build rules. You define a trigger (When), add optional conditions (If), and specify the resulting action (Then). Start by identifying high-volume, low-complexity tasks that are currently performed manually. These are the perfect candidates for your first automation rules.
For Development Teams: Create a rule to automatically transition an issue from Backlog to In Progress when a developer assigns it to themselves. Set up another rule that, when a pull request is created, automatically moves the linked Jira issue to Code Review.
For Service/Support Teams: When a customer comments on an issue in the Waiting for Customer status, create a rule to automatically transition it back to In Progress and assign it to the last agent who worked on it. If an issue remains in Resolved for 5 days without a customer response, automatically transition it to Closed.
Key Insight: The true power of automation is not just saving clicks, but enforcing process discipline. By automating transitions and notifications, you ensure that every issue follows the exact same path, leading to more reliable data and predictable outcomes.
Actionable Tips for Success
Start Simple and Iterate: Begin with basic rules like auto-assigning sub-tasks when a parent issue is created. As you gain confidence, build more complex rules with multiple conditions and actions.
Keep Stakeholders Informed: Set up automation to send notifications to a Slack or Microsoft Teams channel when high-priority issues are created or when a release is deployed. You can learn more about how to configure advanced notifications with Nesty triggers on harmonizepro.com.
Manage Time-Based SLAs: Create rules that trigger reminders or escalate issues that are approaching an SLA breach. For example, automatically comment on and change the priority of a bug that has been in the New status for more than 24 hours.
Document and Monitor: Maintain a Confluence page that documents every automation rule, its purpose, and its trigger. Regularly check the audit log for your automation rules to ensure they are running as expected and not causing unintended side effects.
5. Implement Status Categories for Cross-Project Consistency
As organizations scale, teams often create custom workflows tailored to their specific needs. While this autonomy is powerful, it can lead to reporting chaos when every project has unique status names like "In Review," "Ready for QA," or "Testing." One of the most impactful Jira workflow best practices for maintaining high-level consistency is to leverage Jira’s built-in Status Categories: To Do, In Progress, and Done.
These categories act as a universal translator, grouping disparate custom statuses under a standardized umbrella. This allows for meaningful cross-project reporting and portfolio management without forcing every team into a single, rigid workflow. You can accurately track the overall progress of an epic or initiative even if the underlying teams use different statuses.
How to Implement This Practice
The implementation lies in thoughtfully mapping your custom workflow statuses to one of the three core categories. This mapping is done within the Jira administration settings when you create or edit statuses. The goal is to create a logical grouping that reflects the nature of the work at each stage.
To Do (Blue): Map any state where work has not yet begun. This includes statuses like Backlog, New, To Do, Selected for Development, or Ready for Triage.
In Progress (Yellow): Map all states where work is actively being performed or is in a waiting state between active steps. This is where you would map statuses like In Progress, Code Review, In QA, Blocked, or Waiting for UAT.
Done (Green): Map all statuses that signify the completion of work on an issue. Common statuses include Done, Resolved, Closed, Released, or Cancelled.
Key Insight: Status categories are the key to unlocking meaningful portfolio-level metrics. They provide a common language for reporting that allows leadership to understand overall progress without getting lost in the weeds of each team's specific workflow terminology.
Actionable Tips for Success
Create a Status Mapping Guide: Document your organization's standard for mapping statuses to categories in a Confluence page. This ensures consistency as new projects and workflows are created.
Use Categories in Gadgets and Dashboards: Configure Jira gadgets like the "Issue Statistics" or "Two-Dimensional Filter Statistics" to report based on Status Category. This provides a clean, high-level view for stakeholders.
Leverage Categories in JQL: Use JQL queries like statusCategory = "In Progress" to build filters, boards, and reports that span multiple projects, regardless of their specific workflow statuses.
Review Categorization Regularly: During quarterly process reviews, audit your statuses to ensure they are still mapped to the most appropriate category. As workflows evolve, these mappings may need adjustment.
6. Create Workflow Screens and Field Configurations Per Transition
A cluttered Jira screen is a major source of friction and poor data quality. One of the most impactful Jira workflow best practices is to tailor which fields are visible and required at each step of your process. By creating specific screens for transitions, you guide users to provide the right information at the right time, reducing cognitive load and ensuring critical data is captured before an issue moves to the next stage.
This practice transforms your workflow from a static data-entry form into a dynamic, context-aware system. When a developer moves an issue to "Code Review," they are prompted only for the necessary review information, not irrelevant fields from the initial issue creation. This keeps the process clean, efficient, and focused on the task at hand.
How to Implement This Practice
Jira allows you to associate a unique screen with a workflow transition. This screen can display a completely different set of fields than the standard "Create" or "Edit" screens. Use this feature to implement progressive disclosure, revealing information as it becomes relevant.
For Bug Triage: On the Create screen, show only Summary, Description, Priority, and Affected Version. When a QA engineer transitions the bug to Ready for Development, a transition screen could appear requiring them to add Story Points and Epic Link.
For Release Management: A release ticket might start with just a Summary and Target Release Date. When transitioning to In Staging, a screen prompts for Staging Deployment Notes and a Test Plan link. The final transition to Ready for Production could require a Rollback Plan and Final Sign-off from stakeholders.
Key Insight: Don’t overwhelm users with every possible field on a single screen. Presenting only the 3-5 fields relevant to a specific transition significantly improves user adoption and the accuracy of the data you collect. The goal is to make providing correct information the path of least resistance.
Actionable Tips for Success
Map Fields to Transitions: Before building in Jira, map out your workflow and list which specific fields are essential for each transition. This planning phase is critical.
Keep Create Screens Minimal: The initial creation screen should be as simple as possible to encourage quick issue logging. For agile teams, Summary, Description, and Epic Link might be all you need initially.
Use Required Fields Strategically: Make fields required on transition screens, not on the issue itself. For example, make a Code Reviewer field mandatory only when moving an issue to the Code Review status.
Provide Field Descriptions: Use Jira's built-in "Field Help" to add descriptions explaining what information is needed for complex or ambiguous fields, guiding the user directly on the screen.
7. Monitor and Optimize Workflow Performance with Metrics
A well-designed Jira workflow is not a "set it and forget it" asset; it's a dynamic system that requires continuous monitoring and refinement. One of the most impactful Jira workflow best practices is to establish a framework for measuring performance using key metrics like cycle time, throughput, and lead time. This data-driven approach transforms your workflow from a simple process map into a powerful engine for identifying bottlenecks, improving predictability, and boosting team efficiency.
Without metrics, workflow improvements are based on guesswork and anecdotes. By tracking how work flows through your system, you can pinpoint exactly where delays occur, understand your team’s actual capacity, and make informed decisions to streamline your delivery pipeline.
How to Implement This Practice
Start by identifying the key metrics that align with your team's goals. Jira offers built-in reports like the Control Chart and Cumulative Flow Diagram, which are excellent starting points. Use these tools to establish a baseline before making any process changes.
For Engineering Teams: Focus on cycle time to measure the duration from when work begins (In Progress) to when it's ready for release (Done). A team might track this metric to see if process changes successfully reduced their average code review cycle time from two days to just four hours.
For Support Teams: Monitor the "time in status" for Waiting for Customer. A high average time could indicate a need for better follow-up processes or clearer initial information gathering to reduce back-and-forth communication and improve responsiveness.
For Product Teams: Measure lead time from idea creation to final release. This holistic view helps identify major bottlenecks across the entire value stream, such as delays in design handoffs or environment provisioning, allowing for targeted process improvements.
Key Insight: Focus on cycle time and throughput over velocity. Velocity measures effort, but cycle time measures speed and efficiency. A team that consistently delivers value with a short, predictable cycle time is often more effective than a team with high but volatile velocity.
Actionable Tips for Success
Create Team Dashboards: Build a dedicated Jira dashboard for your team that visualizes key workflow metrics. This promotes transparency and empowers the team to self-monitor their performance without waiting for a manager to generate reports.
Review Metrics in Retrospectives: Make workflow metrics a standing agenda item in your monthly or bi-weekly retrospectives. Use the data to guide discussions about what’s working and what isn’t, turning observations into concrete action items.
Use Time-in-Status Reports: Leverage Jira’s reporting capabilities to see how long issues linger in each state. If issues consistently pile up in Code Review, it's a clear signal that this stage is a bottleneck that needs immediate attention.
Correlate with Qualitative Feedback: Numbers only tell part of the story. Always discuss the metrics with your team to understand the context behind them. A spike in cycle time might be due to a holiday week, not a process failure.
8. Design Workflows for Different Project Types and Methodologies
A common mistake is trying to force a single, company-wide workflow onto every team and project. One of the most impactful Jira workflow best practices is to recognize that different methodologies and project types require tailored processes. A rigid, one-size-fits-all approach creates friction, reduces team buy-in, and ultimately leads to inaccurate data as teams create workarounds to fit their actual process.
Designing workflows for specific needs ensures that the tool supports the team, not the other way around. This flexibility increases adoption, improves process efficiency, and provides more meaningful metrics because the workflow accurately reflects the work being done. A development team’s Scrum process is fundamentally different from a DevOps team’s Kanban flow or a support team’s bug-tracking lifecycle.
How to Implement This Practice
Begin by identifying the distinct work patterns within your organization. Instead of creating unlimited variations, aim to establish a few core, standardized workflow templates that teams can adopt based on their project's nature. This provides both structure and flexibility.
Scrum Development Workflow: A process built around sprints, with clear gates for review and testing. Example: Backlog → To Do (Sprint) → In Progress → Code Review → In QA → Done.
Kanban Continuous Flow Workflow: A simpler, pull-based system focused on managing work in progress (WIP) and optimizing flow. Example: To Do → In Progress → Review → Done.
Bug Tracking Workflow: A lifecycle that includes triage, verification, and resolution steps. Example: New → Triaged → Assigned → In Progress → Resolved → Verified → Closed.
Infrastructure/Ops Workflow: A request-based process with approval gates. Example: Request → Approved → Provisioning → Complete.
Key Insight: The goal is controlled flexibility, not chaos. Establish 2-3 well-documented, core workflow templates that cover 80% of your teams' needs. This prevents workflow sprawl while still accommodating different operational models.
Actionable Tips for Success
Create Workflow Templates: In Jira, design and save your core workflows as templates. This makes it easy for project admins to select the right process when creating a new project, reducing setup time and ensuring consistency.
Document and Guide: For each template, create a Confluence page explaining its purpose, the definition of each status, and which types of teams should use it. Create a simple decision tree to guide teams in their selection.
Use Workflow Schemes: Associate different issue types within the same project to different workflows using Jira’s workflow schemes. For example, a 'Bug' can follow the bug-tracking workflow while a 'Story' follows the Scrum workflow, all within the same project. To see how this can be managed in complex environments, you can learn more about handling cross-functional workflows.
Audit and Consolidate: Periodically review the active workflows in your Jira instance. Identify underused or redundant workflows and work with teams to migrate them to one of your standard templates to reduce administrative overhead.
9. Implement Post-Function Actions and Field Updates
Manual updates are a common source of error and inconsistency in any workflow. One of the most powerful Jira workflow best practices is to leverage post-functions, which are automated actions that Jira performs after an issue transition is executed. By automating tasks like updating fields or notifying stakeholders, you reduce manual effort, enforce data integrity, and ensure your process runs smoothly without relying on human memory.
Automating these small but critical actions keeps your data clean and reliable. It ensures that when a transition occurs, all necessary downstream effects are handled consistently, every single time. This frees up your team to focus on the work itself, not the administrative overhead of managing Jira tickets.
How to Implement This Practice
Post-functions are configured directly within the workflow transition settings in Jira. When you edit a transition (e.g., "Start Progress"), you can add, remove, or reorder the post-functions that fire after the transition completes. While complex automations can be built with apps or custom scripts, Jira’s native post-functions cover many common use cases.
Automatically Set a Resolution Date: When an issue moves to Done, add the built-in "Update Issue Field" post-function to set the Resolution Date field to the current time. This is essential for accurate cycle time reporting.
Assign to the Lead Reviewer: On the Move to Code Review transition, you can use a post-function to automatically assign the issue to a specific user, like the team’s tech lead, ensuring a swift handoff.
Trigger External Notifications: Use a post-function to trigger a webhook that sends a message to a Slack channel when a high-priority bug is moved to In QA, immediately alerting the testing team.
Key Insight: Post-functions are the connective tissue of a smart workflow. They turn a passive status board into an active, automated system that enforces rules and communicates changes, significantly reducing the chance of human error and process gaps.
Actionable Tips for Success
Start with Built-in Functions: Before reaching for a complex scripting app, explore Jira's native post-functions. They are powerful enough to handle common needs like updating fields, assigning users, and setting resolutions.
Document Your Automations: In your Confluence workflow documentation, add a section detailing what each post-function does and why it’s there. This prevents confusion when troubleshooting or modifying the workflow later.
Test in a Sandbox: Always test new or modified post-functions in a staging or test project. An incorrectly configured post-function can cause unintended data changes or even break your workflow.
Keep Logic Simple: A single transition can have multiple post-functions. Keep each one focused on a single, clear action. If you need complex, multi-step logic, consider using a dedicated automation rule instead.
10. Conduct Workflow Training and Change Management
Even the most perfectly designed workflow will fail if the team doesn't understand how or why to use it. A critical, yet often overlooked, Jira workflow best practice is to implement a structured change management and training plan. Simply launching a new workflow and expecting everyone to adopt it seamlessly is a recipe for confusion, inconsistent data, and frustration. A formal rollout plan ensures buy-in, smooths the transition, and maximizes the value of your process improvements.
Proper change management turns a theoretical process diagram into a living, breathing team habit. It reduces friction, clarifies expectations, and creates a positive feedback loop where users feel heard and supported, leading to higher adoption rates and more reliable data from your Jira instance.
How to Implement This Practice
Introduce workflow changes deliberately, not as a surprise. Your plan should cover communication, training, and support from the initial announcement through post-launch feedback. The goal is to make the transition as easy as possible for every team member.
For New Hires: Incorporate a 30-minute "Jira Workflow Essentials" session into your onboarding process. This ensures new team members learn the correct process from day one, preventing them from developing bad habits.
For Existing Teams: When rolling out a new workflow, create a dedicated Slack channel for questions. Host brief, 15-minute daily huddles during the first week to address issues in real-time. Record and share short Loom videos demonstrating key transitions, like moving an issue from In Progress to Code Review.
Key Insight: Don't just show the "what"; explain the "why." When team members understand that a new Ready for UAT state was added to reduce bug kickbacks from the business team, they are far more likely to embrace the change. Connect every process modification to a tangible team benefit.
Actionable Tips for Success
Create Visual Aids: Develop simple, one-page "workflow cheat sheets" or diagrams that teams can reference. Visual guides are much easier to digest than lengthy documentation.
Pilot and Phase the Rollout: Test your new workflow with a small pilot group or a single team first. This allows you to iron out kinks before a full deployment.
Train Super-Users First: Identify team members who are Jira power users. Train them first and empower them to act as go-to resources for their peers, decentralizing support.
Establish Feedback Channels: Actively solicit feedback at the 1-week, 1-month, and 3-month marks after a launch. Use this input to make iterative improvements and show the team their voice is valued.
Jira Workflow Best Practices: 10-Point Comparison
Item
Implementation Complexity 🔄
Resource & Maintenance ⚡
Expected Outcomes ⭐
Ideal Use Cases 📊
Key Tip 💡
Define Clear Workflow States and Transitions
Medium — clear rules, some design effort
Moderate — review quarterly
⭐⭐⭐⭐ Clear status, improved alignment and bottleneck ID
Cross-functional teams, Kanban/Scrum, ops
Start with 4–6 core states; document entry/exit criteria
Implement Role-Based Permissions and Workflow Restrictions
Design Workflows for Different Project Types and Methodologies
High — multiple schemes and templates
High — governance to avoid sprawl
⭐⭐⭐ Better adoption and alignment with team practices
Organizations with diverse teams (Scrum/Kanban/Infra)
Create 2–3 core templates and use inheritance
Implement Post-Function Actions and Field Updates
High — scripting/config and testing
Moderate — monitor for errors/perf impact
⭐⭐⭐ Ensures data consistency and automation of updates
Workflows needing timestamps, links, integrations
Prefer built-in post-functions; document and test thoroughly
Conduct Workflow Training and Change Management
Medium — content and rollout planning
Moderate to High — ongoing education
⭐⭐⭐⭐ Improves adoption; reduces support requests
Any org deploying new/changed workflows
Pilot, train super-users first, provide quick reference guides
From Theory to Practice: Activating Your Ideal Workflow
We've explored ten critical Jira workflow best practices, moving from foundational principles like clear states and transitions to advanced tactics like post-function automation and performance monitoring. The central theme connecting all these strategies is a shift in mindset: Jira should not be a passive task tracker but an active, intelligent engine that guides your team’s delivery process. By transforming abstract process diagrams into tangible, automated workflows, you create a system that reinforces quality, enhances clarity, and accelerates productivity.
The journey to an optimized workflow isn’t a one-time project; it's a continuous cycle of implementation, measurement, and refinement. Your initial goal isn't to build the "perfect" workflow overnight. Instead, focus on incremental improvements. Start by tackling the most significant friction point in your current process, whether it's ambiguous handoffs between development and QA or a lack of clear entry criteria for tasks.
Synthesizing Your Action Plan
To translate these concepts into action, remember the core pillars we discussed. Clarity comes from well-defined states, role-based permissions, and consistent status categories. Efficiency is driven by automation rules, smart transitions, and post-function actions that eliminate manual toil. Quality is enforced through specific screen configurations, custom fields that capture necessary context, and the diligent monitoring of workflow metrics to identify and resolve bottlenecks.
The most effective Jira workflows are not just built; they are cultivated. They evolve with your team, adapting to new challenges and incorporating lessons learned from every sprint and release cycle.
Your immediate next steps should be pragmatic and focused:
Audit Your Current Workflow: Identify one major pain point. Is it tasks getting stuck in a particular status? Are developers missing key information when starting work?
Select One Best Practice: Choose a single strategy from this article that directly addresses your identified pain point. For example, if information is missing, focus on creating a transition screen with required custom fields.
Implement and Communicate: Make the change and conduct a small training session with your team. Effective change management is just as crucial as the technical configuration.
Measure and Iterate: Use Jira’s built-in reports, like the Control Chart, to see if your change had the desired effect. Gather qualitative feedback from your team and plan your next small improvement.
The Power of a Proactive Process
Mastering these Jira workflow best practices delivers benefits that extend far beyond simple organization. It reduces cognitive load for your team, allowing them to focus on high-value work instead of process administration. It creates a predictable, transparent delivery pipeline that stakeholders can trust. Most importantly, it builds a foundation for scalable, high-quality software development, ensuring that as your team grows, your processes become a source of strength, not a bottleneck.
While Jira provides a robust platform, orchestrating intricate processes with nested tasks, conditional logic, and seamless handoffs can stretch its native capabilities. This is particularly true when managing complex activities like customer onboarding, multi-stage QA validation, or detailed release checklists where every sub-task must be tracked and completed in sequence. For teams seeking to automate these complex, multi-layered procedures, a more specialized solution is required to turn an ideal process into a practical, everyday reality.
Jira workflow automation is a method for building simple, rule-based logic into your projects to handle repetitive tasks. Use it to create a series of if-this-then-that instructions that automatically transition tickets, notify the right people, and update fields without manual intervention. This guide will show you how to apply this strategy to make your operations run smoothly as you scale.
Why Jira Workflow Automation Is a Game Changer
Manual Jira updates are a significant time sink. Projects often get bogged down by tedious updates, slow handoffs between teams, and simple human error. For example, a developer might push their code but forget to move the ticket into the "Ready for QA" column. As a result, the testing team remains unaware that a task is waiting, bringing the entire process to a halt.
This is the exact problem Jira workflow automation solves. It transforms your static Jira board into a dynamic, self-managing system. Instead of relying on individuals to remember every step in a complex process, you build rules that execute these tasks automatically.
Moving Beyond Manual Drudgery
The primary value of automation is reclaiming your team's most valuable resource: time. By automating routine administrative tasks, you enable your engineers, QA analysts, and project managers to concentrate on high-impact work.
Here are common problems that you can eliminate with automation:
Slow Handoffs: Tickets no longer sit idle waiting for a manual status or assignee change. Automate these transitions to ensure work flows continuously.
Inconsistent Data: Enforce required fields upon ticket creation or transition. This eliminates the need to chase down information and ensures your reports are built from complete data.
Constant Context Switching: Allow developers to stay focused on coding instead of frequently switching to Jira for ticket updates. Integrate your Git repository to update tickets automatically based on developer actions.
Missed Notifications: Set up rules to automatically notify key stakeholders at critical workflow stages, ensuring everyone stays informed.
The goal is not just to accelerate tasks, but to build a reliable and predictable system that reduces the mental load on your team. When the process works seamlessly, your team can focus on solving problems and innovating.
The Tangible Impact on Your Team
Implementing Jira workflow automation provides immediate, measurable benefits. It is a core reason why Jira is a market leader, controlling over 42% of the project-tracking market. Its automation engine is the foundation for workflows used by millions daily, demonstrating its value as an essential feature.
The results are clear: tickets are resolved faster, and project data becomes more accurate and reliable. For teams looking to implement more structured processes, our guide on getting started with Nesty provides actionable steps for creating nested checklists and advanced triggers.
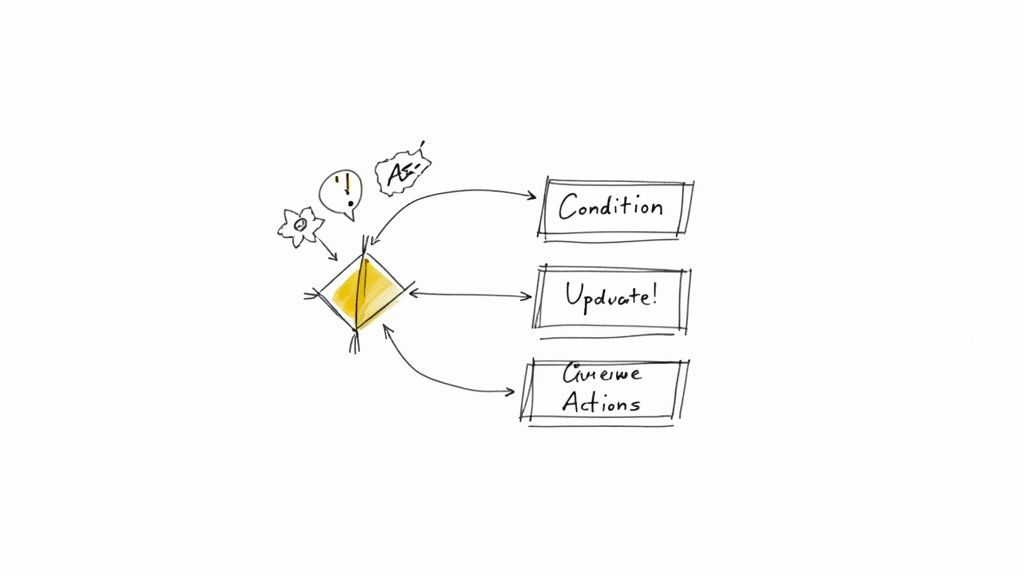
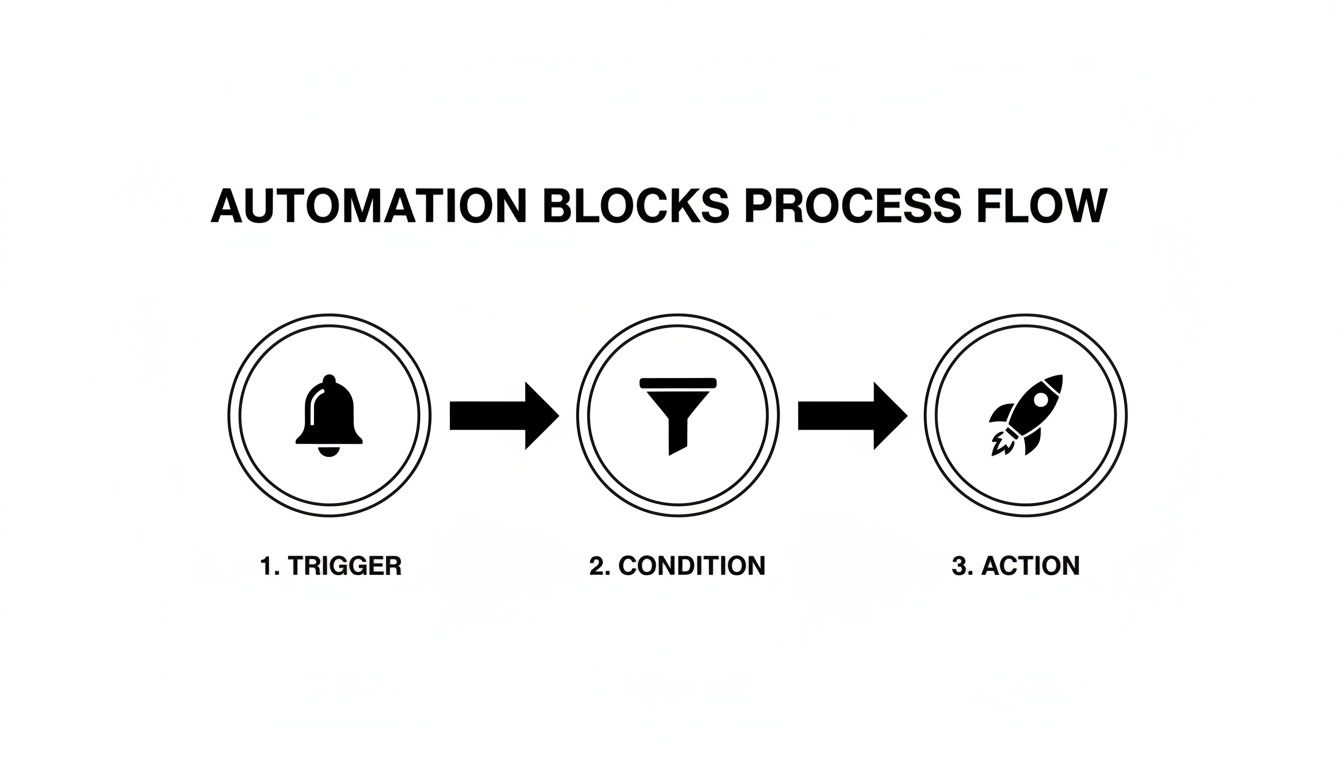
Understanding The Building Blocks Of An Automation Rule
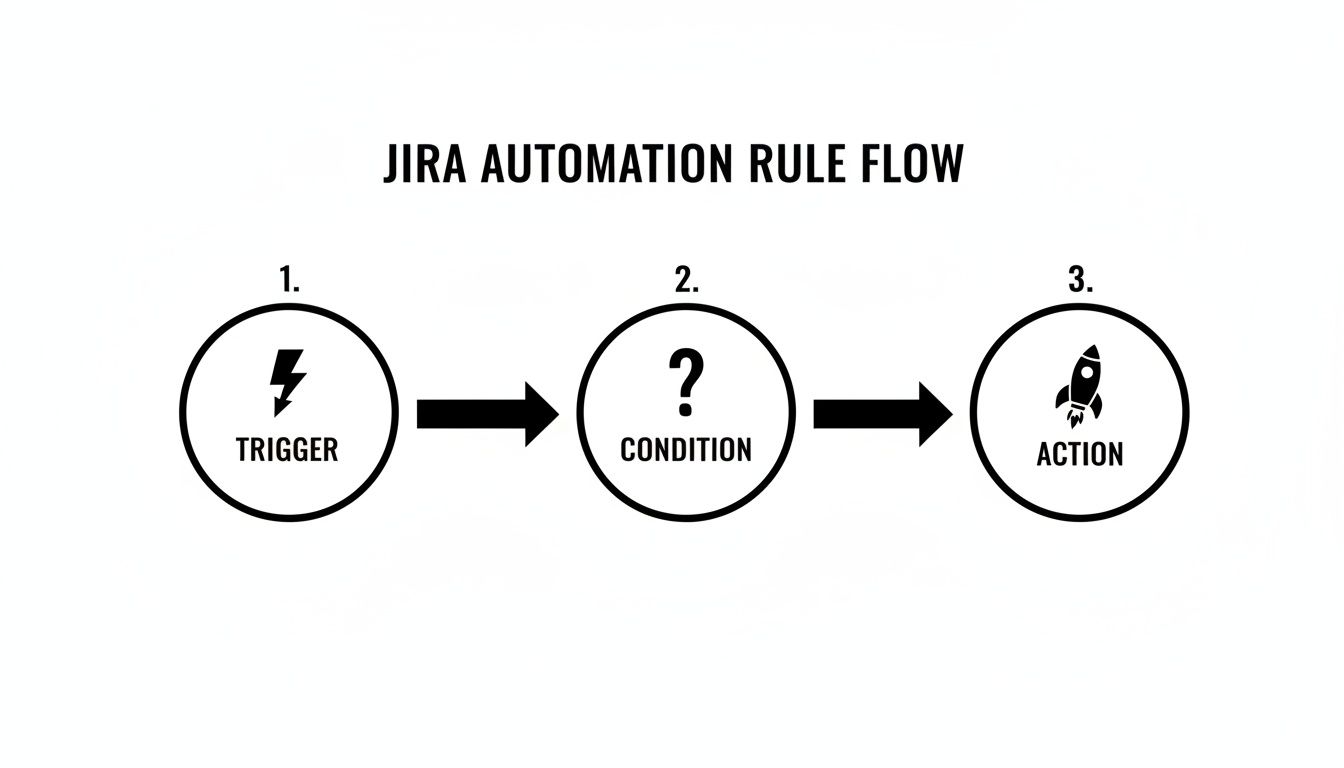
To effectively use Jira workflow automation, you need to understand its fundamental logic. Every automation, regardless of its complexity, is composed of three core components: Triggers, Conditions, and Actions.
This structure operates like a simple command: a catalyst (Trigger) initiates the process, a set of qualifiers (Conditions) confirms it should proceed, and a task (Action) is executed. Mastering this sequence is key to building automations that genuinely assist your team.
Here is a breakdown of these components:
Component
Purpose
Actionable Examples
Trigger
The "If this happens…" event that starts the rule.
Issue Created, Field Value Changed (e.g., Priority is updated), Issue Transitioned (e.g., moves from "To Do" to "In Progress"), Comment Added.
Condition
The "…only if this is true…" checkpoint. The rule stops if conditions are not met.
Issue Type = Bug, Status = In Review, Assignee is empty, or a JQL query like priority = Highest AND "Story Points" > 8.
Action
The "…then do that" task performed by the rule.
Transition Issue, Edit Issue (e.g., add a label), Send Slack/Teams notification, Create sub-tasks, Add a Nesty checklist.
This Trigger → Condition → Action framework is the foundation for everything from sending a simple notification to orchestrating a complex, multi-step deployment process.
Triggers: The Starting Gun
A Trigger is the event that initiates an automation rule. Your rule remains dormant until its specified trigger event occurs.
These events can range from a specific user action to a scheduled time, giving you precise control over when your automations execute.
Here are common triggers to implement:
Issue Created: Use this for setup tasks. When a new issue is logged, automatically assign a default component or add a standard "Definition of Done" checklist.
Field Value Changed: This is highly practical. For instance, trigger a rule the moment the Priority field is changed to Highest to escalate visibility.
Issue Transitioned: Fire the rule when an issue moves between statuses, such as from ‘In Progress’ to ‘In Review’, to notify the next person in the chain.
Version Released: Use this trigger for cleanup. Build a rule to automatically find and close all tickets associated with a version upon its release.
Selecting the correct trigger is the critical first step. An incorrect choice can cause your rule to execute too frequently, not at all, or at inconvenient times.
Conditions: The Brains Of The Operation
If the trigger starts the process, the Condition decides whether it should continue. It acts as an "…only if this is true" checkpoint. After a trigger fires, Jira evaluates the conditions you've set. The rule proceeds to the action only if all conditions pass. If any condition fails, the rule halts.
This is how you add precision to your Jira workflow automation. Conditions prevent your rules from running on every issue, allowing you to target very specific scenarios.
A common mistake is building rules with only a trigger and an action. Conditions provide the necessary control, preventing a rule designed for bug reports from incorrectly running on new feature stories.
Base your conditions on any data point within an issue. For example, use a JQL (Jira Query Language) condition to check if issueType = Bug AND priority = High. Alternatively, use a simpler field condition to check if the ‘Assignee’ field is empty. For advanced use cases, you can even check for a specific change in assignee to initiate a series of other checks.
Actions: The Workhorse
The final component is the Action—the "then do that" part of the rule. Once the trigger fires and all conditions are met, the action is the task the rule performs. This is the workhorse of your automation, executing repetitive tasks so your team doesn't have to.
The range of available actions is extensive, covering everything from modifying the issue itself to communicating with external tools.
Here are a few practical actions you can configure:
Transition Issue: Automatically move an issue to the next status in your workflow.
Edit Issue: Modify a field's value, such as setting a due date or adding a label.
Send a Notification: Ping a user, group, or channel in Slack or Microsoft Teams.
Create Sub-tasks: Instantly break down a larger story into predefined sub-tasks and assign them to the appropriate team members.
By combining Triggers, Conditions, and Actions, you can construct powerful automations tailored to your team's specific workflow.
Practical Automation Recipes You Can Use Today
Understanding the theory of Jira workflow automation is useful, but applying it delivers tangible results. This section provides battle-tested automation recipes you can implement immediately to eliminate common bottlenecks and manual work.
Every automation rule follows a Trigger → Condition → Action sequence. Once you internalize this logic, you can analyze any manual process and break it down into an automatable workflow.
Automatically Assign Bugs to the Right QA Lead
A common bottleneck is bug triage, where new bugs sit in the backlog awaiting assignment. This recipe routes new bugs directly to the appropriate QA lead, preventing delays.
Implement it with this configuration:
Trigger:Issue Created
Condition:Issue Type = Bug AND Component is not empty
Action: Use an If/else block to route the issue based on its component.
If:Component = "API" → Action:Assign issue to Jane Doe
If:Component = "UI/UX" → Action:Assign issue to John Smith
If:Component = "Database" → Action:Assign issue to Emily Rogers
With this rule active, bugs are immediately assigned upon creation, eliminating manual handoffs and ensuring they enter the QA queue without delay.
Move a Task to “In Review” When a Pull Request is Opened
Developers often face context switching when they finish coding, open a pull request, and then must remember to update the corresponding Jira ticket. This automation eliminates that manual step, keeping Jira synchronized with your development work.
To set this up, ensure Jira is connected to your Git provider (e.g., GitHub or Bitbucket).
Trigger:Pull Request Created
Condition:(Optional but recommended)Status = "In Progress". This prevents the rule from moving a ticket backward in the workflow.
Action:Transition issue to "In Review"
This rule provides immediate visibility to the entire team. Product managers can see what is ready for review, and QA can prepare test cases without waiting for a developer's status update.
The key benefit is that Jira begins to reflect the actual state of work, rather than being an additional task for developers. The workflow follows the work, not the other way around.
Auto-Close Stale Tickets and Keep Your Backlog Clean
Backlogs often become cluttered with old, irrelevant tickets. This recipe functions as a digital janitor, automatically closing issues that have been inactive for an extended period.
Trigger:Scheduled (configure it to run daily or weekly).
Condition: Use a JQL query like Status = "Awaiting Customer Feedback" AND Updated < -90d to target issues untouched for 90 days.
Action: First, Add a comment such as, "Closing this due to inactivity. Please feel free to reopen it if the problem persists." Then, Transition issue to "Closed".
This practice keeps your team focused on active work and improves the accuracy of your reporting by removing obsolete items from the backlog. Automating such tasks is a key driver behind the global workflow automation market's projected growth to over $45 billion. Industry reports indicate that smart automation can cut triage time by 30-60%, freeing up significant team capacity.
Sync Parent Task Status with Its Sub-Tasks
A parent story should not remain "In Progress" when all its sub-tasks are complete. This automation ensures the parent issue's status accurately reflects the state of its underlying work.
Trigger:Issue Transitioned (fires when any sub-task changes status).
Condition: First, verify that the triggering issue is a sub-task.
Action: Use the Branch rule / related issues option.
Branch for:Parent
Condition (on the parent): Add a condition to verify that all other sub-tasks of the parent are also in the "Done" status.
Action (on the parent):Transition issue to "Done"
This creates a self-managing work hierarchy, which is particularly useful for complex features with numerous sub-tasks. For teams requiring even more structure, our pre-built Nesty templates offer advanced capabilities. Learn how to add nested checklists and quality gates to enforce your Definition of Done in our guide to Nesty developer workflows.
These recipes are a starting point. By creatively combining Triggers, Conditions, and Actions, you can configure Jira to match your team's real-world processes, saving time and building a more reliable system.
Advanced Techniques for Complex Workflows
Once you master the basics, you can begin automating more complex processes in Jira. Moving beyond simple trigger-action recipes allows you to tackle your team's most nuanced workflows. These advanced techniques transform your rules from simple helpers into the operational core of your project.
Use these methods to build automations that reflect your team's unique processes, making the system adapt to your workflow rather than forcing your workflow to fit the tool.
Handling Multiple Scenarios with Branching Logic
A standard automation rule follows a linear path. However, real-world workflows often have a single trigger that can lead to multiple outcomes. Use branch rules to manage these scenarios effectively.
Branching allows you to create multiple "if-this-then-that" paths within a single rule. Instead of building five separate automations for the same trigger, you can create one master rule that intelligently routes the work.
For example, when a developer merges a pull request, the next step can vary:
A bug fix might need to go to "Ready for Regression Testing."
A new feature should move to "Ready for UAT."
A small tech debt story can go straight to "Done."
A branch rule handles this by using the Pull Request Merged trigger and then branching based on the issueType to transition the issue to the correct status. This approach keeps your automation logic clean, organized, and easier to manage than multiple overlapping rules.
The primary advantage of branching is consolidation. You create a single source of truth for a key workflow step, which simplifies debugging and future updates.
Making Your Automations Dynamic with Smart Values
Static actions have limitations; you cannot hard-code every possible assignee or comment for every scenario. Smart Values solve this by letting you pull dynamic information from your issues and inject it directly into your automation actions.
Smart Values are placeholders, like {{issue.summary}} or {{reporter.displayName}}, that Jira replaces with real-time data when the rule executes. They add context and personalization to your automations.
Here are ways to use them immediately:
Personalized Notifications: Instead of a generic message, send a Slack notification like: "Hey {{assignee.displayName}}, the priority on '{{issue.summary}}' was just raised to Highest by {{initiator.displayName}}."
Dynamic Comments: When escalating an issue, automatically add a comment that tags relevant stakeholders and provides context: @"squad.lead", the due date for this issue was just changed to {{issue.duedate}}. Please review.
Copying Field Data: Sync information between related issues. When creating sub-tasks, use Smart Values to automatically copy the parent issue's Fix Version and Component fields to the new sub-tasks.
Using Smart Values makes your automations more informative and feel less robotic, acting more like a helpful team member who provides the right information at the right time.
Running Automations on a Schedule
Not all automations should be triggered by a user action. Some of the most effective rules run in the background, maintaining project hygiene and data accuracy. For these time-based processes, use scheduled rules.
Set these rules to run at a specific interval—such as daily or weekly. The rule then executes a JQL query to find a batch of issues meeting your criteria and performs an action on them.
This is ideal for housekeeping tasks:
Find Stale Issues: Create a daily rule to find all issues that have not been updated in 30 days and add a comment requesting a status update.
Identify Blocked Work: Set up a rule to run each morning that identifies high-priority issues with the "Blocked" flag and sends a summary to a project manager's Slack channel.
Enforce SLAs: For support teams, a scheduled rule can run hourly to find tickets approaching their SLA breach time and automatically escalate their priority.
Scheduled rules help you proactively manage your workflow instead of constantly reacting to problems after they have already caused delays.
Integrating with External Tools Using Webhooks
Your workflow often extends beyond Jira, connecting to code repositories, CI/CD pipelines, and communication platforms. Webhooks enable your Jira automation to interact with these external systems.
A webhook is an automated message sent from Jira to another application when a specific event occurs. Configure an action in your automation rule to "Send web request." When the rule runs, Jira sends an HTTP POST request with relevant issue data (in JSON format) to a URL you provide.
This enables deep, cross-tool integration. For instance, a development team can link Jira to their CI/CD pipeline:
Trigger: An issue is transitioned to "Ready for Deployment."
Result: The external tool receives the webhook, reads the issue key from the JSON payload, and automatically initiates the correct deployment script.
This creates a seamless flow from development to production, orchestrated entirely by your Jira workflow. By combining these advanced techniques—branching, Smart Values, scheduled rules, and webhooks—you can build an intelligent system that automates even your most intricate processes.
How to Manage Automation Rules Without Creating Chaos
As your team adopts automation, it's easy for rules to become a tangled, undocumented mess, leading to conflicts, silent failures, and maintenance challenges. This "rule sprawl" is a common problem that arises without a clear governance plan.
To prevent this, establish a simple governance framework. These guidelines will help keep your Jira workflow automation scalable, transparent, and manageable as your team grows.
Establish Clear Naming Conventions
The first step is to enforce a consistent naming convention for every rule. A vague name like "Update Ticket" creates future confusion. In contrast, a name like [DEV] → [QA] | Transition to In Review on PR Creation clearly communicates the rule's purpose, scope, and trigger.
A robust naming structure should include:
Scope or Team: Identify the relevant team, such as [Marketing], [DevOps], or [Support].
Trigger Event: Use clear terms like On PR Merge or On Bug Creation.
Primary Action: Describe the main task, such as Assign to QA Lead or Close Stale Ticket.
This discipline makes your automation library easy to scan and is invaluable for debugging or locating a specific rule.
Use Labels to Organize and Filter Rules
Jira allows you to add labels to your automation rules. Use this feature to group related automations, effectively creating folders that let you filter your list and find what you need quickly.
Think of labels as an organizational toolkit. Create labels like notifications, ci-cd, triage, or housekeeping. This enables you to instantly view all rules related to a specific function, regardless of their project.
This is highly effective for auditing. If you suspect an issue with your notification system, filter by the notifications label to review all relevant rules at once, instead of searching through a long, unsorted list.
Define Ownership and Monitor Usage
Not all rules are equal. Enterprise governance often requires a tiered approach. Allow team leads to manage project-specific rules, but assign a designated owner or a small governance team to any global rules that affect multiple projects.
This is crucial because automation is a finite resource. Atlassian plans have execution limits, and exceeding them can throttle your instance or incur extra costs. Central ownership for global rules helps prevent redundant or inefficient automations from consuming your monthly quota. For further reading, there are excellent governance models for Jira on dev.to available.
Make it a practice to regularly review the audit log for failures and monitor your usage statistics. If a single rule is responsible for 40% of your monthly executions, investigate whether it can be optimized. Proactive monitoring ensures your system remains healthy and performant, supporting your organization's growth.
Frequently Asked Questions About Jira Automation
As you implement Jira workflow automation, you will likely encounter specific challenges. Here are answers to some of the most common questions from teams getting started.
Can Automation Rules Run in a Specific Order?
A frequent question is whether you can force an execution order when multiple rules share the same trigger.
The short answer is no. Jira processes rules triggered by the same event asynchronously, so you cannot guarantee their execution order.
The best practice is to consolidate the logic into a single, smarter rule. Instead of creating three separate rules, build one master rule that uses branching logic (e.g., if/else blocks) to handle the different conditions. This approach makes the execution path predictable and simplifies debugging.
How Do I Test an Automation Rule Without Affecting Live Data?
To avoid accidentally impacting your production project, test your automation rules in a safe environment.
The recommended method is to create a dedicated "sandbox" project. Clone your main project’s workflow and settings to create a safe space where you can build and refine rules using test issues.
Another practical tip is to add a temporary condition to your rule, such as creator = currentUser(). This ensures the rule will only run on issues you create. Once you have confirmed it works correctly, remove the condition to deploy it.
Pro-Tip: Use a "manual trigger" for testing. Configure the rule to fire only when you click a specific button on an issue. This gives you complete control over when and where the automation runs during the testing phase.
What’s the Difference Between Project and Global Rules?
Understanding this distinction is key to keeping your Jira instance organized.
Project Rules: These are created within a specific project and can only affect issues in that project. They are ideal for team-specific processes and can be managed by project administrators.
Global Rules: These are configured by a Jira administrator and can run across multiple projects or your entire Jira site. Use them to standardize processes everywhere, such as ensuring every "Bug" issue created in any project receives a specific label.
Knowing when to use each type helps prevent "rule sprawl" and keeps your automations manageable as your organization scales.
Ready to go beyond basic automation and build truly intelligent, structured workflows? Harmonize Pro's flagship app, Nesty, transforms your Jira issues with unlimited nested checklists, quality gates, and smart triggers to automate complex handoffs for Dev→QA, deployments, and onboarding.
Jira is the central nervous system for countless development teams, yet many organizations barely scratch the surface of its potential. Without a clear strategy, what should be a source of truth quickly devolves into a chaotic collection of inconsistent tickets, ambiguous workflows, and cluttered projects. This disorganization leads directly to confusion, missed deadlines, and frustrated teams who spend more time deciphering Jira than building products. The difference between a high-performing team and a struggling one often lies in how they manage this critical tool.
This guide cuts through the noise. It isn't a theoretical overview; it's a practical, actionable playbook for implementing essential best practices in Jira. We will explore 10 field-tested principles that transform Jira from a simple ticketing system into a powerful engine for collaboration, predictability, and efficient delivery. This comprehensive roundup is designed for immediate impact, helping you bring order to your projects and empower your teams.
For each best practice, you will learn:
The Why: The strategic value behind the practice and the problems it solves.
The How: Concrete, step-by-step instructions for implementation within Jira.
Common Pitfalls: Mistakes to avoid that can undermine your efforts.
Automation & Enforcement: How modern tools like Harmonize Pro / Nesty can enforce these standards automatically.
By moving from reactive Jira usage to a proactive, structured approach, you can eliminate ambiguity and ensure your teams stay aligned, efficient, and focused on delivering value. Let's dive into the practices that create clarity and drive results.
1. Standardize Project and Issue Key Naming Conventions
Consistent naming conventions for Jira projects and issue keys are foundational for maintaining clarity and efficiency at scale. When every team member can instantly identify a project's purpose or an issue's context from its key, you eliminate ambiguity and speed up cross-team collaboration. This practice is a cornerstone of effective information architecture within your Jira instance.
Why It's a Best Practice
Standardized naming prevents the chaos that ensues when project keys are cryptic or inconsistent. A clear convention like MKT for Marketing or DS for Data Science immediately tells a user where a ticket originates. This predictability is crucial for filtering, searching, and creating effective JQL queries. For example, a developer can quickly find all dependencies related to a specific product by searching for its prefix, a vital step in complex release planning. Without this, teams waste time deciphering ticket origins, leading to delays and miscommunication.
Actionable Implementation Steps
To implement this best practice in Jira, start by defining and documenting your standards.
Establish a Project Key Formula: Create a simple, memorable formula. A common approach is a 2-4 letter abbreviation of the team, product, or initiative (e.g., IOS for the iOS App team, WEB for the Web Platform team).
Define Issue Summary Prefixes: For issue summaries, use standardized prefixes to signal the work type. For instance, a bug report could start with BUG:, a new feature with FEAT:, and a technical task with TASK:.
Document Everything: Create a central Confluence page or shared document that clearly outlines these conventions for all teams, including onboarding materials for new hires.
Key Insight: The goal is not just consistency but predictability. A team member from any department should be able to reasonably guess a project key or understand an issue's context without needing a decoder ring.
Automating Naming Conventions
Manually enforcing these rules is prone to human error. Tools can automate this process, ensuring every project and issue conforms to your standards from the moment of creation. For instance, you can create standardized project templates that lock in naming conventions.
For teams looking for robust enforcement, platforms like Harmonize Pro’s Nesty can automatically apply these naming conventions based on predefined rules, ensuring 100% compliance. You can learn more about how to set up these automated templates on Nesty's getting started page. This automation solidifies one of the most impactful best practices in Jira, turning a manual chore into a reliable, background process.
2. Implement Comprehensive Issue Type Structure
A well-defined issue type structure is the backbone of an organized Jira instance. By creating a clear taxonomy for different types of work, you ensure that every task, bug, and story is categorized consistently. This foundation is essential for enabling accurate reporting, precise filtering, and streamlined workflow management across all teams.
Why It's a Best Practice
Without a standardized issue type scheme, teams often default to generic types like "Task," leading to a chaotic backlog where a critical bug holds the same classification as a minor documentation update. This ambiguity makes it nearly impossible to prioritize work effectively, generate meaningful reports, or build specialized workflows. For example, a "Bug" issue type can be routed through a specific QA and verification workflow, while a "Story" follows a product discovery and development path. This level of process clarity, a key component of best practices in Jira, is only possible with a thoughtful issue type hierarchy.
Actionable Implementation Steps
To implement this best practice, focus on creating a clear, intentional, and well-documented set of issue types.
Limit Core Issue Types: Start with a core set of 5-7 issue types per project, such as Story, Task, Sub-task, Bug, and Epic. This prevents user confusion and ensures each type has a distinct purpose.
Map to Your Development Process: Align issue types with your actual workflow. If your team handles infrastructure requests differently from feature development, create a custom issue type like "Infra Task" with its own workflow.
Train and Document: Create a Confluence page detailing when to use each issue type, with clear examples. Include this training in your onboarding process to ensure new team members adopt the standards from day one.
Audit Regularly: Periodically review your projects to identify and remove misused or obsolete issue types. This keeps your Jira instance clean and efficient.
Key Insight: Your issue types should reflect your team's unique processes, not force your processes into a generic template. The goal is to make categorization intuitive and meaningful for everyone.
Automating Issue Type Structure
Maintaining this structure manually can be challenging as teams evolve. Automation can ensure your established taxonomy is consistently applied. For instance, you can use project templates to pre-configure a standard set of issue types for all new projects.
For more advanced governance, tools like Harmonize Pro’s Nesty allow you to define and enforce organizational standards for issue type schemes. You can lock in a specific set of issue types for certain project categories, preventing unauthorized additions and ensuring every project aligns with your established best practices. This automation helps maintain long-term structural integrity in your Jira instance.
3. Maintain Clean and Descriptive Issue Summaries
A well-written issue summary is the first point of contact anyone has with a ticket. It acts as the headline, determining whether stakeholders can quickly grasp the task's purpose. Clean, descriptive summaries are crucial for effective communication, searchability, and overall backlog hygiene, making this one of the most fundamental best practices in Jira.
Why It's a Best Practice
Vague summaries like "Fix bug" or "Update page" create informational black holes. Team members are forced to click into every ticket to understand the work, wasting valuable time and causing confusion during backlog grooming, sprint planning, and reporting. A descriptive summary, such as "BUG: Login button unresponsive on mobile Safari," provides immediate context, enabling team members to filter, prioritize, and assign work efficiently. This clarity accelerates everything from daily stand-ups to high-level roadmap discussions, as the nature of the work is instantly recognizable.
Actionable Implementation Steps
Implementing clear summary standards requires a simple but disciplined approach.
Create a Summary Template: Establish a standardized format that includes key information. A popular and effective template is [Type]: [Component] - [Action]. For example, FEAT: User Profile - Add two-factor authentication option.
Define Clear Verbs: Encourage the use of specific action verbs. Instead of "Work on," use verbs like "Implement," "Investigate," "Remove," or "Refactor."
Document the Standard: Add these guidelines to your team's Confluence page or central documentation. Ensure it's part of the onboarding process for new hires to build good habits from day one.
Key Insight: A great issue summary should pass the "glance test." Anyone, from a developer to a product manager, should understand the core task in under three seconds without needing to open the issue.
Automating Summary Standards
Consistently enforcing summary formats can be challenging, especially in large or fast-moving teams. Manual reviews are time-consuming and often fall through the cracks. Automation can ensure every new issue adheres to your defined structure from the moment it's created.
Tools like Harmonize Pro’s Nesty can automatically validate and enforce summary patterns using predefined rules. For instance, you can configure it to ensure every bug report starts with BUG: and includes a component name. This removes the manual burden of policing standards and guarantees a clean, searchable backlog. You can find out more about setting up these rules on the Nesty product page.
4. Define and Enforce Clear Workflow States
A well-defined workflow is the backbone of process management in Jira, guiding an issue from creation to completion. Establishing explicit, clear workflow states ensures that every team member understands the status of a task at a glance. This clarity is essential for accurate reporting, identifying bottlenecks, and preventing work from getting lost in ambiguous or undefined stages.
Why It's a Best Practice
Clear workflows bring predictability and structure to complex processes. When states like Backlog, Ready for Dev, In Progress, In Review, and Done are universally understood, it eliminates confusion and standardizes how work progresses. This visibility allows teams to accurately forecast timelines and helps stakeholders understand the status of deliverables without needing constant updates. Without clear states, teams often misinterpret an issue's progress, leading to duplicated effort and missed deadlines.
Actionable Implementation Steps
To implement this best practice in Jira, focus on simplicity and enforcement.
Keep It Simple: Design workflows with a minimal number of states, ideally between 5 and 7. A common, effective flow is To Do → In Progress → In Review → Done.
Define Each State: Document what each status means and the criteria required to move an issue into it. For example, an issue can only move to In Review if it has an assigned reviewer.
Use Workflow Conditions: Leverage Jira’s built-in workflow conditions and validators to enforce business rules. For instance, prevent an issue from moving to Done unless the "Resolution" field is set.
Key Insight: A workflow shouldn't just map your process; it should enforce it. Use conditions and validators to build guardrails that guide users toward the correct actions, making the right way the only way.
Automating Workflow Management
Manually managing transitions and ensuring compliance is time-consuming. Jira automation can be configured to transition issues based on specific triggers, such as moving a ticket to In Review when a pull request is created. This reduces manual overhead and ensures the workflow moves forward consistently.
For organizations needing to standardize workflows across multiple projects, Harmonize Pro’s Nesty allows you to create and deploy locked-down, reusable workflow templates. This ensures every project follows the same proven process from the start. Learn more about how to set up cross-functional workflows on Nesty's documentation page. Automating your workflows is a critical step in scaling your best practices in Jira.
5. Leverage Custom Fields Strategically and Sparingly
Custom fields are powerful for capturing unique metadata, but their overuse is a common Jira pitfall that leads to cluttered screens, slow performance, and user confusion. Strategic use of custom fields ensures you collect essential information without overwhelming teams. This practice is key to maintaining a clean, efficient, and user-friendly Jira environment.
Why It's a Best Practice
An excessive number of custom fields complicates issue creation, making it a chore for users to fill out tickets. This can lead to incomplete data or, worse, users avoiding ticket creation altogether. A lean approach ensures that every field serves a distinct, valuable purpose, making data entry faster and more accurate. For instance, an engineering team benefits from a "Reproducibility" field on bug reports, but a marketing team does not. Tailoring fields to project needs is a critical component of successful best practices in Jira.
Actionable Implementation Steps
To implement this best practice, focus on necessity and regular maintenance. A disciplined approach prevents field-creep and keeps your instance optimized.
Audit Existing Fields: Regularly review your custom fields. If a field is unused or provides redundant information, archive it. Start by auditing fields that are not associated with any screen.
Prioritize Built-in Fields: Before creating a new custom field, determine if a default Jira field like "Component," "Affects Version," or "Labels" can serve the purpose.
Limit Fields Per Project: Aim to keep the number of required custom fields to a minimum, ideally 3-5 per project, to streamline the issue creation process. Document the purpose of each field in a shared Confluence page.
Key Insight: Treat every custom field as a form of "technical debt." Each one adds complexity and requires maintenance. Only add a field if the value of the data it collects clearly outweighs the cost of its existence.
Automating Custom Field Management
Manually auditing and managing custom fields across a large instance is time-consuming. You can improve this process by using Jira’s built-in tools to identify unused fields and associate specific fields with relevant issue-type screen schemes. This ensures that a bug report for a mobile app has different fields than a content request for the marketing blog.
For more advanced governance, tools can provide insights into custom field usage and help enforce standards. Harmonize Pro’s Nesty allows administrators to create and manage project templates with pre-defined custom field configurations, ensuring new projects start clean and adhere to organizational standards from day one. This proactive approach prevents clutter before it begins, solidifying your custom field strategy.
6. Use Automation to Reduce Manual Work and Errors
Jira's automation features are a powerful tool for reducing the burden of repetitive manual tasks, minimizing human error, and accelerating workflow execution. By creating rules that trigger specific actions, teams can ensure processes are followed consistently and efficiently without constant manual intervention. This is a crucial step in scaling operations and freeing up team members to focus on more strategic work.
Why It's a Best Practice
Manual processes are slow, prone to mistakes, and inconsistent. Forgetting to update a ticket's status, notify a stakeholder, or assign a sub-task can cause significant delays and communication breakdowns. Automation solves this by creating reliable, event-driven workflows. For instance, an automation rule can instantly assign a newly created bug to the QA lead for the specified component, ensuring it never gets lost in the backlog. This practice transforms Jira from a simple task tracker into a dynamic system that actively manages your workflow.
Actionable Implementation Steps
To effectively integrate automation, start small and build complexity over time. Focus on high-impact, low-effort rules first.
Identify Repetitive Tasks: Pinpoint common, rule-based actions your team performs daily, such as transitioning issues, adding comments, or assigning work.
Start with Simple Rules: Begin with straightforward automations. A great starting point is a rule that automatically closes a parent story when all its sub-tasks are moved to "Done."
Document and Test: Create a central record of all automation rules, explaining their triggers and actions. Always test rules in a sandbox or with a limited scope before deploying them globally to avoid unintended consequences.
Key Insight: The most effective automation doesn't just save time; it enforces process. It ensures that critical steps are never missed, creating a more reliable and predictable workflow for everyone.
Automating Notifications and Workflows
Leveraging automation for notifications and workflow transitions is one of the most impactful best practices in Jira. Instead of manually pinging team members, rules can handle it for you. You can set up triggers to send automated notifications when critical issues are created or when a ticket is unassigned for too long.
Tools like Harmonize Pro’s Nesty extend these capabilities, allowing you to build complex, multi-step automations that can manage entire processes. For example, Nesty can automatically create a standardized set of sub-tasks for a new feature request, assign them to the correct individuals, and set due dates based on the parent issue's timeline. You can explore how to set up advanced automated triggers with Nesty's documentation on notification triggers. This level of automation ensures consistency and accelerates project timelines from day one.
7. Establish Clear Estimation and Planning Practices
Consistent estimation practices are the engine of predictability in agile development. Whether using story points or time-based estimates, a shared understanding of effort allows teams to forecast sprints accurately, plan capacity effectively, and communicate realistic timelines to stakeholders. This discipline transforms planning from a guessing game into a data-driven process, forming a key pillar of effective Jira best practices.
Why It's a Best Practice
Inconsistent estimation leads to unreliable sprint commitments, missed deadlines, and a breakdown of trust between development teams and business stakeholders. When every team member applies a consistent scale, such as the Fibonacci sequence (1, 2, 3, 5, 8), the team develops a stable velocity. This velocity is a crucial metric, enabling accurate long-term forecasting and providing an empirical basis for sprint planning. Without this foundation, sprint planning is chaotic, and roadmaps become unreliable fantasies.
Actionable Implementation Steps
To implement this best practice in Jira, focus on creating a shared framework and process.
Choose and Define an Estimation Scale: Decide whether to use story points (e.g., Fibonacci) or time-based estimates (e.g., hours, days). Document what each value represents in a shared Confluence page. For example, a "3" might represent a straightforward task with minimal unknowns.
Conduct Team-Based Estimation Sessions: Use techniques like Planning Poker during sprint planning. This collaborative approach ensures the entire team contributes to the estimate, uncovering hidden complexities and fostering a shared understanding of the work.
Track and Analyze Velocity: Use Jira's built-in Velocity Chart to track the team's output over the last 3-4 sprints. This establishes a baseline that makes future sprint commitments more reliable and predictable.
Key Insight: The goal of estimation is not perfect accuracy on a single ticket but consistent predictability over a body of work. It’s about creating a reliable forecast, not a contractual obligation for each issue.
Automating Estimation and Planning
While the estimation process itself is collaborative, Jira can be configured to support it seamlessly. Ensure your boards are configured to display your chosen estimation statistic (Story Points or Original Time Estimate). This makes the data visible and central to all planning activities.
For more advanced needs, platforms like Nesty can help standardize the fields and workflows associated with planning. By ensuring that estimation fields are mandatory at the right workflow stage, you can enforce that no work is committed to a sprint without a proper estimate. You can explore how Nesty helps structure these workflows on Nesty's getting started page. This automation reinforces the discipline required for one of the most critical best practices in Jira.
8. Maintain Organized Backlogs with Proper Prioritization
A well-organized backlog is the engine of an agile team, translating strategic goals into actionable work. Without clear prioritization, teams waste cycles on low-impact tasks, lose momentum, and fail to deliver value efficiently. This practice ensures that every sprint is focused on what matters most, aligning development efforts directly with business objectives and making it one of the most crucial best practices in Jira.
Why It's a Best Practice
An unmanaged backlog quickly becomes a "junk drawer" of outdated ideas, vague requests, and technical debt. Proper prioritization provides clarity and focus, enabling teams to make informed decisions during sprint planning. When the backlog is refined and ordered, developers can pull the next most important item without hesitation, stakeholders have visibility into the product roadmap, and product managers can accurately forecast timelines. This structured approach prevents scope creep and ensures resources are allocated to tasks with the highest return on investment.
Actionable Implementation Steps
To implement this best practice, establish a routine and a clear framework for backlog management.
Choose a Prioritization Framework: Adopt a consistent method like the MoSCoW method (Must, Should, Could, Won't) or a Value vs. Effort matrix to objectively rank issues. This removes subjectivity and aligns the team around a shared understanding of priority.
Schedule Regular Refinement Sessions: Hold weekly or bi-weekly backlog grooming meetings. Use these sessions to discuss, estimate, and prioritize upcoming user stories, ensuring the top of the backlog is always ready for development.
Define Clear Acceptance Criteria: Every user story should have well-defined acceptance criteria before it's considered "sprint-ready." This minimizes ambiguity and reduces back-and-forth during the development cycle.
Key Insight: A great backlog is not just a list; it's a living, breathing artifact that reflects the product's strategic direction. The top items should be small, well-defined, and ready for work, while items further down can remain larger and less detailed.
Automating Backlog Organization
Manually managing priorities and ensuring stories are properly formatted can be tedious. Automation can help maintain the integrity of your backlog by standardizing issue creation and organization. Templates and predefined fields are a good starting point for ensuring every new issue contains the necessary information for prioritization.
For more advanced control, platforms like Harmonize Pro’s Nesty can enforce the inclusion of specific fields like "Business Value" or "Effort Score" upon issue creation. By setting up templates in Nesty’s getting started guide, you can guarantee that every new backlog item is created with the data needed for effective prioritization, keeping your backlog clean and actionable.
9. Create and Maintain Comprehensive Issue Documentation
Comprehensive issue documentation is the lifeblood of an effective development cycle. When issues are created with rich context, clear acceptance criteria, and detailed descriptions, they become a single source of truth that prevents ambiguity, reduces rework, and enables asynchronous collaboration. This practice transforms a simple ticket into a comprehensive work package that accelerates resolution and improves final quality.
Why It's a Best Practice
Poorly documented issues are a primary source of friction and wasted effort. When a developer has to chase down a product manager for clarification or a QA engineer cannot reproduce a bug, valuable time is lost. Well-documented issues eliminate these bottlenecks by providing all necessary information upfront. For example, a bug report with clear reproduction steps, logs, and screenshots allows a developer to diagnose the problem immediately, rather than spending hours trying to replicate it. This level of detail ensures that everyone, from engineering to QA, operates from the same shared understanding.
Actionable Implementation Steps
To implement this best practice in Jira, focus on creating structured templates that guide users to provide complete information.
Develop Issue Templates: Create different templates for Bugs, Stories, and Tasks. For a bug, require fields like "Steps to Reproduce," "Expected Behavior," and "Actual Behavior." For a story, include "User Persona," "Use Cases," and "Acceptance Criteria."
Mandate Essential Information: Make key fields mandatory. Include attachments like screenshots or logs, specify affected versions and environments, and use @mentions to pull in relevant stakeholders for initial review.
Document and Train: Store these templates and guidelines in a central Confluence page. Train teams on why this level of detail is crucial and how to use the templates effectively.
Key Insight: Treat every Jira issue as a formal handover document. The goal is for anyone to pick up the ticket and understand the "what," "why," and "how" without needing a live conversation.
Automating Documentation Standards
Relying on manual compliance for detailed documentation can be inconsistent. Automation can enforce these standards, ensuring every issue created meets your quality bar. You can use Jira’s built-in issue template features or configure automation rules that prompt users to fill in missing information.
For more advanced control, tools like Harmonize Pro’s Nesty allow you to create dynamic, pre-populated templates that can be automatically applied based on project or issue type. This ensures that every bug report, feature request, or task is created with the necessary structure and detail from the start. Learn how to configure these powerful templates by visiting the Nesty documentation. This transforms one of the most critical best practices in Jira from a guideline into a guaranteed process.
10. Implement Effective Labeling and Component Organization
Effective labeling and component organization are critical for creating a multi-dimensional and searchable Jira instance. While issue types define what an item is, components and labels define where it belongs and what it affects. This practice turns your Jira instance from a simple task list into a powerful, cross-functional database that supports targeted reporting, filtering, and JQL queries.
Why It's a Best Practice
Without a structured approach, labels proliferate uncontrollably, creating a "tag swamp" where security, Security, and sec all mean the same thing but return different search results. Components, when ill-defined, become too granular or too broad to be useful. A strategic system for both prevents this chaos. Components like authentication or payment-gateway clearly group work by functional area, while labels like performance or technical-debt track cross-cutting concerns that touch multiple components, making them essential best practices in Jira.
Actionable Implementation Steps
Start by defining a clear, documented strategy for how your teams should use labels and components.
Define Component Structure: Use components to represent major, stable parts of your product or system. Good examples include Backend, Frontend, iOS-App, or API. Avoid creating components for temporary features.
Create a Standard Label Set: Establish a curated list of 15-20 global labels for cross-cutting concerns (e.g., security, accessibility, documentation). This prevents duplicates and ensures consistency.
Document and Govern: Maintain a Confluence page detailing the purpose of each component and the definition of each standard label. Periodically audit and consolidate labels to remove redundant or unused tags.
Key Insight: Treat Components as the "nouns" of your project (the parts) and Labels as the "adjectives" (the characteristics). This mental model helps teams decide which to use and prevents overlap.
Automating Labeling and Components
Manually adding the correct labels and components to every issue is tedious and prone to error. Automation ensures that issues are correctly categorized from the start, improving the accuracy of your reports and filters. For example, an automation rule could add the security label to any bug created with a "critical" priority.
For organizations requiring strict governance, Harmonize Pro’s Nesty allows administrators to create predefined, approved lists of labels and components. This prevents users from creating ad-hoc tags and enforces taxonomic consistency across all projects, ensuring your Jira data remains clean and reliable. You can explore how to enforce these structures on Nesty's documentation page.
Top 10 Jira Best Practices Comparison
Practice
🔄 Implementation complexity
⚡ Resource requirements
📊 Expected outcomes
💡 Ideal use cases
⭐ Key advantages
Standardize Project and Issue Key Naming Conventions
Low–Moderate 🔄: policy definition + initial setup
Low ⚡: admin time, docs
Improved discoverability and consistent identification 📊
Enhanced filtering, routing, and flexible reporting ⭐
Turn Best Practices into Automated Habits
Navigating the complexities of software development, QA, release management, and customer onboarding requires a central nervous system that is both powerful and precise. As we've explored, Jira can be that system, but only when it’s configured with intention and discipline. Moving beyond the default settings to implement structured best practices in Jira is not merely an administrative exercise; it's a strategic imperative that directly impacts your team's velocity, predictability, and overall product quality.
We've covered a wide spectrum of actionable strategies, from establishing standardized naming conventions for projects and issues to maintaining meticulously organized backlogs. We've seen how clear workflow states eliminate ambiguity, while strategic use of custom fields adds valuable context without creating clutter. Each of these practices, whether it’s writing clean issue summaries or leveraging automation, contributes to a single, overarching goal: creating a seamless, transparent, and efficient delivery pipeline.
From Theory to Daily Reality
The challenge with any set of best practices is transforming them from a documented ideal into a lived reality. It's one thing to agree that every bug report should include detailed steps to reproduce; it's another thing entirely to ensure it happens every single time, without fail, across a growing team. This is where the true value of process maturity emerges. The most successful teams don't rely solely on human memory or manual enforcement. Instead, they embed these best practices directly into their tools and workflows, making the "right way" the "easy way."
This is the critical shift from simply knowing the best practices in Jira to operationalizing them. When you automate the mundane-yet-critical tasks, you create an environment where excellence becomes the default. Consider the impact:
Reduced Cognitive Load: Your team members no longer have to remember a long checklist of requirements for each issue type. The system guides them, ensuring nothing is missed.
Increased Consistency: Every issue, from a simple task to a critical production bug, adheres to the same high standard of documentation and structure, making handoffs between teams (like development to QA) frictionless.
Proactive Quality Gates: Instead of discovering missing information late in the cycle, you can build automated checks directly into your workflow transitions, preventing incomplete issues from ever moving forward.
Your Actionable Path Forward
Adopting all ten practices at once can be overwhelming. The most effective approach is incremental. Start by identifying your team's most significant pain point. Is it inconsistent bug reports slowing down your QA team? Begin by implementing a comprehensive issue structure and documentation standards for bugs. Are sprint planning meetings chaotic due to a disorganized backlog? Focus on establishing clear estimation practices and rigorous backlog grooming.
Choose one or two key areas to focus on this quarter. Work with your team to define what "good" looks like, configure Jira accordingly, and most importantly, explore how automation can lock in those gains. For example, you can configure Jira automation to automatically add a "Definition of Done" checklist to every new user story or to assign a ticket to the QA lead once it moves into the "Ready for Testing" status. This small step turns a manual process into a reliable, automated habit.
By systematically implementing and automating these best practices in Jira, you are not just cleaning up your project management tool. You are building a scalable foundation for high-performance engineering, predictable releases, and ultimately, a more innovative and less reactive culture. The goal is to make your process serve the work, not the other way around, freeing your team to focus on what they do best: building exceptional products.
Ready to move beyond manual enforcement and turn Jira best practices into automated, self-managing workflows? Harmonize Pro’s Nesty app transforms your static Definition of Done and Acceptance Criteria into dynamic, intelligent checklists inside Jira, ensuring quality and consistency at every step. See how you can build a more predictable delivery pipeline by visiting Harmonize Pro today.
Let's get right to it. Workflow automation is using technology to run a sequence of tasks automatically based on rules you set. Think of it as creating a digital assembly line for your business processes. Instead of your team manually passing tasks, sending update emails, and entering data, the software handles it for you.
This simple shift frees your team from repetitive work, allowing them to apply their skills to strategic thinking, customer engagement, and creative problem-solving—activities that directly drive business growth.
What Is Workflow Automation and Why It Matters
At its core, workflow automation is the system that ensures data and tasks move smoothly between your people and your software. It’s the practical solution to stop chasing updates through endless email chains and messy spreadsheets. By setting up simple "if this, then that" rules, you build a reliable process that executes perfectly every time.
For instance, you can create a workflow where a new customer signing a contract automatically triggers the creation of their account, sends a notification to the onboarding team, and schedules their kickoff call. This all happens instantly, without anyone needing to manually coordinate the steps.
From Manual Effort to Automated Efficiency
The transition from a manual process to an automated one is a game-changer for productivity. Manual workflows are inherently slow, inconsistent, and prone to human error. Critical steps get missed, causing delays, rework, and team-wide frustration. Automation introduces structure and predictability, ensuring your standard operating procedures are actually followed.
To see just how significant this shift is, let's compare the two approaches.
Manual vs Automated Workflows A Quick Comparison
This table breaks down the core differences and their direct impact on your business operations.
Aspect
Manual Workflow
Automated Workflow
Execution Speed
Slow, dependent on human availability.
Fast, runs instantly 24/7.
Consistency
Varies by person and day; prone to error.
Highly consistent; follows rules precisely.
Scalability
Difficult; requires hiring more people.
Easy; handles increased volume without issue.
Visibility
Opaque; hard to track status without asking.
Transparent; provides real-time tracking.
Team Focus
On repetitive, low-value administrative tasks.
On strategic, high-value creative work.
Cost
High operational costs due to labor.
Lower long-term costs; improves resource use.
The differences are stark, and the business world is taking notice.
The financial case for this shift is compelling. In 2023, the global workflow automation market was valued at around $20 billion and is projected to surge to nearly $37.5 billion by 2030. This growth is driven by the practical need for companies to reduce manual work, accelerate project timelines, and scale operations efficiently. You can find more detail on these workflow automation market trends in recent industry reports.
By automating routine processes, teams can consistently execute their work with higher speed and accuracy. This doesn't just improve productivity; it builds a foundation for scalable operations and allows employees to focus on high-value activities that drive business growth.
Ultimately, understanding what workflow automation is means recognizing its power to transform how your teams collaborate. It's about turning chaotic, manual processes into streamlined systems that run themselves, ensuring no detail is ever missed.
The Three Building Blocks of Automation
To effectively use workflow automation, you need to understand its core components. Every automated process, no matter how complex, is built from three simple parts. This logic is the engine of all automation. Once you grasp these three building blocks—Triggers, Conditions, and Actions—you can design workflows to handle nearly any repetitive task with precision.
Let's break down how to use each one.
Triggers: The Starting Gun
A Trigger is the specific event that initiates an automated workflow. It’s the starting signal that tells the system, "Begin the process." A trigger can be a customer submitting a support ticket, a developer merging code, or a specific date arriving.
Actionable examples of triggers include:
A new email arrives in a shared inbox like support@company.com.
A prospect submits a "Request a Demo" form on your website.
A new file is added to a specific Google Drive or Dropbox folder.
A Jira issue is moved from "In Progress" to "Ready for QA."
Conditions: The Rulebook
Once a workflow is triggered, it consults the Conditions—a set of rules that must be met for the process to proceed. Conditions act as a filter, ensuring the automation only runs when appropriate. They add logic, asking, "Should I execute this action now?"
For example, your trigger might be "a new invoice is received." A practical condition would be, "Only if the invoice amount is over $1,000." This rule prevents your finance lead from being bothered with minor approvals, saving their time for more critical tasks.
Conditions are the brain of your workflow. They turn a simple, reactive process into an intelligent one that can handle different situations, making sure the right things happen at the right time.
Actions: The Work Itself
Finally, if the trigger event occurs and all conditions are met, the workflow performs one or more Actions. An action is the specific task the system executes for you. This is where the work gets done automatically.
Practical examples of actions include:
Sending a Slack notification to the #dev-team channel.
Creating a new task in your project management tool and assigning it to the project manager.
Updating a customer's status from "Lead" to "Active" in your CRM.
Adding a new row with customer data to a Google Sheet.
By combining these three elements, you can build powerful automations. For instance, a Jira ticket transition (Trigger) for a high-priority bug (Condition) could automatically create a dedicated Slack channel and ping the on-call engineer (Actions). To get more ideas on how different triggers can fire off notifications, you can explore various notification trigger types in Nesty’s documentation.
Seeing Workflow Automation in Action
Theory is helpful, but seeing automation solve real-world problems makes its value clear. Let's examine three common business scenarios where a well-designed workflow can eliminate bottlenecks and improve efficiency. These examples show how triggers, conditions, and actions work together to streamline everyday processes.
This flow—event happens, rule is checked, action is taken—is the engine behind every automation.
Think of it as a digital domino effect you control. A specific event tips the first domino, a rule decides if the next one falls, and a task is completed at the end of the line.
Example 1: The Developer to QA Handoff
In software development, the handoff from a developer to the quality assurance (QA) team is a frequent bottleneck. A developer merges their code but forgets to update the Jira ticket or notify the QA engineer. The feature sits idle, delaying the release cycle.
An automated workflow eliminates this delay.
Trigger: A developer merges a pull request into the main branch in GitHub or Bitbucket.
Condition: The linked Jira ticket's current status is "In Progress."
Actions: The system automatically transitions the Jira ticket's status to "Ready for QA," assigns it to the QA team lead, and sends a notification to the team's Slack channel with a direct link to the ticket.
With this automation, the QA process begins the moment code is ready, ensuring no time is lost and nothing is forgotten.
Example 2: Streamlining New Hire Onboarding
Onboarding a new employee involves numerous tasks across HR, IT, and management: creating accounts, setting up hardware, and scheduling orientation meetings. A manual process is often disorganized, leading to a frustrating first day for the new hire.
Workflow automation transforms this chaos into a seamless, professional experience.
Automating the onboarding process ensures every new hire gets the same great experience. It also frees up your HR and IT teams to focus on the more human side of welcoming someone to the company. A smooth, well-organized first day sets the tone for their entire time with you.
Here’s how to structure the workflow:
Trigger: An HR manager updates a candidate's status to "Offer Signed" in the company’s HR platform.
Condition: The new hire’s start date is less than two weeks away.
Actions: The workflow initiates a series of tasks: it generates an IT ticket to provision a laptop, creates user accounts in necessary systems, and automatically schedules introductory meetings with key team members on their calendar.
This ensures every new employee has everything they need on day one, without anyone relying on a manual checklist. For a more detailed look, you can learn about setting up automated onboarding workflows and see the steps involved.
Example 3: Managing Marketing Content Approvals
Getting a blog post approved via email is often chaotic. The draft is sent, feedback arrives from multiple people, and no one is sure which version is the latest. This back-and-forth slows down content production significantly.
An automated approval workflow brings order to this process.
Trigger: A writer moves a draft card to the "Ready for Review" column in a tool like Trello or Asana.
Condition: The content card is tagged as "High Priority."
Actions: The system automatically @-mentions all required reviewers, setting a clear due date for feedback. As each person marks an "Approved" checklist item, the system tracks progress. Once all approvals are received, the card automatically moves to the "Scheduled for Publishing" column.
The True Business Impact of Automation
Understanding the components is one thing, but what tangible results can you expect? The impact of automation extends beyond speed. It delivers measurable improvements to your bottom line, team morale, and capacity for growth. By removing manual, repetitive work, you change how your team operates, allowing them to achieve more without increasing headcount.
Drive Greater Operational Efficiency
The most immediate benefit is a significant boost in operational efficiency. Automated workflows run 24/7 without breaks. Tasks that previously took hours of manual coordination—like the handoff between development and QA—are now completed in seconds.
This increased speed leads to shorter project cycles and faster delivery of value to your customers. Your entire operation gains a predictable rhythm, allowing your team to manage a larger workload without feeling overwhelmed. This is how you build a process that scales with your business.
Improve Accuracy and Reduce Costly Errors
Human error is inevitable in manual processes. Mistakes in data entry, forgotten steps in a checklist, or miscommunication can lead to costly rework, compliance issues, and dissatisfied customers.
Automation enforces consistency. It executes rules precisely, every single time. By eliminating the potential for human error in repetitive tasks, you dramatically improve data quality and process reliability. This precision not only saves the money and time spent fixing mistakes but also builds trust in your operations.
The real power of workflow automation lies in its ability to create a clear, digital audit trail for every process. It enhances accountability and makes compliance straightforward, as every action, approval, and handoff is automatically logged and time-stamped.
Boost Team Morale and Strategic Focus
No one enjoys a day filled with mind-numbing administrative work. When you automate tedious tasks, you give your team their time and brainpower back. They can finally focus on the high-value, strategic work they were hired for. This isn't about replacing people; it's about elevating their roles.
The impact on job satisfaction is significant. Burnout decreases and employee retention improves. Instead of ticking boxes, your team can dedicate their energy to innovation, customer interaction, and creative problem-solving—the activities that drive your business forward.
It’s no surprise, then, that organizations are prioritizing this shift. Reports show that between 51% and 66% of companies have already automated at least one business process, with many seeing a first-year ROI between 30% and 200%. You can dig into more of these workflow automation statistics to see just how widespread its adoption and impact have become.
Your First Steps to Implementing Automation
Ready to get started? Launching your first automation project doesn't have to be a massive undertaking. The most effective approach is to start small, secure a quick win, and build momentum from there.
By following a clear, step-by-step plan, you can confidently reclaim your team's time and build more reliable processes. Use this as your roadmap for getting your first successful automation implemented.
This visual lays out the game plan, from finding the right tasks to making continuous improvements. Let’s walk through each of these steps so you can put them into practice yourself.
Find the Right Tasks to Automate
Start by targeting "low-hanging fruit." Identify tasks that are repetitive, rule-based, and consume a significant amount of your team's time. These low-complexity, high-volume processes are ideal candidates for your first automation.
To find them, ask your team these questions:
What daily or weekly tasks are the most tedious and time-consuming?
Where do handoffs between people or teams consistently cause delays?
Which processes are most prone to simple human errors?
Map Your Current Workflow
Before you automate a process, you must understand it completely. Map out every step as it currently exists. Identify who is responsible for each task, what information they need, and where the bottlenecks occur.
This critical step often uncovers hidden inefficiencies and ensures your automation solves the right problem. Do not skip this.
Choose the Right Automation Tools
The best tool depends on your specific needs and existing software stack. Many platforms you already use, like Jira, have powerful native automation features. For more complex, cross-platform workflows, you might need a dedicated automation tool.
The right tool makes everything feel more intuitive. For teams already deep in Jira, this could mean starting with its native features or grabbing a specialized app from the Atlassian Marketplace to handle more intricate, multi-step processes without ever leaving the platform.
For example, our Nesty app is built specifically for Jira to manage complex, nested checklists and multi-stage handoffs—perfect for structured processes like deployments or new hire onboarding. You can see how it works by getting started with Nesty's documentation.
Build and Test Your First Workflow
Now it's time to build. Begin with a simple, low-risk workflow. Using the process map you created, define your triggers, conditions, and actions in the tool you have selected.
The most important part is to test thoroughly. Run the workflow in a controlled environment before deploying it to your team. This allows you to identify and fix any issues without disrupting active work. Your first automation doesn't need to be perfect, but it must be reliable.
Monitor and Refine Your Process
Effective automation is not a "set it and forget it" activity. Once your workflow is live, monitor its performance. Is it running as expected? Is it delivering the time savings you anticipated? Gather feedback from your team and look for opportunities for improvement.
This cycle of refinement is what separates successful projects from the ones that fizzle out. And the stakes are high. While some studies project automation could create a net positive of nearly 80 million jobs by 2030, other industry analyses show that a staggering 60-70% of automation projects fail to meet their goals. Success isn't about the technology alone; it depends on smart implementation and continuous improvement.
Common Questions About Workflow Automation
As you explore workflow automation, some common questions are likely to arise. Getting clear answers is key to moving forward with confidence. Let's address the most frequent ones.
A common point of confusion is the difference between workflow automation and Robotic Process Automation (RPA). While related, they solve different problems. RPA is best thought of as a bot that mimics human actions—like clicking and typing—within a single application's user interface. It's ideal for repetitive, on-screen tasks.
Workflow automation, however, orchestrates entire business processes across multiple systems, teams, and tools. It ensures a complex project moves smoothly from start to finish. It’s not just about automating one task; it's about connecting the entire sequence.
Does Automation Replace Jobs?
This is the most common concern. The goal of automation is not to replace people but to free them from the most tedious and repetitive parts of their jobs so they can focus on higher-value work.
Instead of spending hours manually transferring data from a form to a spreadsheet, an employee could be using that time to solve a complex customer problem or develop a new marketing campaign. Automation handles the grunt work, allowing your team to focus on critical thinking, creativity, and human interaction.
Automation shifts the focus from mind-numbing task execution to high-value problem-solving. It doesn't take jobs; it makes them better by giving people back their time and brainpower.
What Technical Skills Are Needed to Start?
The belief that you need to be a developer to create automations is outdated. The emergence of no-code and low-code platforms has democratized workflow automation.
These tools feature visual, drag-and-drop interfaces that allow you to build workflows without writing a single line of code. If you can map out a process on a whiteboard, you have the necessary skills to build an automation with modern tools.
This empowers the people who know the processes best—your team—to become "citizen automators," building the solutions they need without creating a bottleneck for the IT department.
Ready to turn your team's complex Jira processes into self-managing workflows? Harmonize Pro's Nesty app empowers you to build powerful, automated checklists and handoffs directly within Jira, ensuring nothing ever falls through the cracks. Learn more and start your free trial.